The Illusion Of Illumination: Why Most Landscape Lighting Fails

Over Lighting Destroys What You Built
You want people to see what you spent money on. That’s the real reason this section matters to you. But here’s the mechanism: every fixture you add becomes visual noise. Brightness is a zero-sum game in landscape design. When everything glows equally, nothing reads. Your eye has nowhere to rest, nowhere to focus. The garden becomes a parking lot.
Most installations use wattage as the default setting instead of purpose. A 20-watt LED feels like it should replace a 100-watt halogen, so installers just keep stacking fixtures. The result is flat, featureless light that washes out texture, shadow, and depth. You end up with illumination that blocks perception instead of enhancing it. The mechanism is straightforward: excessive light destroys contrast, and contrast is what makes a space feel intentional.
Shadow Is The Real Design Tool
Contrast works like emphasis in visual hierarchy. Remove the shadow, and you remove the reason to look. Most advice tells you to light paths, features, and focal points equally. That’s backwards. The garden lighting that works has dark zones. Those dark zones make the lit zones matter. This is the inverse of what beginners do, and it’s why professional installations read so differently from amateur ones.
Build your lighting plan around what you want unseen, not what you want seen. A tree lit from below with one fixture creates drama. The same tree lit from multiple angles becomes invisible. Start by mapping shadow first, then place light to create deliberate contrast. This shifts the entire design from coverage to composition. The moment you stop trying to light everything is the moment your garden starts to work.
Beyond Brightness: The Psychology Of Outdoor Landscape Lighting Ideas

Where Your Eye Goes, Your Mind Follows
You want landscape lighting ideas because you know a well-lit yard signals competence and control to anyone who sees it. The real mechanism at work here is visual hierarchy, borrowed from graphic design: you’re placing lights to create dominance relationships between elements, forcing attention toward what matters and away from what doesn’t. A 40-watt uplighter on a specimen tree doesn’t just illuminate it. It tells the viewer that tree is important. Everything else recedes.

Most people waste lighting budget spreading illumination evenly across their property, which erases hierarchy entirely and creates visual noise. Instead, identify one focal point per viewing zone—a water feature, architectural detail, mature plant, or hardscape edge. Position a single source to graze or uplight it. The contrast between that lit element and the darker surroundings makes the focal point read immediately. Your eye settles there first because light always wins attention in darkness.
Mood Is Not Abstract, It’s Neurological
Lighting design shapes measurable human response through color temperature and intensity, not sentiment. Warm light (2700K and below) triggers relaxation by suppressing alertness hormones. Cool light (4000K and above) activates attention systems. You’re not creating “ambiance.” You’re manipulating circadian response. A backyard with only bright white uplighting will feel sterile and stimulating even if you intend intimacy. A yard lit entirely in warm tones at low intensity signals safety and encourages lingering, which is why that choice works for entertaining spaces.
The emotional impact compounds when you layer multiple sources at different intensities rather than running everything at full brightness. A path light at 40 percent output creates security without harshness. The same fixture at 100 percent feels institutional. Control intensity through dimmer circuits, not fixture selection. If your landscape lighting ideas don’t include a dimmer, you’ve locked yourself into one emotional setting and eliminated flexibility.
The “Sculpting Shadow” Method: Where To Place Landscape Lighting
Darkness Creates The Image, Not Light
You want people to notice your garden at night without looking like a gas station. Here’s what most people get wrong: they think lighting means illuminating everything. It doesn’t. Borrowed from sculpture, the principle of negative space applies directly here. Sculptors carve away material to define form. Landscape lighting works the same way. Strategic darkness makes the lit elements visible. Light without shadow creates visual noise.

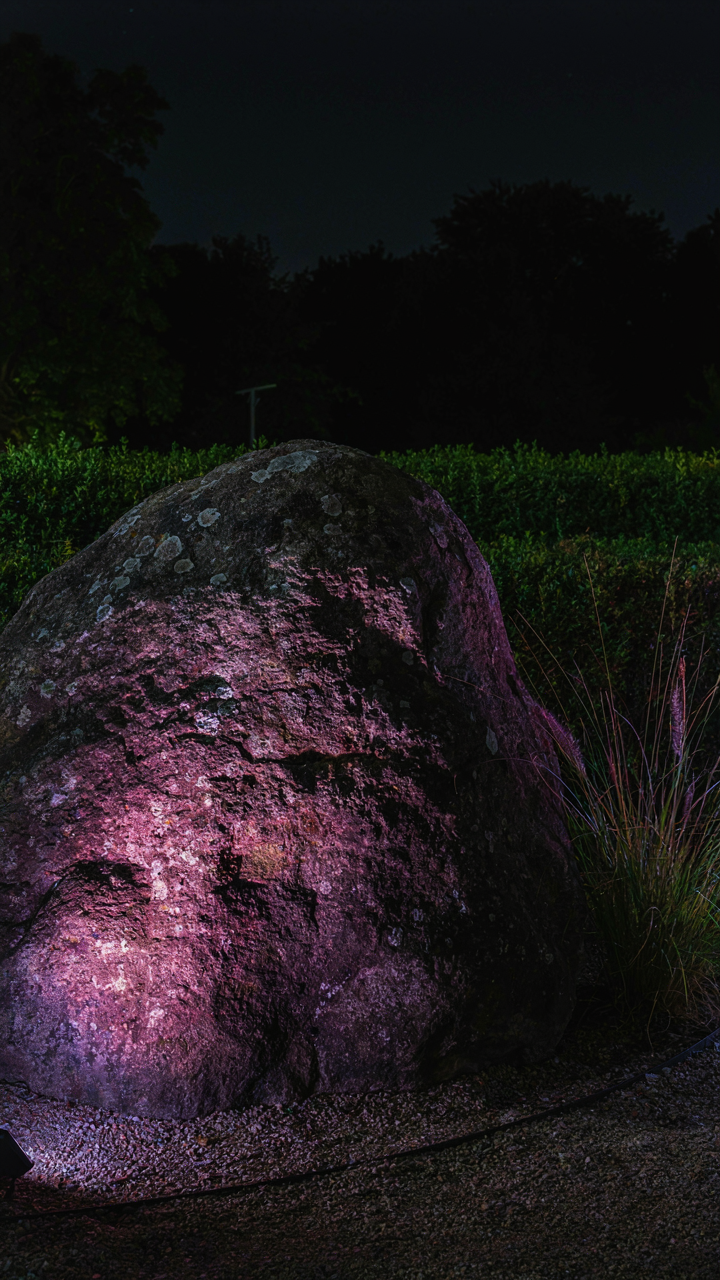
Place fixtures to cast shadows, not to erase them. A tree lit from below throws its canopy shadow upward against the house. A boulder lit from one side shows its texture through contrast. The unlit areas recede. The lit areas advance. This is not decoration. It’s visual hierarchy through controlled darkness. Position your light source perpendicular to the object you want to define, not directly at it.
Layering Creates Depth Without Distance
Most landscape lighting advice treats your yard as one flat plane. It isn’t. Depth exists in layers: foreground plants, mid-ground structures, background trees or fence lines. Each layer needs a different light intensity and distance from the viewer. A fixture near the front border should be dimmer than one deeper in the garden. Closer light feels closer. Distant light feels distant. This is how your eye actually processes space.
Install fixtures at three distinct distances from your viewing position. Put one set at the edge of your patio or seating area. Put another set halfway through the garden depth. Put the final set near the property line or back structures. Each layer gets its own circuit or dimmer control. Light the nearest layer first to establish baseline visibility, then add the middle layer, then the back. Never light all three equally or they collapse into one flat plane.
The Visual Hierarchy Protocol For Front Yard Lighting Ideas

Where The Eye Lands First
You want people to notice your home before they notice anything else on your street. That’s the real reason you care about this. Visual hierarchy is borrowed from graphic design and typography, where designers control attention by establishing dominant and subordinate visual weight. In landscape lighting, the entryway becomes your primary anchor. This is the point where visitors physically transition from public to private space. A 3000K warm light fixture mounted above or flanking the door commands attention because it’s where movement naturally stops. Brightness matters less than placement and color temperature consistency. The entry must read as intentional, not accidental.

Most people throw a single uplighter or wall sconce at their front door and call it done. That’s lazy. Real entryway dominance requires redundancy without clutter. Position lights to illuminate both the door hardware and the visitor’s face as they approach. This dual-target method creates depth and confirms the space is genuinely important. Use 15 to 20 watts of warm LED output at the door itself, then establish a subtle path light trail leading backward into your landscape to signal depth and invite further visual exploration.
Architectural Details That Anchor The Landscape
Your home’s structure already has geometry. You’re just making it visible when the sun disappears. Subordinate lighting supports the primary entryway by articulating walls, columns, rooflines, and material transitions without competing for attention. These fixtures work in service of the architecture itself, not against it. Architectural lighting uses grazing techniques where light approaches a surface at a shallow angle, exposing texture and dimensionality. A brick or stone wall lit from below shows mortar lines and depth. A column or tree trunk lit from the side reveals form. Place these fixtures 12 to 18 inches from the surface to avoid harsh shadows and unnatural hotspots.
Common advice here is to “light up everything equally.” That destroys hierarchy and wastes energy. Instead, choose no more than three architectural features per facade to emphasize. A two-story home might feature the left chimney, the roof edge, and the main wall plane. Each fixture operates at 8 to 12 watts in warm color temperature, supporting but never competing with the entry. When subordinate elements read as secondary, the entire composition tightens and the entry regains psychological dominance.
Kinetic Lighting Principles: Applying Military Strategy To Landscape Lights Ideas

Hide The Source, Control The Effect
You want people to notice the light but not think about where it comes from. That’s the real game here. Military strategy calls this concealment, and landscape lighting borrowed the concept wholesale without naming it. The mechanism is simple: hide the fixture, expose only the beam. This forces the viewer’s eye to the illuminated surface instead of the equipment producing it.

Most garden lighting advice tells you to “place lights strategically” and calls it done. That’s lazy. Concealment requires deliberate obstruction between the light source and the observer’s line of sight. Bury fixtures below grade, tuck them behind plant material, mount them inside architectural features. A 12-watt LED recessed into soil near a tree trunk throws light upward through foliage without any visible hardware. The garden reads as naturally lit. The fixture becomes irrelevant because you can’t see it.
Path Of Light Determines Path Of Movement
Military tacticians use sight lines to control where troops move and what they engage. Landscape lighting does the same thing with human attention and foot traffic. A lit pathway doesn’t just provide safety. It channels movement. A pool of light on a garden bench says “sit here.” Uplighting on a specimen tree says “look up and walk toward this.” Shadow and light create invisible boundaries.
The common mistake is spreading light evenly across a space. That erases hierarchy and kills navigation. Instead, use light as a tool to establish primary and secondary routes. Illuminate a front walkway brightly to draw people in one direction. Use subtle accent lighting deeper in the garden to reveal secondary destinations without broadcasting them. Start at the entry with 50-100 lux, drop to 20-30 lux for pathways, and use 5-15 lux for accent features. This gradient tells the nervous system where to go before conscious thought arrives.
Up Lighting Landscape: The Unseen Power Of Vertical Illumination

Tree Canopies Creating Dramatic Silhouettes
You want people to notice your property at night without looking like you’re running a sports complex. Up lighting works because it reverses the natural light hierarchy—it makes viewers look up instead of across, which feels intentional and rare.

Borrowing from theater lighting, up lighting uses a principle called “key light positioning.” Place fixtures low and aim them upward at the tree’s trunk and canopy. The light stops at the leaf layer and creates a defined edge. This boundary is what reads as drama—not the light itself, but the shadow it casts against the sky.
Fixture placement matters more than wattage here. Position lights two to four feet from the trunk base, angled at forty to sixty degrees. Trees with structured branching patterns—oaks, maples, birches—produce cleaner silhouettes than dense conifers. The fixtures must sit hidden from street view and eye level. Bury them slightly into mulch or use well-cover hardware so only the beam shows.
Lamp type determines how crisp the outline becomes. LED fixtures in the 2700K range hold detail without washing out the canopy texture. Metal halide and older halogen systems often over-illuminate and flatten the effect. Run the fixtures on a dedicated circuit with a dimmer so you can dial intensity based on how much ambient light the neighborhood generates.
Wall Textures And Architectural Detail
Most people skip this because they think walls need to be “pretty” to light them up—wrong assumption. Stone, brick, stucco, and siding all have surface dimension. Uplighting reveals that texture because light rakes across it at a low angle, creating micro-shadows that depth requires.
The mechanism is surface relief amplification. Grazing light—projected nearly parallel to the wall face—makes every imperfection and material variation visible. Place fixtures three to six feet from the wall base, angled upward at thirty to forty-five degrees. The shallower the angle, the more pronounced the texture becomes. This works on chimneys, accent walls, garden walls, and foundation stonework.

Material affects the result directly. Rough-cut stone creates strong shadow patterns. Smooth stucco produces subtle gradation. Brick reads in bands because mortar joints interrupt the surface. Choose lamp color based on what you want to emphasize—warmer tones (2700K) enhance earth-toned materials; cooler tones (3000K) sharpen geometric lines and modern surfaces.
Fixtures must be positioned so viewers cannot see them directly—this kills the effect instantly. Use well-mounted LED uplights rated for ground installation with proper drainage. Aim the beam at the wall, not above it. Texture lighting only works when the surface receives the full illumination and the fixture remains invisible.
Backyard Lighting Ideas: Engineering The Experience Economy

The Work Light Trap
You want your backyard to feel intentional, not like a construction site at midnight. Task lighting gets this wrong in most residential applications because it treats the space like a problem to solve instead of an experience to control. The mechanism is simple: spread lumens evenly across a zone and you flatten contrast, which is what your eye actually reads as “mood.” Glare ruins this because it forces your pupil to close down, crushing your ability to perceive the subtle gradations that make a space feel designed rather than lit.
Pathway lights, deck step markers, and cooking zone illumination need brightness, but they need directionality more. A recessed light with a clear lens under a soffit throws light straight down onto the surface you’re using, then stops. Fixtures with shields or baffles prevent light from bouncing into your field of view while you’re standing in the space. The fixture itself should disappear from your conscious attention. Position task lights at working height or below sightline whenever the layout allows it, then aim output directly at the surface, not the person using it.
Separating Signal From Noise
Economics calls it price discovery: the mechanism where limited information creates buying decisions that feel inevitable. Landscape lighting does the same thing, except the currency is attention. Your eye moves toward contrast and brightness differential, not absolute brightness. The common advice to “light up your garden evenly” is wrong because it removes the visual hierarchy that actually makes a space feel composed instead of exposed.
- Accent lighting on focal points: Direct narrow beams at specimen plants, architectural details, or water features to create visual anchors that organize the entire composition around intention rather than uniform coverage.
- Uplighting for volume and scale: Position lights low and angle them upward along tree trunks or structures to expand perceived vertical space and generate depth without increasing total wattage across the zone.
- Silhouetting for definition: Place lights behind foreground elements so they block light and create dark shapes against brighter backgrounds, adding visual separation between depth layers in your yard.
- Grazing for texture emphasis: Angle lights nearly parallel to walls or plantings to rake across surface details, making rough material read as dimensional rather than flat and featureless.
- Layered intensity zones: Install separate circuits for different regions so you control which areas glow and which stay dark, letting you adjust the narrative the space tells moment to moment.

The physics term is “light ratios.” A 3:1 ratio between your brightest and dimmest lit surfaces feels composed. A 10:1 ratio feels dramatic. A 1:1 ratio feels like you’re standing under a parking lot lamp. Choose your ratio first, then spec fixture brightness and placement to hit that number, not the other way around.
The Minimalist’s Manifesto: Yard Lighting Efficiency
Placement Over Proliferation
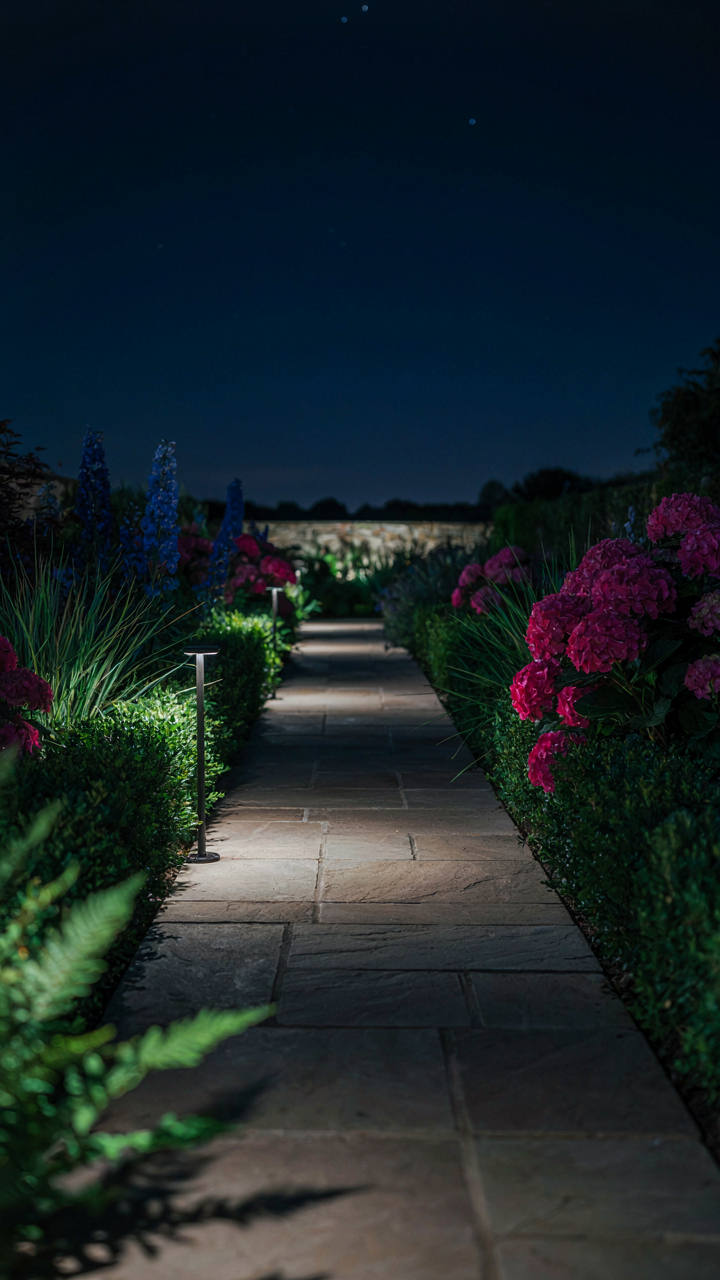
You want to feel like you made a smart choice without doing the actual thinking. That’s why most people buy too many fixtures. The real mechanism is called layering in architectural lighting design, borrowed from theater and film production. Instead of spreading weak light everywhere, you stack focused beams at different heights and angles to cover the same ground with fewer sources. One 12-watt LED uplighter at the base of a tree does more visual work than three scattered path lights. Position becomes your leverage point.
The math is simple: fewer fixtures mean fewer connection points for failure, less wire to bury, and easier maintenance later. A strategically placed fixture at the garden’s focal point draws the eye there first, making the entire space feel intentional. Your brain fills in shadows naturally. Place lights where they create contrast, not where they fill every corner uniformly. This is how professional landscape architects work constrained budgets.
Long Term Costs Collapse With LEDs
Most people still think LED conversion is about the upfront price tag when the real calculation sits downstream. LEDs consume 80 percent less power than incandescent or halogen alternatives and last 25,000 to 50,000 hours compared to 1,000 to 2,000 hours for older tech. Your transformer runs cooler. Your circuit breaker stops carrying unnecessary load. Over a decade, you’re cutting landscape lighting’s energy consumption from roughly 10 to 15 percent of outdoor electrical use down to under 2 percent for the same illumination level.

The infrastructure cost drops too. Fewer fixtures mean smaller transformers, less copper wire, fewer junction boxes. A minimalist design with LED sources often costs less to install than a dense traditional system and runs for a fraction of the operating expense. You don’t get savings by switching to LEDs in a bloated fixture count. You get savings by using fewer LEDs in the first place, then amplifying that advantage with efficient technology.
Advanced Landscape Lighting Placement: Avoiding Amateur Hour

Where The Light Lives, Not Where You See It
You want people to notice your garden looks expensive without noticing you tried. That’s the real reason you care about fixture placement. The mechanism is simple: concealment defeats detection. In landscape lighting, the fixture itself is visual pollution. Your eye shouldn’t find the source, only register the effect on the plants, paths, and architectural features. This requires placing lights where shadows, vegetation, or grade changes hide them from normal sightlines.
Most people mount uplights on exposed stakes or tuck them where they’re technically hidden but catch ambient light reflection. Wrong. You need zero-visibility mounting. Bury fixtures below grade in wells with ground-level trim rings. Nestle them into dense plantings where foliage blocks them from the viewing position. Mount them on vertical surfaces like fence posts or tree trunks, angled so the beam projects forward while the fixture sits behind the viewing plane. The physics of occlusion teaches us that an object cannot be seen if something blocks its line of sight to the observer. Use landscape occlusion strategically.
Controlling Light Scatter And Pupil Response
Glare isn’t an aesthetic problem. It’s a physiological one that breaks the entire experience. When light enters the eye above a certain intensity or angle, the iris constricts and the viewer’s pupils shrink, forcing them to look away or squint. This destroys the soft garden glow you designed. Your job is managing the angle of incidence and the beam intensity so no direct light rays reach eye level.
Install fixtures with proper barn doors, shields, or louvers that control beam spread and direction. A 40-degree beam spread pointed directly at a seating area will glare. The same fixture with a 20-degree spread and a horizontal visor will not. Place warm-white sources (2700K) lower and cooler sources (3000K) higher, because eye sensitivity to glare increases with color temperature. Keep fixtures below the horizontal line of sight from all primary viewing positions. Test your placement at night from the actual sitting spots in your garden, not from 10 feet away or during daylight.
The Unseen Symphony: Orchestrating Your Garden’s Night Presence

When Light Meets Season
You want to believe your landscape lighting setup works year-round without adjustment, which means you won’t have to touch it again. The real mechanism is that solar angle, plant density, and atmospheric conditions shift constantly, making static lighting obsolete by mid-season. Winter sun sits lower, casting longer shadows and exposing gaps in your fixture placement. Summer foliage thickens and blocks light paths you relied on in spring. Fall and spring transitions create entirely different shadow angles that either enhance or destroy the effects you engineered.
Adapt your fixture angles and color temperature twice yearly, minimum. In winter, angle uplights steeper to compensate for the sun’s lower trajectory and to penetrate the bare branching structure. In summer, reduce fixture intensity or reposition them to account for denser canopy coverage. Most gardeners skip this step because it feels like maintenance rather than design, but seasonal calibration is the difference between intentional lighting and accidental chaos. Test these changes at dusk when the mechanism becomes visible.
Dynamic Effects Through Intentional Control
Automation in landscape lighting operates like military logistics: you preposition assets, define engagement rules, and let the system execute without constant manual command. Smart controllers function as your remote operator, adjusting brightness and color temperature based on time, season, and occupancy. This isn’t about convenience. It’s about eliminating the human lag time that creates misalignment between your intent and the landscape’s actual state.
Install controllers that respond to ambient light sensors rather than fixed schedules alone. When clouds pass overhead or fog rolls in, a sensor-based system compensates instantly. When you’re away for weeks, it reduces intensity to conserve power and prevent the overlit look that signals vacancy. Wire your system so fixtures dim during off-peak hours and brighten when activity occurs. The protocol is simple: measure ambient conditions, establish response thresholds, execute adjustments automatically. This moves your landscape from performing when you remember it to performing regardless.
The Real Obstacle Isn’t A Lack Of Light, But A Poverty Of Intent

Most people treat landscape lighting like an afterthought. They buy generic fixtures and wonder why their garden feels flat. The shift happens when you stop thinking about illumination and start thinking about intention. What mood do you actually want to create? Walk outside tonight and pick one spot, one tree or corner, and imagine what light would do there. That single decision beats reading a thousand lighting guides. Your garden doesn’t need more light. It needs you to decide what it’s for.



