
The Myth Of “Free” Materials: Why Old Windows Cost You More

The Labor Trap Nobody Names
You want to believe old windows are free because admitting otherwise means admitting your time has a price. Here’s the mechanism: salvage economics treats extraction as zero-cost and labor as invisible. Pulling old windows from demolished buildings, estates, or construction sites demands hours of careful removal. You unbolt frames, preserve glazing, transport weight that destroys your vehicle’s suspension. Then cleaning begins: decades of paint, putty, grime, and oxidation don’t vanish through good intentions.
Most growers underestimate the work by 60 to 80 percent. A single old window takes four to six hours of restoration before it’s usable. You scrape glazing compound, replace rotted putty, repair loose joints, and verify the panes seal properly. That’s not time you earn money doing. Scale this across thirty to fifty windows for a functional greenhouse and you’ve invested two hundred to three hundred hours. The math fails immediately. Buying reclaimed windows from dealers costs less per unit than salvaging them yourself.
When Old Glass Becomes A Liability
Structural engineers call this the load path problem: the sequence of forces flowing through materials. Old windows weren’t designed to withstand the lateral stress a greenhouse frame imposes. Single-pane glass flexes under wind load. Wood frames split at the joints when temperature swings thirty degrees in six hours. Metal sashes corrode faster when exposed to constant humidity from soil and transpiration.
Here’s what matters: old windows fail not because they’re old, but because greenhouses demand continuous stress. Modern greenhouse glass is tempered or laminated to handle deflection. Reclaimed windows are brittle by comparison. One hard frost and the putty cracks. Thermal cycling from day to night degrades the seal. You’ll replace failed panes and frames every two to three years instead of once per decade with new materials. Budget for replacement costs now, or budget for teardown and rebuilds later.
The Structural Integrity Protocol: Engineering Your Window Greenhouse For Longevity

Building Frame Load Capacity Without Overthinking
You want this thing to survive winter without collapsing, but you’re afraid of doing structural math. Here’s the actual mechanism: wind doesn’t push evenly on a greenhouse. It creates pressure differentials. Old windows are dead weight. Your frame must distribute that load to the ground, not to the glass itself.

Use 2×4 lumber for the perimeter and corners. Space vertical studs 24 inches apart maximum. Run horizontal cross-bracing diagonally on long walls to resist racking (the lateral twisting that kills amateur builds). The frame carries the load. The windows fill the gaps. Bolt everything to a concrete footer or gravel-filled trench. Corners take the most stress, so reinforce them with gusset plates or half-lap joints. Bolts outperform screws under seasonal wind cycles because they maintain clamping force as wood shifts.
Orientation And Gap Sealing For Heat Retention
The common advice says “just caulk everything.” That misses the real problem: air exchange. A greenhouse from old windows bleeds heat through gaps you cannot see until February. Use thermal imaging or the draft test: hold a candle near all seams at night. Movement means failure.
Seal every window frame perimeter with low-temperature silicone or weatherstripping. Single-layer old windows have an R-value around 0.9. Layering creates dead air space. Install the second layer 2 to 4 inches away from the original frame inside the greenhouse. This gap becomes insulation. Caulk the interior perimeter of that second layer only. The exterior window remains open to drainage. Orientation matters less than seal quality. A north-facing wall loses more heat through poor sealing than a south-facing wall with tight gaps.
Beyond Aesthetics: Designing Your Old Window Greenhouse For Peak Plant Performance

Light Penetration And Ventilation Strategy
You want this to look intentional, not like you’re haphazardly stacking glass. Here’s the real mechanism: light penetration follows the inverse square law from physics, meaning intensity drops by the square of distance from the source. Old window glass transmits 85-90% of visible light on a clear day, but angle and dirt reduce this fast. Position your frame so glass faces true south in the northern hemisphere, tilted 30 to 40 degrees from vertical to catch winter sun lower on the horizon while reducing summer overheat.

Ventilation removes humidity and prevents fungal disease before it starts. Vents work through convection, not magic: warm air rises and escapes through openings at the top, pulling cooler air in from the bottom. Most growers get this backwards and cut vents in the wrong spots. Install operable windows or louvers on the north side high and south side low. This pulls air across your plants instead of funneling it around them. Dense crops need more air exchange than sparse ones, so adjustable vents beat fixed holes every time.
Workflow Layout And Space Density
Stop thinking about how many plants fit and start thinking about how many times you’ll walk past each one. Benching height matters more than footprint. Raised beds or tiered shelving at waist height reduce bending and let you spot problems instantly. Pathways need to run lengthwise through the greenhouse, not in loops. This cuts transit time and prevents you from crushing foliage on the sides.
Spacing your plants poorly costs yield more than low light does. Tomatoes need 2 feet of horizontal distance to prevent disease spread when leaves touch. Lettuce can run 4 to 6 inches apart. The difference is airflow around leaves. Tight spacing creates still pockets where humidity climbs and spores settle. Map your crop types first, then assign their zones based on ventilation current paths, not what looks balanced on a grid.
The Thermal Mass Imperative: How To Store And Release Heat In Your Window Greenhouse

Water Barrels And Rock Beds As Heat Sinks
You want this to work without spending money on heating systems, but you’re avoiding the actual problem: your greenhouse temperature swings 40 degrees between day and night, and plants die in the swing, not the cold. Thermal mass operates on the physics principle of heat capacity—the amount of energy required to change a material’s temperature. Water holds roughly five times more heat per unit volume than air, making it your primary heat battery in a window greenhouse.

Position dark-painted water barrels along the north wall where they absorb passive solar gain during the day. The water warms slowly and releases that energy through the night, flattening the temperature curve your plants experience. Rock beds work similarly but with lower efficiency—they hold heat but release it faster than water and require significantly more volume to match water’s storage capacity. Use rocks no smaller than 3 inches; smaller stones fragment heat dissipation across too many surfaces and lose effectiveness.
Insulation Strategies For Nighttime Heat Retention
The generic advice says “add bubble wrap,” which is incomplete. You’re not trying to block cold—you’re trying to slow the rate at which stored heat escapes into the atmosphere. Thermal resistance (R-value) matters, but so does timing and placement. Install rigid foam board or recycled polystyrene sheets on the interior wall surfaces that face outward. Position them behind your water barrels and rock beds, creating an insulation layer that prevents radiant heat loss through old glass panels that conduct temperature at predictable rates.
Seal gaps between window panes and frames with weather stripping or caulk before the season starts. Double or triple-layer old windows—even with air gaps—outperform single panes, but only if you eliminate convective loops where cold air finds paths inside. At night, roll out reflective emergency blankets or canvas tarps over the interior, securing them to wooden frames you’ve already built. Remove them at sunrise. This single daily protocol cuts nighttime temperature loss by 10 to 15 degrees and dramatically extends your growing season in cold climates.
Condensation Catastrophe: Managing Moisture In Your Greenhouse Using Old Windows

The Physics Of Stagnant Air
You’re afraid your plants will rot before they produce anything. That fear is rational. Here’s the mechanism: old windows trap heat differently than modern glazing. Single-pane glass conducts temperature unevenly. Warm air rises and hits cold glass at the top, cooling instantly and dumping moisture as condensation. Thermodynamics—the field governing energy transfer—shows us that trapped air creates temperature gradients. Your greenhouse becomes a pressure cooker without escape routes.

Stagnant air breeds mold because moisture settles on surfaces instead of cycling out. You need active movement, not passive hope. Condensation pools on the inside of old windows because air has nowhere to go. Install vents at the peak and low points of your structure. Hot air exits through roof vents while cooler air pulls in through base openings. This creates a pressure differential that forces moisture out before it pools on leaves or soil.
Drainage And Saturation Control
Most growers ignore the floor. They focus on venting and forget that water saturates the ground beneath the plants, creating constant upward vapor pressure. Capillary action—water’s tendency to climb through soil against gravity—feeds moisture into the air regardless of how many vents you cut. The real problem sits below your feet.
Build a base layer that breaks capillary action. Lay landscape fabric directly on soil, then add 2 to 4 inches of gravel. This stops water from wicking upward. Install a simple drainage trench around the interior perimeter, sloped slightly toward one corner where you place a sump bucket or gravel pit. Drainage gutters along the bottom of your old window frames channel runoff away from plant roots. Check and empty collection points after watering. This single protocol—floor management—eliminates half your moisture problems before vents even matter.
The “Scrap” Heap Fallacy: Why Cheap Materials Still Demand Quality Craftsmanship
Poor Joins Compound Into Structural Failure
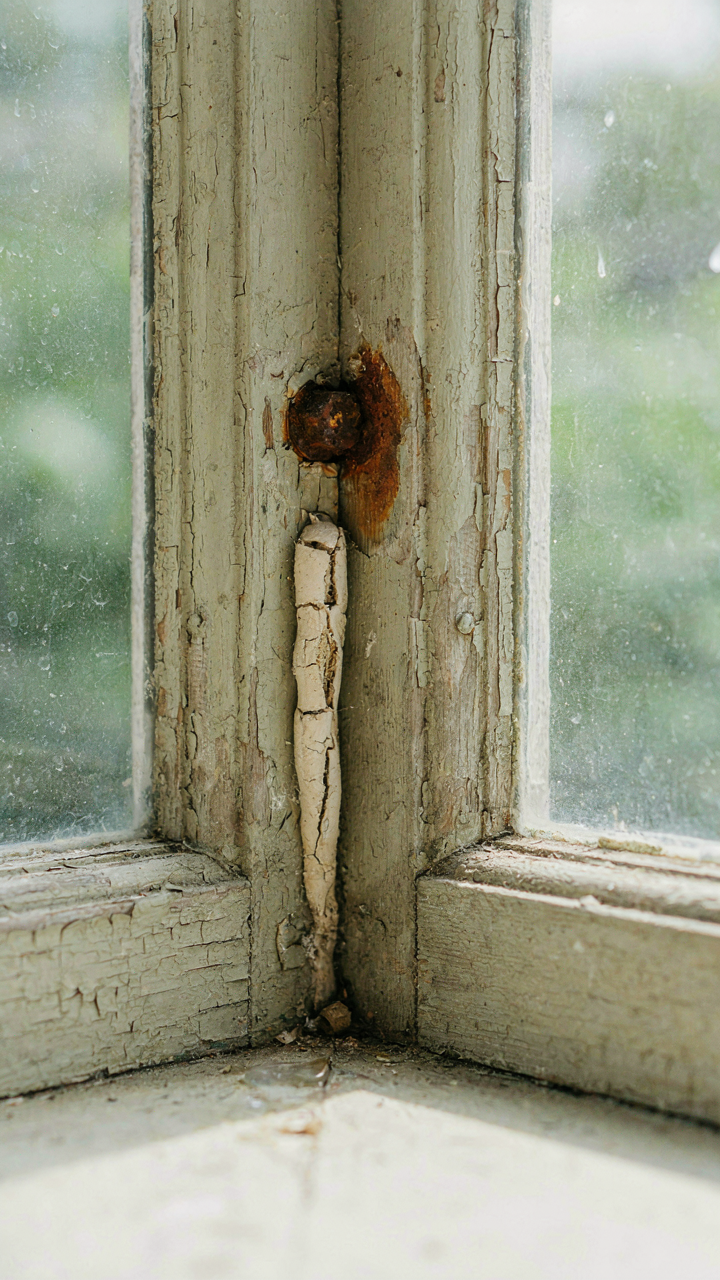
You want to believe salvaged windows solve the cost problem without any real trade-off. They don’t. The mechanism is borrowed from structural engineering: stress concentration. A weak fastener or poorly sealed joint becomes a failure point that multiplies force rather than distributes it. Old window frames expand and contract with temperature swings. Cheap hardware or misaligned glazing bars can’t accommodate this movement. Hairline cracks become splits. Sealant fails. The structure degrades faster than if you’d used inferior materials consistently.

The real cost emerges over time. A single rusted bolt holding a critical angle, a caulk joint applied without surface prep, or overlapped panes that trap water instead of shedding it—these aren’t minor oversights. They’re the difference between a greenhouse that functions for five years and one that collapses in two. The frame itself might cost nothing, but the labor to retrofit proper fastening, replace failed joints, or reinforce weak angles costs money you didn’t budget. Start with solid joinery or don’t start at all.
The Hidden Expense Of Perpetual Maintenance
Everyone fixates on the purchase price of zero and ignores the math of constant repair. A greenhouse with loose joins requires seasonal inspections, recurring caulk reapplication, periodic hardware replacement, and eventually structural reinforcement. These aren’t one-time costs. They’re taxes on poor execution. You’re paying for the same problem repeatedly instead of solving it once. Water intrusion from bad seals leads to frame rot, which demands wood replacement or reinforcement framing. A single season of neglect can double the total cost of the project by the time you fix what breaks.
The mechanism is simple: deferred maintenance on a structure that endures weather escalates in cost exponentially. A $50 repair done now prevents a $300 rebuild later. Most people running cheap greenhouses don’t track this. They justify repeat repairs as “part of owning it.” That’s denial. Build your joints tight the first time using proper sealants, stainless fasteners, and aligned frames. The upfront labor saves you hundreds in replacement and repair cycles across the life of the structure.
The Biological Feedback Loop: Monitoring Your DIY Greenhouse Old Windows Ecosystem

Self Regulating Temperature And Humidity
You want to believe a greenhouse runs itself. It doesn’t. What you actually want is a system that corrects its own drift before you have to. Cybernetics—the study of control systems in machines and organisms—calls this negative feedback. Your old window greenhouse needs the same mechanism: when temperature rises, something opens. When humidity drops, something closes. The mechanism doesn’t care about your intentions.

The old window frame itself is your first regulator. Wood and metal conduct heat differently and respond to moisture expansion at different rates, creating passive venting. Hinged top windows open naturally as internal air heats and pressure builds. This isn’t magic. It’s physics. The gap widens in heat, air escapes, temperature stabilizes. Louver vents or simple propped-open panels extend this range. You’re not fighting thermodynamics. You’re amplifying the system’s existing tendency to self-correct by giving it more surface area to work with.
Turning Raw Data Into Decisions
Sensors in a greenhouse aren’t for peace of mind. They’re for spotting the lag between what you did yesterday and what the plants show today. Most growers check temperature and humidity but don’t act on the pattern. You need a threshold protocol: if humidity stays above 75 percent for six consecutive hours, you increase ventilation that evening. If nighttime temperature drops below 50 degrees three nights running, you adjust your thermal mass or cover strategy immediately. The number only matters when it triggers a specific action.
Log your data in columns by time of day: early morning, midday, late afternoon, before close. You’ll see which hours drive problems. Many old window greenhouses overheat by 2 PM and undercool by 6 AM because the window orientation and mass don’t align with seasonal sun angle. Once you identify the time window where drift occurs, you modify your venting or shading strategy for that window only. Stop measuring everything. Measure the variables that control the outcome you care about, then move when they cross the line.
Beyond The Build: Essential Maintenance For Your Old Window Greenhouse

Stop Treating It Like A Static Object
You want to believe that once you frame it and seal it, the work stops. It doesn’t. Old windows fail because thermal stress cycles wood and glass differently, and that gap widens every season until water finds it. Think of your greenhouse like a mechanical system in thermodynamics where expansion and contraction are the governing forces. Your panes and frames expand and contract at different rates with temperature swings. This mismatch compounds annually.

Monthly visual inspections catch problems before they cascade. Walk the perimeter in spring and fall. Check where glass meets wood for visible gaps or caulk that’s fractured. Look at the interior for water stains or mineral deposits that signal seepage. These aren’t cosmetic issues. They reduce insulation value, invite rot into the frame, and turn a functional greenhouse into a liability. The mechanism is simple: water enters wood, wood swells then shrinks, frame warps, seals fail faster.
Stopping Leaks Before They Rot The Frame
The standard advice here is to recaulk everything annually. That’s incomplete. Recaulking works only if you remove the old caulk first, which most people don’t. Old silicone or acrylic caulk bonds to the substrate differently than new material. Layering new caulk over degraded old caulk creates a false seal that fails within months. You must scrape or cut out failed caulk completely.
For loose panes, the fix depends on the frame type. Single-pane windows in wooden sashes need the glazing compound removed, the glass reset firmly into the rebate or channel, then new glazing compound applied and tooled smooth. Double-pane sealed units can’t be reglazed individually. If one fails, the entire unit requires replacement. Check for condensation between panes as your indicator. Once you’ve removed and reseated panes or replaced units, establish a two-year recaulking cycle, not annual, because you’re working with predictable material degradation rates.
The Upgrade Path: Scaling Your Window Greenhouse For Serious Yields

When Automation Stops Being Optional
You want automation because you’re tired of manual labor, not because it sounds advanced. That’s the real reason, and it matters because it shifts where you invest money. Borrowing from control systems engineering, your greenhouse needs “feedback loops”—sensors that trigger responses without your input. A simple drip line on a timer isn’t feedback. A soil moisture sensor that opens a valve only when the substrate dries past a threshold is. Old windows trap heat and humidity unpredictably. Automation doesn’t eliminate that chaos. It measures it and responds faster than you can.

Start with ventilation, not watering. Heat kills seedlings before thirst does. A basic thermostat wired to a roof vent or small exhaust fan costs under fifty dollars and prevents the midday collapse that wipes out whole flats. Mount the sensor at canopy height, not near the glass. Watering automation comes second because it’s easier to overwater manually and catch it than to undercool and lose everything in four hours. Use drip lines with adjustable emitters, never misters inside a window frame setup. Misters create mold pressure on old glass and encourage fungal issues in high-humidity pockets.
Building Flexibility Into Your Frame
You’ll want to expand, which means your original frame can’t be a load-bearing wall of your system. It has to be modular. This applies the construction principle of “load paths”—each section must carry its own weight independently, not rely on the whole structure. Most people weld or bolt window frames together as one rigid unit, then can’t adjust anything without rebuilding. Instead, build a treated wood perimeter frame on the ground. Bolt window panes into aluminum extrusion or steel channels that slide into that frame. This lets you remove, replace, or swap windows without touching the core structure.
Design the floor plan for one direction of growth only initially. Extend length along one axis, not radially outward. This keeps utilities simple and lets you run irrigation lines in a single trench rather than building a network. Anchor your frame to concrete footers buried below frost line, even for a small unit. Frost heave will destroy everything when spring arrives and your frame shifts upward. Wire conduits into the main frame at installation, not after. Running electrical and water lines later means tearing into your structure or patching things together with visible hacks. Plan for fifty percent more roof area than you currently need. You’ll fill it.
Your Real Obstacle Isn’t The Cost; It’s The Belief That Shortcuts Exempt You From Competence

People think cheap greenhouse windows mean cheap results. Wrong. A salvaged window still demands you understand ventilation, temperature swings, and soil composition. The material costs nothing. Your attention costs everything. Stop looking for the budget hack that skips the work. Today, measure your windowsill and calculate how much light it actually gets during winter. That single number separates growers who eat what they grow from growers who grow excuses. Saving money on materials just means you get to spend it on competence instead.



