
The Folly Of “Authentic” Restoration: Why You’re Missing The Point
Original State Versus Living Function
You want the trunk to look like it stepped out of 1920, untouched and museum-worthy. That’s status anxiety dressed up as historical respect. The real mechanism at work is that you’re confusing the trunk’s original purpose with your current one. A steamer trunk was built to survive travel, absorb damage, and protect cargo. You’re buying it to store blankets in your living room. These demands don’t align.
The obsession with “authentic restoration” comes from design media that treats old objects like artifacts rather than tools. Trunks were disposable then, rebuilt constantly as needed. What matters now isn’t matching factory specs from a century ago. It’s making the trunk functional and visually coherent in your space. That requires letting go of the fantasy of perfect historical accuracy.
Wear As Evidence, Not Defect
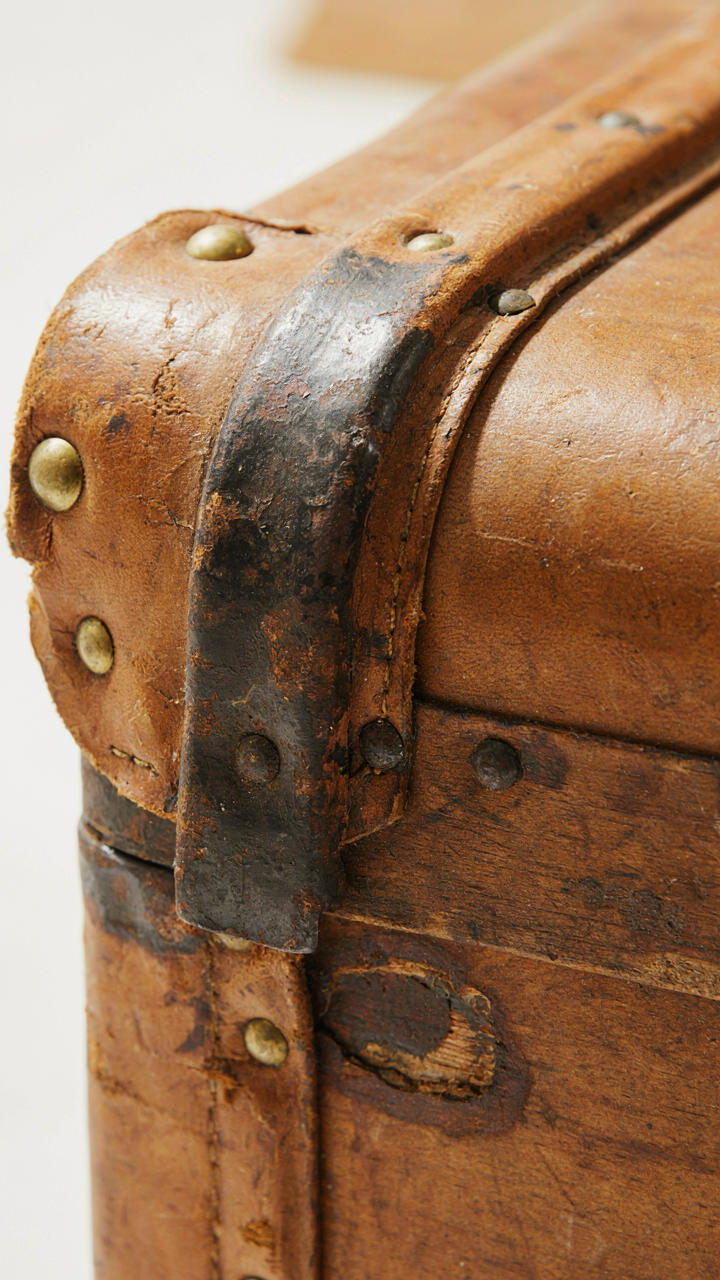
Scars on a trunk tell you how it was actually used, which is more valuable than pristine condition that signals the piece never did its job. Design thinking calls this “aging in place”—the material records real wear patterns under real stress. A dent in the lid isn’t a flaw you sand out. It’s data about what the trunk endured.
When you refinish a trunk, you’re deciding what to preserve and what to replace. Stripping everything to bare wood erases the evidence. Instead, keep the wear. Sand only what’s flaking or rough. Patch deep gouges with epoxy that matches the wood tone, not perfect filler. Paint or stain around the patina, letting old and new layers coexist. This approach takes longer than sanding to zero, but it’s honest about what you actually have.
The Unfinished Vintage Trunk Makeover: A Blueprint For Neglect

Quick Cosmetic Work Collapses Under Load
You want to skip the hard part and still look like you know what you’re doing. Here’s the mechanism: surface treatments fail under stress because they don’t address the load-bearing system underneath. A trunk is a structural object, not decoration. Paint, new hardware, and fabric lining mask rot, weak joints, and compromised wood. When you place weight inside a trunk with hidden damage, the corners separate, the bottom sags, and your makeover becomes evidence of the problem it hid.

Wood deterioration in vintage trunks follows a predictable path. Moisture gets trapped in joints and seams, fungal growth weakens the grain, and the structural integrity fails silently. You cannot sand, stain, or upholster your way past this. The common advice says “just refinish and rebrand.” That’s incomplete. You must inspect the frame, test for soft wood with a screwdriver, and address water damage before any aesthetic work happens. Skip this and your trunk fails the first time someone actually uses it.
Function First, Then Everything Else
The real constraint isn’t what the trunk looks like inside, it’s whether it stays closed and holds weight without collapsing. Most vintage trunk makeovers treat function as an afterthought because it’s invisible and unsexy. Wrong priority. A trunk that doesn’t seal properly lets dust and pests in. Latches that don’t hold mean the lid swings open. Handles that pull away mean you can’t move it. These aren’t minor details. They’re why the trunk exists.
Start by making the trunk work, not look good. Test the seal by closing it and checking for light gaps. Ensure hinges move smoothly and hold weight. Verify the latches engage fully and don’t slip. Replace or repair hardware before considering aesthetics. This order matters because once you refinish the exterior, you’ll avoid taking it apart again for repairs. Function locked in means your makeover actually lasts instead of becoming a display piece that falls apart when touched.
The Trunk Redo Algorithm: From Relic To Relevant

What’s Actually Inside That Shell
You want to believe the trunk is salvageable because throwing it away means admitting you bought dead weight. The real mechanism is this: a trunk’s value hinges entirely on what’s structurally intact versus what’s cosmetic damage. Pop the latches. Open it fully. Look for soft spots in the wood, rust that’s eaten through metal bands, and whether the interior lining has deteriorated to dust or just needs cleaning. Most people skip this step and waste time on a trunk that’s already collapsing from the inside.

The frame, hinges, and base determine if a trunk can hold actual weight or just look pretty on a shelf. Press firmly on all four corners and along the bottom seam. If wood gives easily or you hear cracking, structural failure is already underway. Interior inspection matters more than exterior appearance because you’ll know immediately if this project is restoration or staged decoration. That distinction changes everything about what you’ll actually do next.
Stability Through Targeted Reinforcement
Structural reinforcement operates on the same principle as load-bearing walls in architecture: distribute weight across multiple points rather than concentrate it at joints. Old trunks fail at hinges, corners, and the base because makers prioritized aesthetics over load capacity. You reinforce by targeting these failure points with appropriate materials.
For wooden trunks, apply epoxy wood filler to any soft spots in the frame, then sand flat once cured. Metal bands that are rusted but not perforated need wire brushing to bare metal, then a rust-converting primer followed by metal-safe paint. Hinges take the most stress during daily use, so replace them entirely with modern equivalents rated for the trunk’s weight capacity rather than trying to save originals. The base gets reinforced by adding wooden feet or a support frame underneath if the original bottom shows warping or separation along seams.
Painted Trunks: The Psychology Of Surface Level Solutions

Preparation Dictates Paint Longevity
You want the transformation to stick because a peeling trunk looks worse than an unpainted one. Here’s the mechanism: paint doesn’t adhere to surfaces—it adheres to what’s on the surface. Dust, old finish, and oxidation sit between the wood and your new coat like a barrier. Remove them and the paint bonds mechanically. Skip this and you’re guaranteed failure within months.

Surface prep determines whether paint lasts years or weeks. This isn’t negotiable.
- Wire brush or steel wool: Removes rust, corrosion, and loose paint from metal hardware and trim. Work in circular motions until the surface feels smooth and uniform to touch.
- TSP (trisodium phosphate) wash: Cuts through decades of grime and wax buildup. Mix per instructions, scrub thoroughly, rinse completely, and allow full drying before sanding.
- 120-150 grit sandpaper: Smooths the wood and creates tooth for primer adhesion. Sand with the grain on flat surfaces, use a sanding block for even pressure throughout.
- Primer application: Seals the wood, blocks stains, and provides the base for topcoat adhesion. Use bonding primer if the trunk has glossy or heavily finished surfaces previously.
- Caulking gaps and seams: Fills splits and joints that trap moisture and cause paint failure later. Use paintable caulk rated for wood, let it cure fully before sanding smooth.
Most people paint over dirt and call it done. You’re spending the same labor either way—do the work once. A trunk prepped correctly holds paint for a decade or more. A rushed trunk shows failure within the first season.
Strategic Color For Spatial Illusion
Color isn’t decoration—it’s spatial architecture. Light colors push walls back; dark colors pull them forward. This principle comes from physics and how light scatters off surfaces at different wavelengths. Apply it to trunk placement: a light-painted trunk in a corner recedes into the room. A dark trunk becomes a focal point. Choose based on whether you want the piece to disappear or command attention.
The wrong color choice wastes the entire makeover. A dark trunk crammed into a small bedroom makes the space feel compressed. A light trunk in an oversized living room looks diminished and cheap. Paint color must answer one question first: do you want this trunk to anchor the room or fill a gap? Everything else follows from that single decision.
Beyond The Brush: The Art Of Repurposing Vintage Trunk Ideas

Match Your Room’s Design Language First
You want the trunk to look intentional, not like you salvaged it from a garage sale and hoped nobody noticed. Here’s what actually matters: a trunk only reads as design when it echoes the existing visual language in your room. Think of this as constraint-based design from architecture—you’re working within the existing structural rules of the space, not fighting them. A steamer trunk with brass fittings doesn’t integrate into a minimalist Scandinavian room because the visual weight contradicts the aesthetic logic already at work.

Start by identifying your room’s dominant materials, color temperature, and line weight. If your furniture favors clean angles and light woods, a heavily detailed ornate trunk disrupts that system. If your space runs warm and eclectic with mixed metals and layered textiles, a painted steamer trunk fits the grammar. The placement matters equally—a trunk at the foot of a bed works differently than one against a wall serving as a console. Position it where it answers an existing visual question in the room, not where it just occupies space.
Function Determines What You Actually Do To It
Most people paint or refinish a trunk without asking what they’ll actually use it for. That’s backwards. A trunk holding seasonal linens needs interior climate control and moisture management, which changes how you treat the materials. A trunk acting as seating requires reinforced joints and a stable lid that won’t collapse under weight. A trunk functioning as a coffee table needs a sealed, damage-resistant surface because it takes impact and spills constantly.
Storage trunks benefit from cedar or aromatic wood lining if you’re protecting textiles from moths. Display trunks can stay structurally simpler because visual appeal matters more than load capacity. Functional restoration comes before aesthetic choices—don’t add a decorative finish to a trunk with structural rot in the slats, and don’t leave the interior raw if you’re storing anything moisture-sensitive. Check the hardware first. Broken hinges and latches fail predictably, so replace them before committing to any visual treatment. The finish you choose must support the actual work the trunk will do.
The Material Intelligence Of A Painted Metal Trunk
Rust Isn’t Random Decay
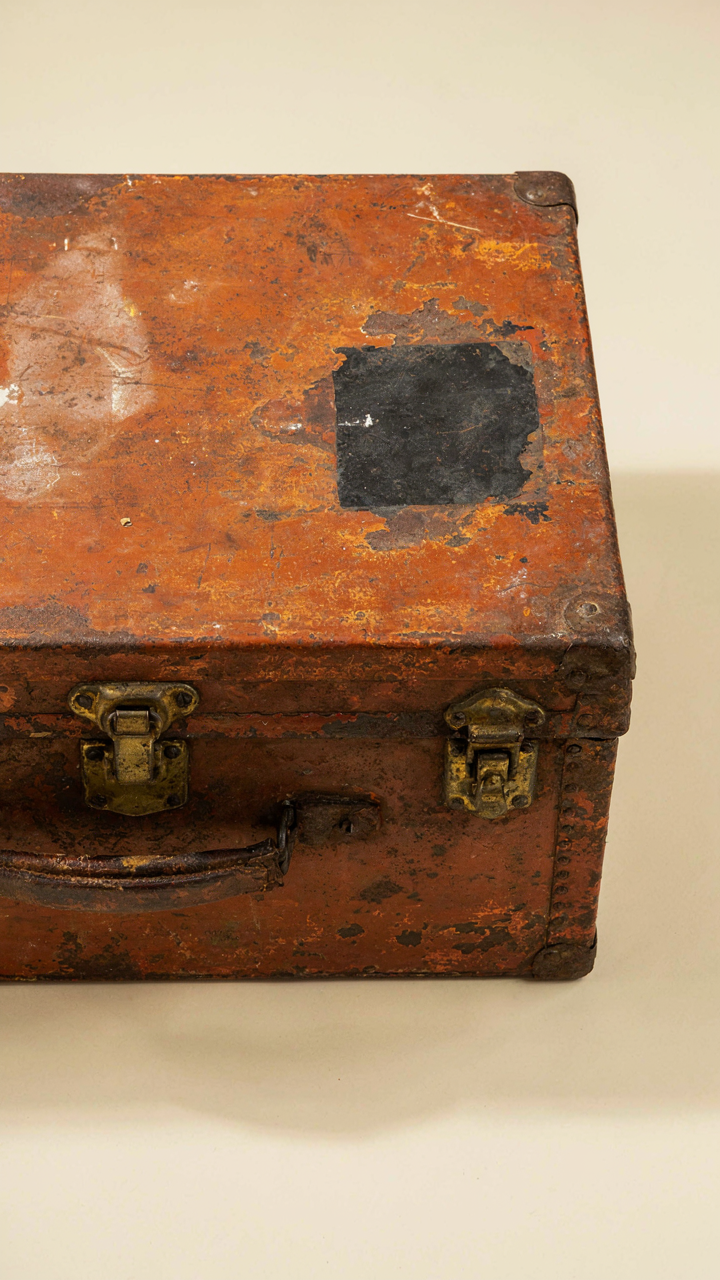
You want to paint over rust because it looks bad, but the real reason you need to understand rust is that it’s a process that doesn’t stop under paint. Rust operates like an invading organism in biology: it consumes the host material from the inside out, creating expansion pressure that cracks and bubbles any coating you apply. The trunk will fail faster with paint trapping moisture than it would left bare. Rust is oxidation, plain and simple—iron molecules bonding with oxygen in the presence of water.

Once rust starts, it accelerates because the oxidized iron creates a porous surface that holds more moisture. Paint alone stops nothing. You need to interrupt the biological process before the coating goes on, which means removing all corrosion down to bare metal or converting it chemically. Trunks stored in basements and garages accumulate rust faster because humidity stays high and air moves slowly. This is why vintage metal trunks with visible rust require intervention, not just cosmetic coverage.
Convert Before You Seal
The common advice is to sand everything. That’s incomplete. Industrial chemistry offers a smarter option: surface conversion products like phosphoric acid-based rust converters. These don’t remove rust, they transform it into a stable compound that accepts paint. This is the single mechanism that makes painted metal trunks durable. The converter chemically bonds to oxidized iron and creates a primer layer in one step. You apply it, let it cure, then paint directly over it.
Phosphoric acid converters work best on trunks with light to moderate surface rust where the metal structure is intact. Heavy rust with pitting or flaking requires manual removal first, but conversion products handle the stubborn spots that wire brushes miss. After conversion cures fully, your paint adheres properly and seals the trunk against future moisture. The trunk is now protected by an actual chemical barrier, not just pigment sitting on top of rust waiting to fail.
The Unseen Value: Maximizing Storage With Vintage Trunk Makeover

Internal Compartments That Actually Work
You want the trunk to look intentional, not like you’re hiding chaos inside. The mechanism is simple: a vintage trunk without internal structure forces you to excavate every time you need something, which means you stop using it. Dead investment.

Think of this like inventory management from logistics. A trunk has finite cubic space, but without zones, you’re treating that space like undifferentiated bulk storage. Vintage trunks—especially steamer trunks from the 1920s-1940s—were originally built with compartment systems because traveling required organization. You’re not adding something new. You’re restoring the original function.
- Divider Trays: Removable wooden or fabric-lined trays that slot into the trunk at different heights. Keeps folded items separated and prevents shifting when you move the trunk.
- Felt-Lined Boxes: Small wooden boxes custom-fitted to corners or the base. Perfect for accessories, jewelry, or documents that need containment without taking up vertical space.
- Hanging Rod or Hooks: Some trunks accommodate interior rods or adhesive hooks mounted to the lid. Useful for suspending garment bags or flat storage items on the inside of the lid itself.
- Fabric Organizers: Canvas or linen pouches attached to the interior walls with small tacks or adhesive strips. Prevents items from settling into dead zones at the bottom.
- Partition Panels: Flat boards or stiff fabric panels that create vertical divisions, turning one large cavity into 3-4 distinct zones for different item categories.
The goal is simple: you should be able to grab what you need in under 10 seconds without moving three other things first. If your compartment system requires that, you’ve won. If not, it’s just visual theater.
Access Points That Match How You Actually Live
Nobody talks about this because it’s not glamorous. Most vintage trunk makeovers ignore the fact that how you use a trunk daily determines whether it becomes storage or a decoration you feel guilty about.
A trunk sitting in a bedroom corner as a blanket storage gets opened maybe twice yearly. A trunk at the foot of a bed in an active household needs weekly access. These demand different approaches. The first trunk can tolerate deep, hard-to-reach compartments. The second one can’t. Accessibility determines your internal layout before you ever install a divider. Put your most-grabbed items—seasonal throws, extra pillows, everyday linens—at the top or in the front third. Secondary items go deeper. Rarely-used ceremonial stuff goes in the back. This mirrors how retail stores organize shelving by item velocity. You’re not being clever. You’re eliminating friction from your own life.
The second principle is lid mechanics. An old trunk with a heavy, slow-closing lid teaches you to avoid opening it. Replace the lid stay with a modern friction hinge or add a prop rod that holds the lid open at 90 degrees. You want zero friction between the impulse to grab something and actually grabbing it. That’s when a vintage trunk moves from storage object to functional furniture.

From Junk To Jewel: The Economics Of The Vintage Trunk Makeover

DIY Labor Against Professional Cost
You want to know if your time is worth less than money. That’s the real question hiding under this one. Economics teaches us opportunity cost, the value of what you give up by choosing one path over another. Your DIY makeover has a hidden price tag: the hours you spend instead of earning, resting, or building something that scales.
A professional restoration costs between 300 and 1,200 dollars depending on trunk condition and your region. DIY materials run 50 to 200 dollars. The gap looks obvious until you calculate labor hours. A thorough restoration takes 15 to 40 hours for someone without experience. At that rate, DIY only wins if your hourly value is under 12 dollars. Most people doing this project are worth more and won’t admit it.
Market Demand And What Actually Sells
Steamer trunks from the 1920s to 1950s command the strongest resale interest because they’re rare enough to feel special but common enough that buyers exist. A well-executed makeover on a mid-century trunk moves between 150 and 400 dollars online. Victorian trunks from the 1880s to 1910s sometimes exceed 500 dollars, but they require expertise to restore without erasing authenticity, which kills resale value instantly.
The market cares about one thing: originality with functional improvement. Adding trendy paint colors or modern hardware actually reduces what a collector will pay. Restoring hardware, fixing structural issues, and using period-appropriate finishes increases value. Resale success depends on matching the trunk’s era to the right buyer, not on making it match your living room aesthetic.

The Real Obstacle Isn’t The Trunk’s Age; It’s Your Inability To See Beyond Its Original Purpose

Most people stare at a vintage trunk and see a relic. You need to see a problem solver. Stop asking what it was designed to do. Start asking what your life actually needs. A trunk becomes valuable the moment you claim it. Go find one today, pick a single room it will transform, and commit to that decision. The trunk doesn’t need permission to become something new. Neither do you.



