Introduction
Newspaper crafts offer a simple and creative way to decorate your home while being eco-friendly. Using old newspapers to create beautiful and useful items can reduce waste and bring a unique touch to your living space. This article explores creative newspaper craft ideas you can easily make yourself to add charm and sustainability to your decor.
DIY newspaper crafts not only save the environment but also save money and provide a rewarding hobby. From making baskets and wall art to decorative bowls and organizers, you will find step-by-step prompts and useful tips to bring your eco-conscious decor vision to life.
Getting Started with Newspaper Crafts DIY
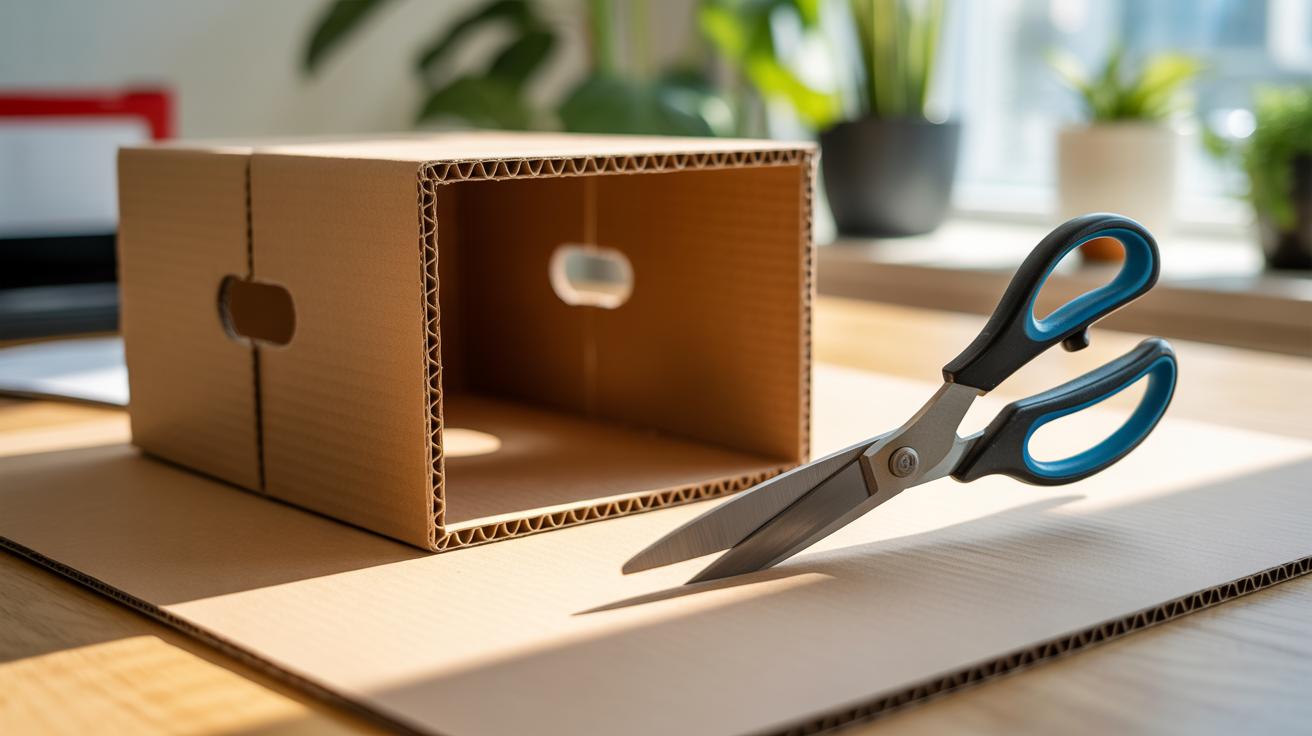
Newspaper crafts might seem a bit simple at first glance, but there’s actually a surprising amount of ways to bring them to life. Besides newspapers themselves, you’ll need some basic materials and tools—things most people already have around the house. Think glue, scissors, tape, maybe paint if you want to add some color or seal your projects.
Preparing your newspapers is pretty straightforward. It’s best to use sheets that are mostly clean and not too glossy because the ink sometimes smudges or feels sticky when wet. Some prefer older newspapers since the ink is dry, which makes working easier. Tear or cut the pages into strips or shapes depending on what you’re making. Avoid the shiny ads unless you want to experiment with texture.
Newspaper crafts are good for the environment because they give new life to something that might otherwise be tossed out. Plus, they encourage creativity—the limits of thin paper mean you get to think about folding, rolling, or layering in ways that wouldn’t come to mind with sturdier materials.
Materials and Tools You Need
You don’t need a fancy list. Mostly, grab:
- Scissors—sharp enough for clean cuts but nothing elaborate.
- Glue—white craft glue is versatile. A glue stick works, too, for lighter jobs.
- Tape—clear or masking, handy for quick fixes or holding things temporarily.
- Paint or markers—optional, for decorating or sealing your pieces.
- A ruler or a pencil—to mark and measure.
Preparing the newspaper means unfolding the sheets and smoothing out creases. Sometimes you’ll want to tear rather than cut to keep that raw, natural edge. Start with lighter, thinner pages; they’re easier to fold or roll. Avoid super thick, glossy inserts as they won’t hold shapes well.
Basic Techniques to Learn First
Before jumping into complex projects, get comfortable with a few simple methods:
- Folding: Try folding strips into accordion shapes. It strengthens the paper and creates neat patterns.
- Rolling: Roll strips tightly from one corner to form tubes or coils. These can be glued together for structure.
- Weaving: Weave flat strips over and under to create mats or basket bases. It’s a relaxing way to see texture emerge.
- Gluing: Use glue to layer strips and build thickness or secure parts. Allow glue to dry fully for better hold.
Practicing these helps you understand how the paper behaves—sometimes it tears unexpectedly, sometimes it bends nicely after a few tries. Don’t hesitate to experiment; mistakes can be opportunities.
Creating Decorative Newspaper Bowls
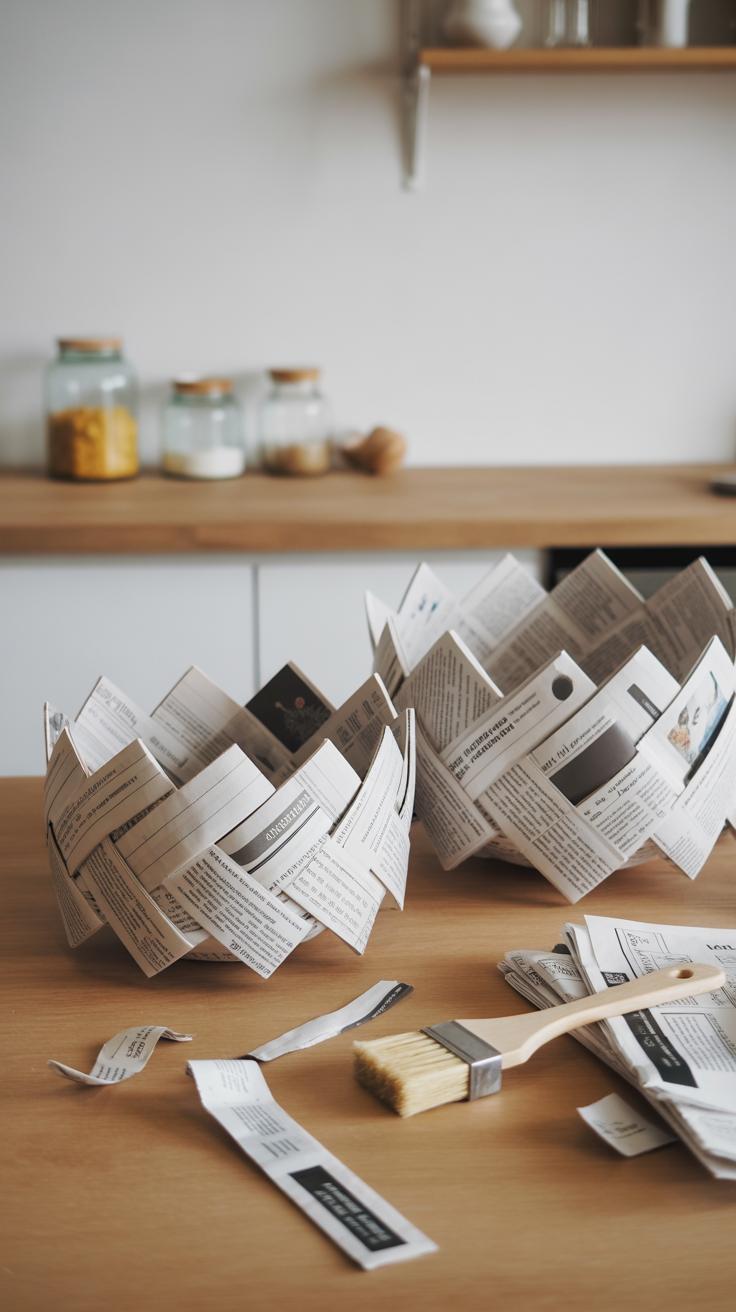
Making newspaper bowls starts with folding strips of newspaper into tight, uniform pieces. Cut your paper into long, narrow strips—about an inch wide works well. Take each strip and fold it lengthwise several times to create a sturdy, rod-like piece. These will serve as the building blocks for your bowl.
Next, find a mold to shape your bowl. A simple upside-down bowl or a balloon works fine. Begin gluing the folded strips around the mold, layering them in circular rows. Use a mix of white craft glue and water to keep things flexible but sticky. Overlap the strips slightly; this adds strength.
Once your initial layer is done, add two or three more layers, making sure the shape holds. Press firmly but gently. Let the glued paper dry completely—overnight usually does the trick. At this point, your bowl feels fragile, so reinforcing is necessary. Add a last layer using a thicker glue or papier-mâché paste for extra durability.
For finishing touches, protect your creation by applying a non-toxic waterproof coating. Options like clear acrylic sealers or homemade beeswax mixes keep moisture out. You could also paint your bowl for color or use decoupage techniques with leftover decorative paper. These not only brighten the bowl but also increase longevity. Have you thought about how your decoration choice might affect the bowl’s feel or function? Sometimes, a glossy finish makes it too slippery, while a matte coating invites more touch. It’s a small detail but worth considering.
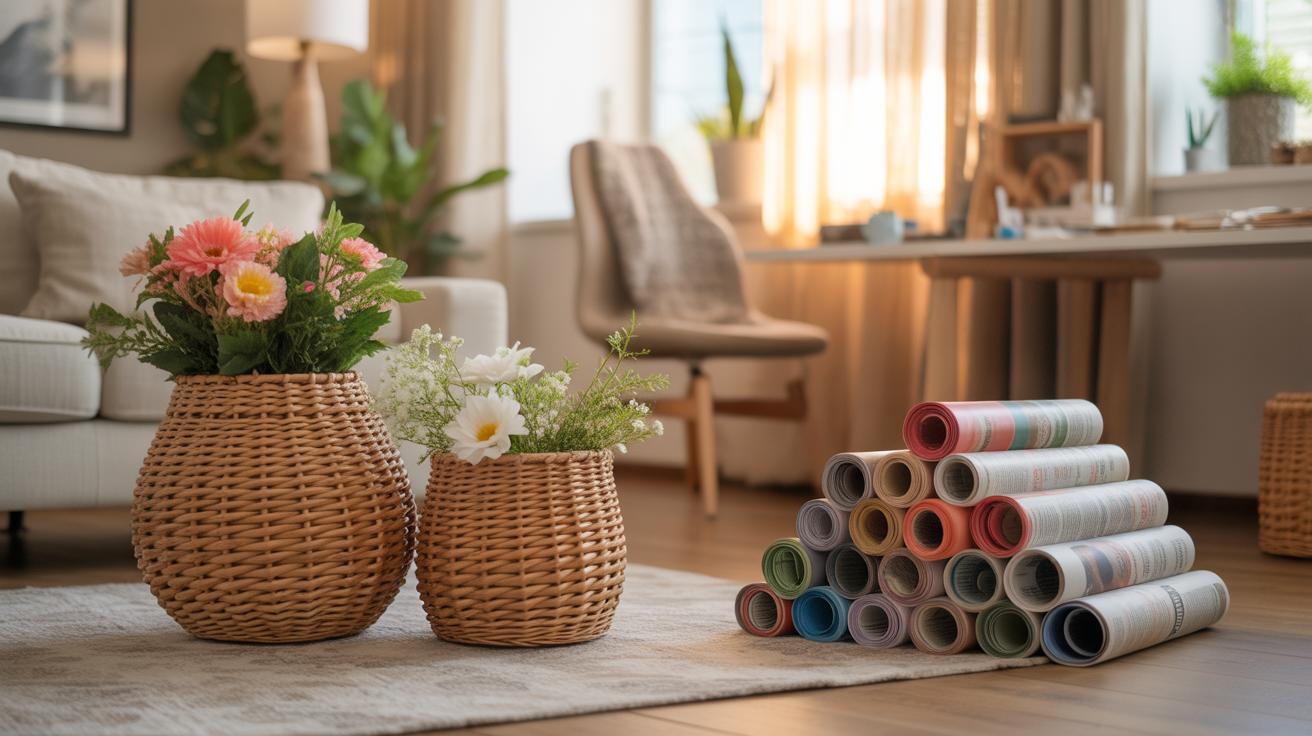
Weaving Newspaper Baskets for Storage
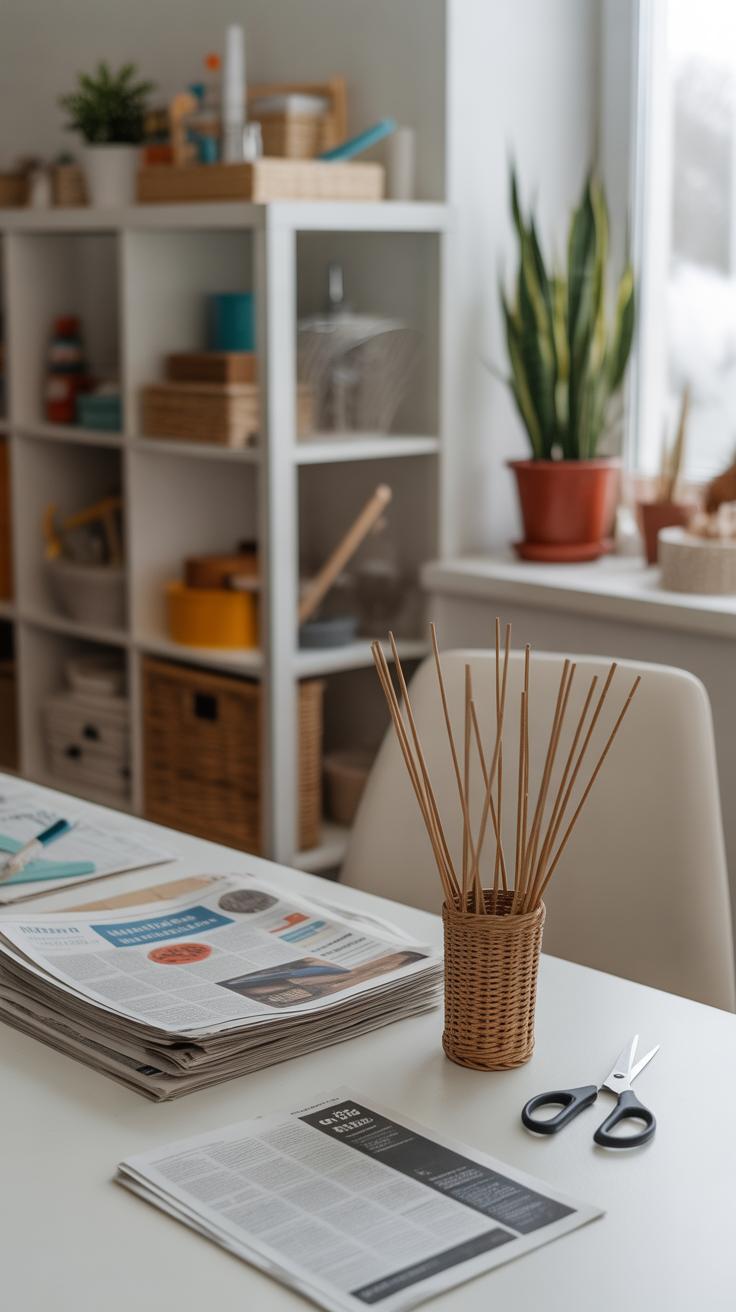
Preparing Newspaper Strips for Weaving
Start by selecting your newspaper sheets and decide how wide you want your strips. Usually, 1 to 1.5 inches works well for weaving. Use a ruler and a sharp pair of scissors or a craft knife for more precise cuts. You want strips that are uniform in size, making the weaving process smoother and more consistent. Uneven strips can cause your basket to look a bit lopsided—though, if you like a quirky charm, that might be fine.
Next, decide if you want to roll or flatten your strips. Rolling each strip tight along its length creates a sturdy, rod-like base. I find rolling gives the strips better strength, especially when you’re planning a larger basket. Flattening is simpler but can make the strips more fragile. If you’re going to flatten, try pressing them under a heavy book overnight to get an even surface and improve durability.
To help the strips hold up, consider applying a thin layer of glue or even a mix of water and white glue on them. It stiffens the paper a bit and prevents quick wear. Take your time here; soaking or rushing can make the paper soggy. Your strips should be flexible but firm. Overdoing it might cause brittleness, so test a few strips first and see what feels right.
Weaving Patterns and Basket Assembly
Once your strips are ready, set up the base by laying out an even number of strips parallel to one another—call these your warp strips. Then, weave another strip over and under these, creating the weft. The simplest pattern is the plain weave, where you alternate going over one strip, under the next, and so on. It can feel repetitive but produces a solid, clean surface perfect for beginners.
As you build the base, gently push the weaving together, keeping the basket’s bottom tight and sturdy. To shape the sides, bend the warp strips upward once the base reaches your desired size. Continue weaving in and out horizontally around these vertical strips, gradually building height. You might find the basket wants to lean one way at first. Just adjust the tension—sometimes loosening or tightening certain strips will help the shape even out.
For finishing touches, fold the upper ends of the warp strips inward or outward, then glue or tuck them neatly to avoid sharp edges. Handles can be made by braiding a few rolled strips or twisting thicker strips and attaching them securely to opposite sides of your basket. Handles are useful, but optional—sometimes the basket looks better without them.
Try making several sizes: a small one for keys, a medium basket for magazines, or a larger one for blankets. Each demands a bit of a different approach to tension and weaving technique. It’s quite rewarding to see these eco-friendly creations come to life, giving your space practical storage with a touch of handmade charm.
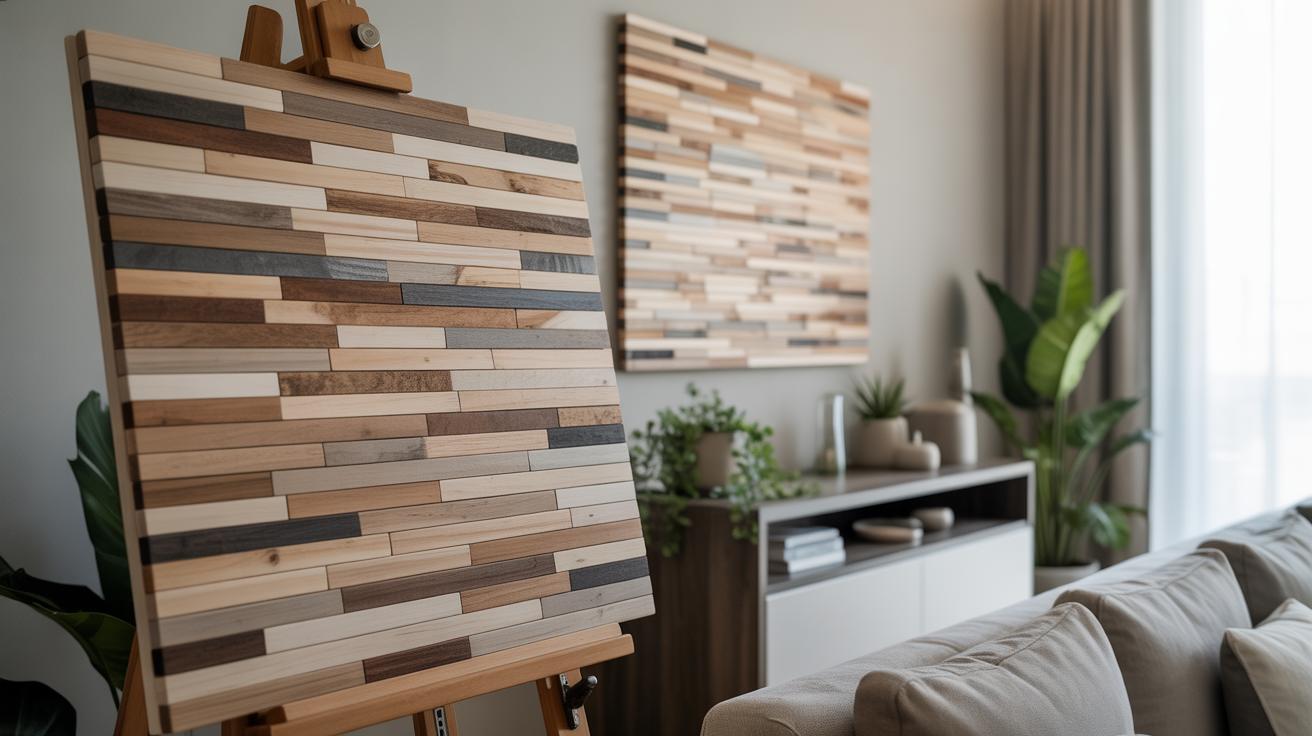
Designing Wall Art with Newspaper
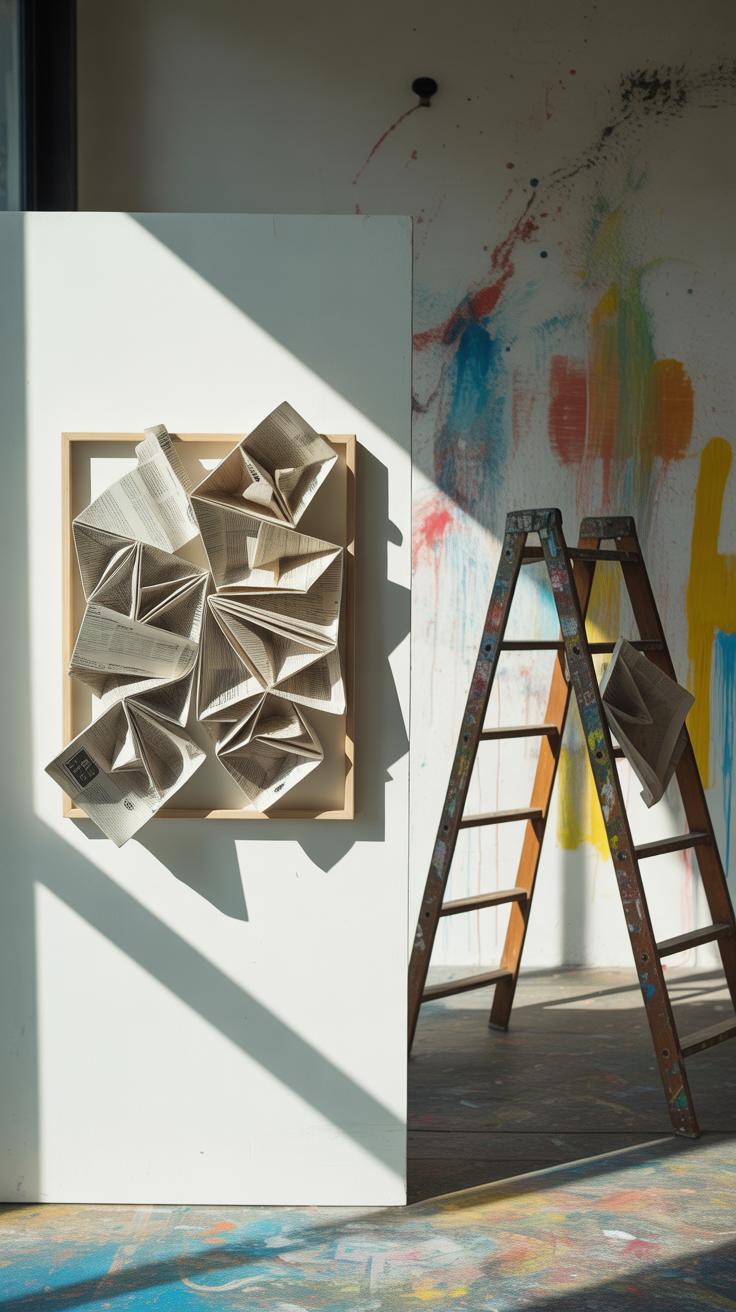

Using newspaper to create wall art is a surprisingly flexible way to bring character to your space without spending much or harming the environment. You can roll strips into tight curls, layer torn or cut pieces for collages, or arrange snippets like tiles for mosaic effects. Each technique offers a different texture and feel, so mixing them might give you something really unique. For example, rolling papers into curls can add dimension—just cut long strips and twist them around a skewer or pencil. Glue these curls onto a backing to form shapes or abstract patterns.
Collages are simpler. Gather images, headlines, or text snippets that catch your eye, and layer them directly on a canvas or thick paper. Play with overlaps and wrinkles for interest. Mosaics require cutting papers into repeating shapes—squares, triangles, circles—and fitting them tightly like puzzle pieces. You can create forms or patterns by varying colors and types of print. It takes patience but the effect can be striking.
Techniques for Newspaper Wall Art
Start by deciding what texture or look you want. Rolling strips into curls is surprisingly soothing and hands-on—curl, then glue in clusters or lines. You can make grape-like bunches or string them for garlands. Layering for collages means tearing or cutting papers randomly or with intent. Overlap different tones of gray, black, and white, maybe ink or paint over it to add depth.
Cutting shapes for mosaics calls for patience. Use scissors to make uniform pieces or experiment with irregular cuts. Arrange these on a board and move them around until the pattern feels right before attaching. Each method works well on simple cardboard or stretched canvas, depending on your budget and tools.
Ideas for Unique Newspaper Art Designs
Think beyond basic arrangements. You could depict nature scenes, like trees made from curled strips or birds formed by collaged headlines. Abstract art suits layered textures—imagine blocks of text overlapped with swirls of ink or watercolor stains. Word art is another fun idea. Cut out letters to form favorite quotes or words that inspire you, then scatter or align them on your background.
Color can play a role too. You don’t have to stick strictly to black and white. Try dipping parts of the paper in natural dyes or paint, or add subtle accents with markers. Also, mixing other materials—like scraps of fabric or dried flowers—can give your piece personality. What story do you want your wall art to tell? Sometimes the simplest newspaper fragments hold the most unexpected meaning.
Making EcoFriendly Gift Wraps and Tags
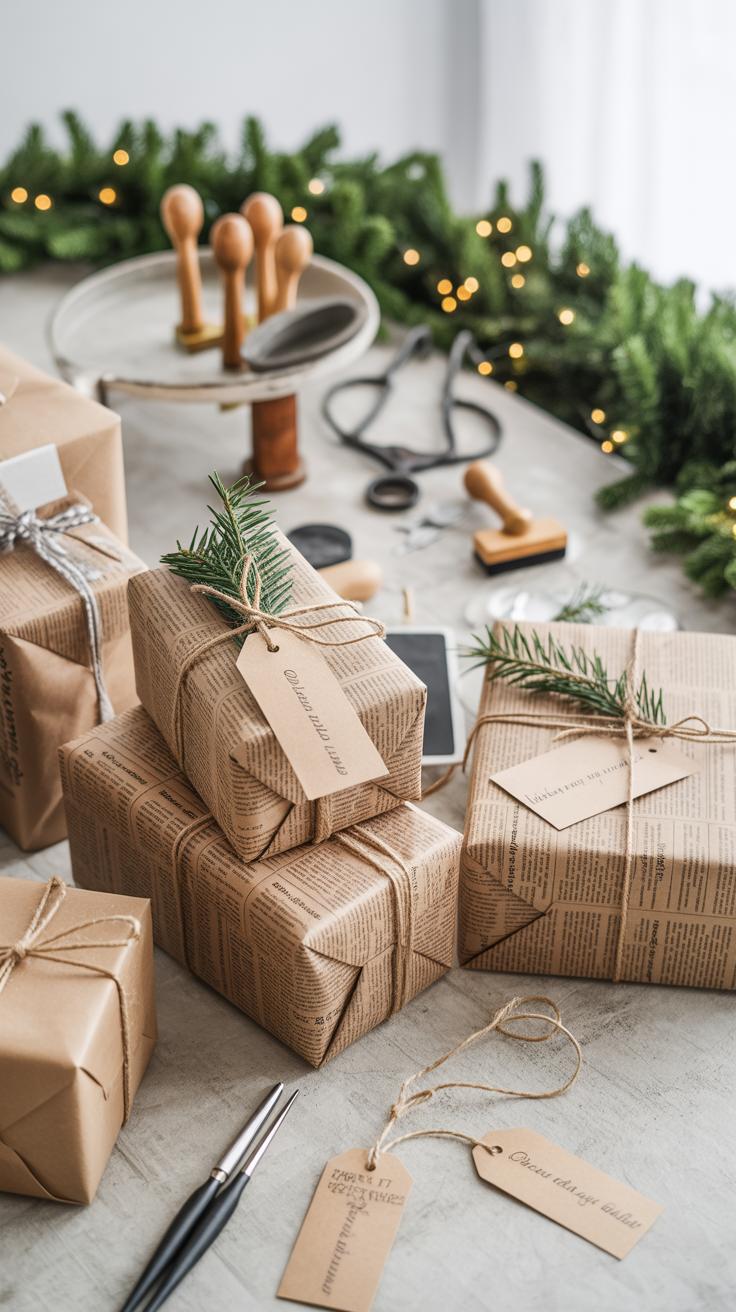
Repurposing newspaper as gift wrap is surprisingly easy and yields a genuinely rustic look. You start by choosing the right sheets—usually the larger pages work best. Cut or fold them to fit your gift size. You might find that thinner pages tear, so reinforcing with a bit of clear tape or layering two sheets helps avoid rips during wrapping.
Decorating the paper is where you can get creative. Simple rubber stamps or hand-painted designs add personality without overwhelming the natural print. I once used some leftover acrylic paint to create abstract dots and lines—something imperfect and casual, which somehow fit perfectly. Ribbon or twine in plain or muted tones works well to finish the look, keeping things earthy yet charming.
Steps to Create Newspaper Gift Wrap
Measure your gift so the newspaper will fully cover it, allowing for a couple of extra inches on each side.
Cut the paper to size—consider doubling a sheet for durability. Smooth out wrinkles before folding it neatly around the gift.
Secure the edges with thin strips of tape, placed discreetly to not distract from the newspaper’s texture. If any tears appear, patch those with small bits of tape from behind.
Next comes decorating: stamp simple patterns, paint minimalist shapes, or strew bits of dried leaves for extra flair. Don’t overdo it; remember, the print itself is part of the charm.
Crafting Personalized Gift Tags
Cut gift tags from thicker newspaper junk mail ads or layered sheets to keep them sturdy. Simple shapes like rectangles, circles, or hearts work well—and giving them uneven or torn edges adds a handmade feel.
Use markers or pens to write names directly on the newspaper. If you want a bit more flair, glue on small paper layers or draw subtle embellishments.
Personalizing tags is fun and doesn’t have to be perfect. Sometimes, the uneven handwriting or off-center drawings feel more heartfelt. Thread them onto your ribbon or twine, and you have a gift topping that’s eco-friendly and truly original.
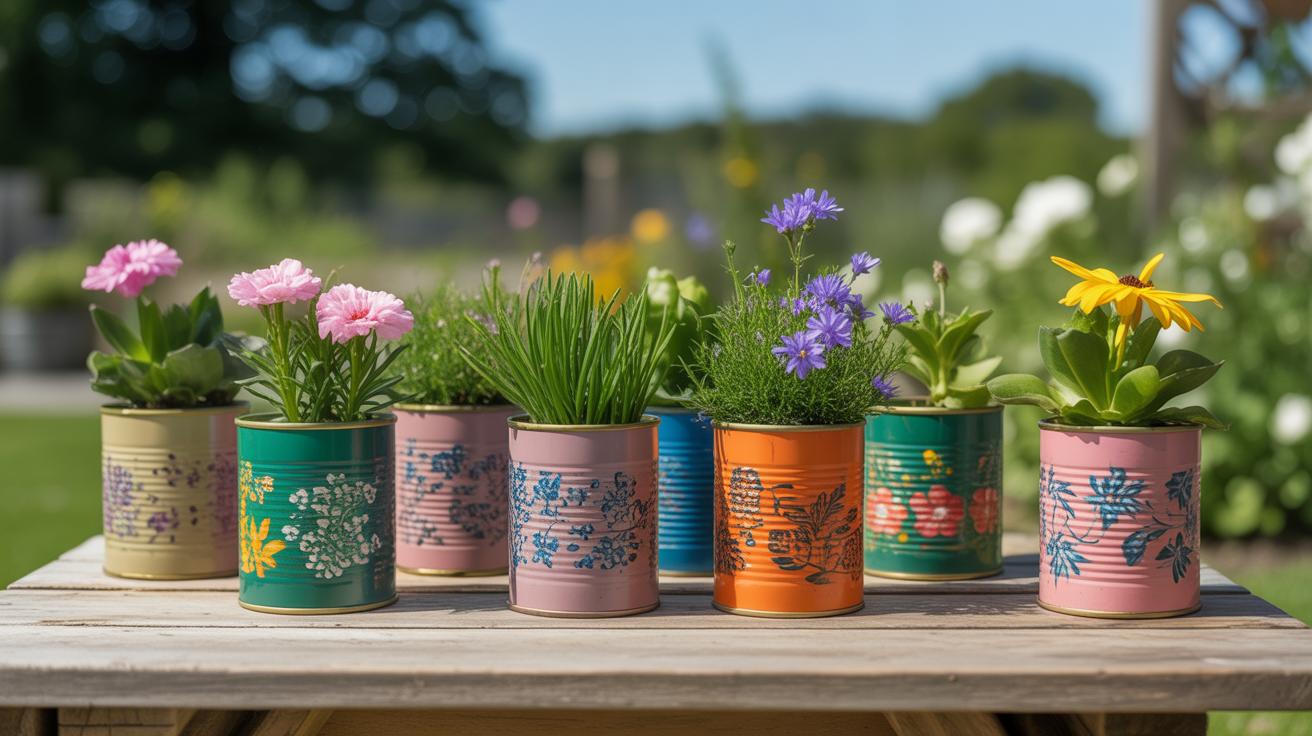
Building Newspaper Planters for Indoor Plants

Forming and Reinforcing Planters
Creating newspaper planters starts with folding or rolling the paper into the shape you want. You might try folding sheets into square or rectangular boxes, or rolling strips tightly to form cylinders—both work nicely for small pots. The trick is making the structure firm enough to hold soil without collapsing. Layering several sheets or weaving rolled strips can add strength. Sometimes I double up on the base by folding it several times—it really helps.
Since newspapers absorb moisture, lining the planter is key. You could use a plastic bag cut to size, some wax paper, or even a thin layer of recycled aluminum foil. The lining keeps water from soaking the paper and makes sure your planter lasts longer. You might wonder if this takes away from the eco-friendly vibe, but reusing plastic or foil already on hand can still reduce waste overall.
Decorating Planters for Style
Once the planter is shaped and lined, it’s time to dress it up. Painting is a simple way to customize colors to fit your space, but keep in mind that acrylic paints might not be the greenest choice. If you want to stay closer to nature, try gluing dried leaves, small twigs, or flower petals onto the surface with a glue that dries clear. Decoupage with leftover newspaper clippings or vintage book pages can add interesting patterns and texture.
Some people like to stamp patterns using potato stamps or carved erasers—that gives a handmade feel and lets you control the design precisely. What kind of look are you going for? Minimalist? Rustic? Floral? The great thing about newspaper planters is that they can be as bold or subtle as you wish, blending with modern clean lines or cozy natural corners just as well.
Crafting Newspaper Jewelry and Accessories
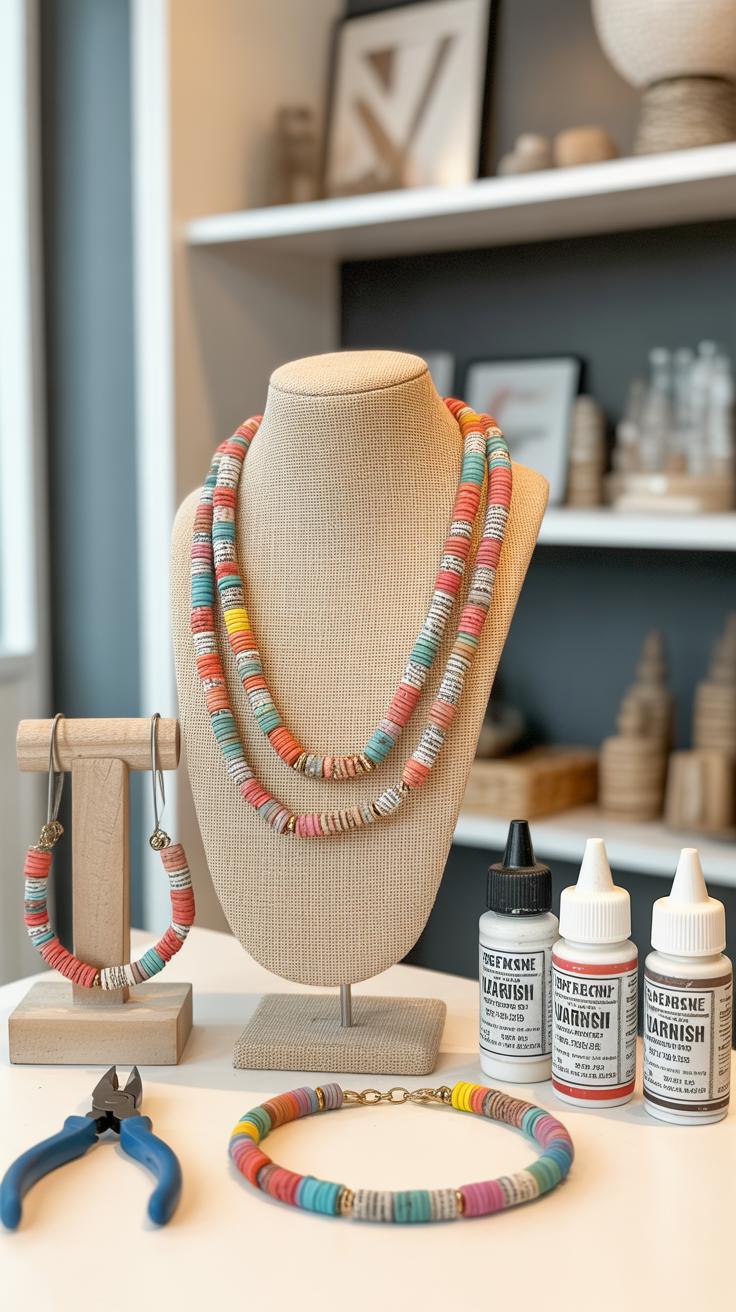
Making jewelry from newspaper might sound unusual, but it’s actually quite fun and surprisingly simple. You can start with a pile of old newspapers and, with some patience, turn them into beads, necklaces, or even bracelets. Rolling or folding strips into small shapes forms the beads, which become the foundation of your accessories. I’ve found that working with thinner paper makes rolling easier and results in smoother beads, but sometimes thicker print adds a nice texture. Safety-wise, keep scissors sharp and be mindful if you’re using strong adhesives or varnishes—working in a well-ventilated space never hurts.
Creating Newspaper Beads
To make beads, cut newspaper into narrow strips—about 1 to 2 centimeters wide—and roll them tightly from the wider end. Secure the tip with a bit of glue; white glue works, though a quick-drying craft glue speeds things up. After rolling, experiment with shapes by trimming if you want rounded or more angular beads. Painting the beads can either help hide the newsprint or enhance their look. I sometimes use acrylic paint, but a clear varnish seals the bead better and boosts durability. It’s a good idea to let them dry fully overnight to avoid smudging or soft spots.
Assembling Accessories and Wearing Tips
Linking beads into bracelets or necklaces is as straightforward as threading them on a cord or wire. You can add clasps or findings, easily found online or at craft stores, to finish your piece professionally. If you’re unsure about knots or closures, slip the ends through beads for added security. Since newspaper is delicate compared to metal or plastic, treat your jewelry gently. Avoid water and store pieces flat to keep the shape. I’ve learned the hard way that rough handling shortens their lifespan. Still, with basic care, your paper creations can last quite a while and be conversation starters too.
Maintaining and Preserving Your Newspaper Crafts
Newspaper crafts can be surprisingly delicate. The thin paper tends to tear easily, and colors fade faster than you might expect, especially if your pieces catch a lot of sunlight. So, keeping them looking good takes a bit of care, though you don’t need to fuss over every fold.
Cleaning and Handling Newspaper Crafts
When it comes to cleaning, dust is usually the biggest enemy. Gently brushing with a soft, dry cloth or a small paintbrush often does the trick. Avoid any damp cloths—they risk warping or staining the paper. It’s tempting to want to wipe off a smudge, but newspaper absorbs moisture too easily.
Handling is just as important. Hold your crafts by sturdy parts, especially if they have thin rolled pieces or tight folds. One slip, and a tear can easily form. I learned this the hard way after dropping a delicate necklace once; now I’m a bit more cautious. When you move or display them, try not to squash or bend the shape. Sometimes that means extra space, which can be a hassle but keeps the craft intact.
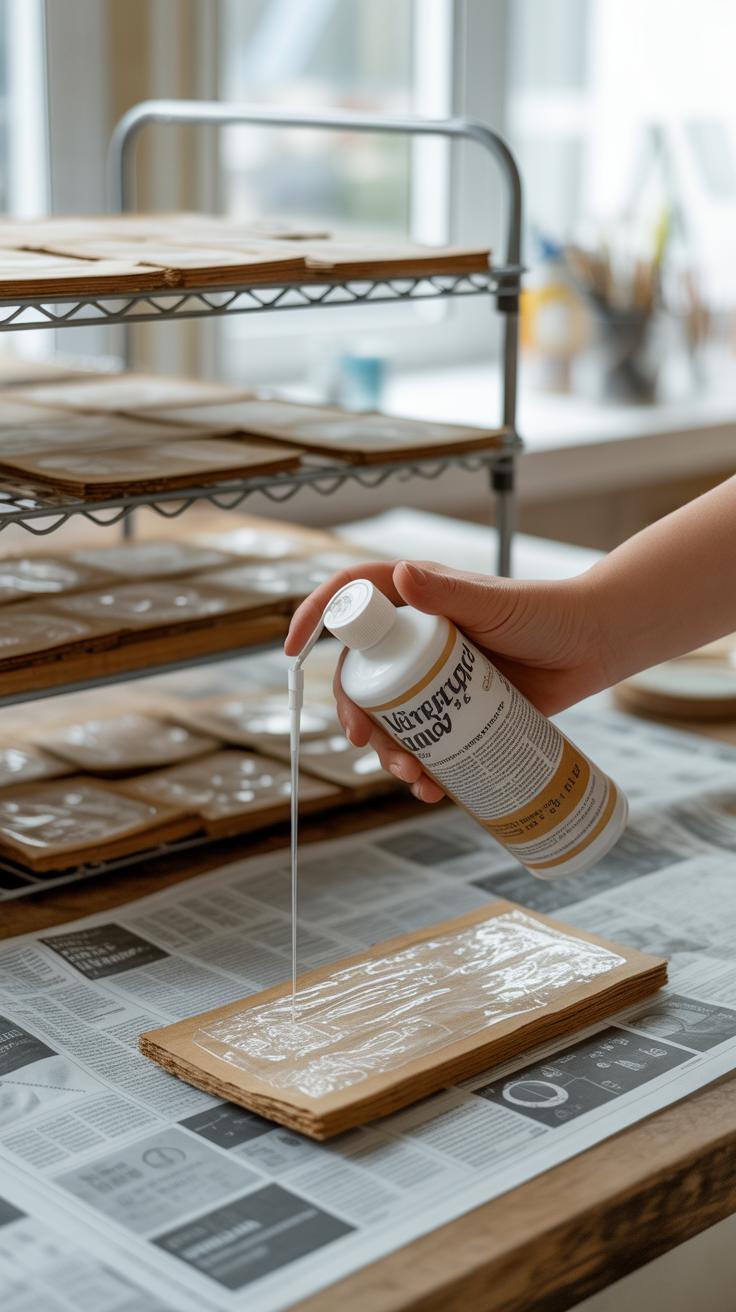
Protective Coatings and Storage
Protective finishes help a lot. Water-based varnishes or clear acrylic sprays create a barrier against moisture and slow down fading. Test a small area first—you don’t want your favorite project becoming stiff or glossy in an unwanted way. And, although UV protection is less common in craft sprays, choosing one with some UV resistance will help colors last longer.
Storage makes a difference too. Keep your crafts in a cool, dry place away from direct sunlight and high humidity. Acid-free boxes or containers help prevent yellowing. I sometimes wrap items in tissue paper, but be careful—too much wrapping can crush fragile parts. If you plan to keep them for a long time, checking on them now and then might save you from surprises.
Have you noticed your newspaper crafts losing their vibrancy over time? Sometimes, small preventative steps make all the difference. It’s a bit of a balancing act between enjoying your creations and preserving them.
Incorporating Newspaper Crafts into Your Home Decor
Functional Uses Around the House
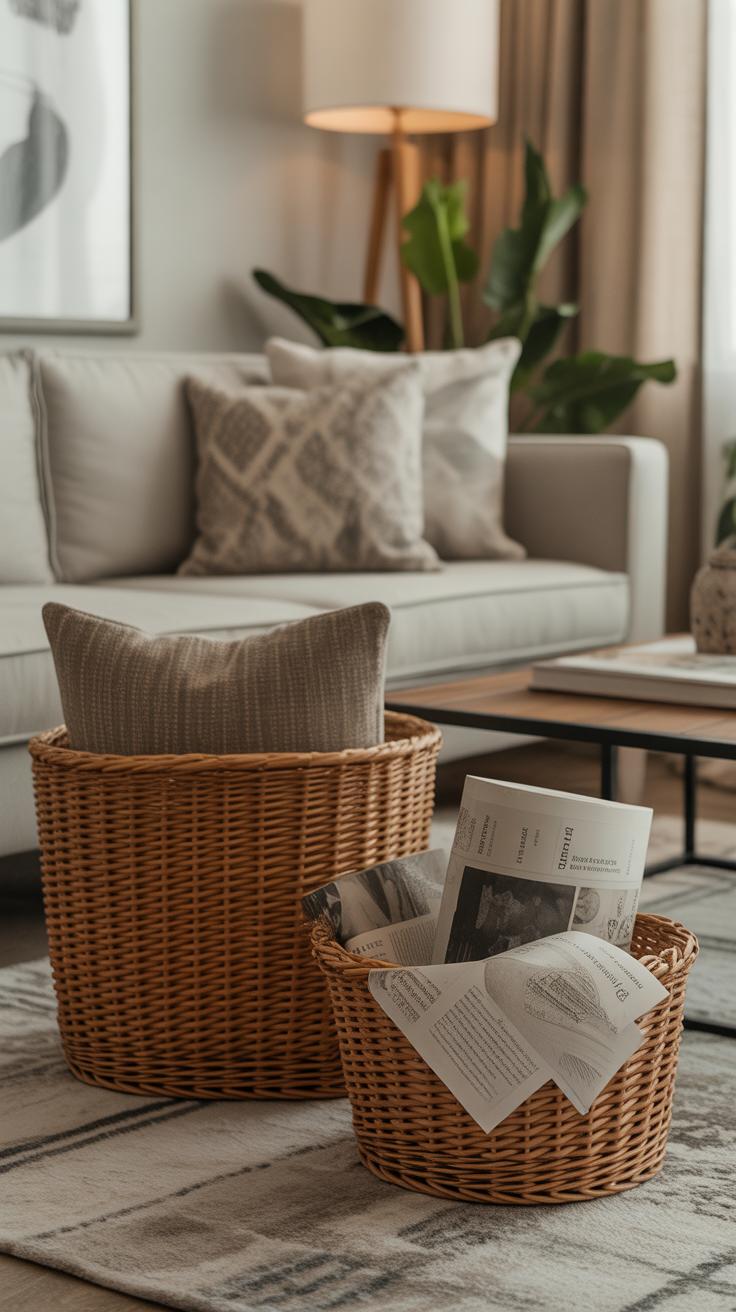
Newspaper crafts can be surprisingly practical in everyday spaces. Take woven baskets made from old newspapers—they’re perfect for tidying up clutter in living rooms or offices. You can stash magazines, remote controls, or even kids’ toys inside. I’ve seen people use small newspaper bowls as catch-alls on kitchen counters, holding fruit or loose change.
Planters crafted from layered newspaper add a soft, rustic touch to windowsills or desks. While they might need a waterproof liner, they’re great for starting seedlings or holding small houseplants. It’s a neat way to bring green inside without plastic or ceramic pots every time. And honestly, these functional items don’t feel out of place whether your style is minimalistic or cozy country.
Decorative Placement and Styling Ideas
When placing newspaper crafts, grouping several together creates a themed vignette. Imagine a trio of different-sized bowls on a console table—each with varying weave patterns or shades from the print. It draws the eye without overwhelming the space. Try mixing the neutral tones of newspaper crafts with wooden furniture or metal accents; the contrast is oddly appealing.
If you’re aiming for color, consider painting or coating parts of your craft. Some light washes with watercolors can add warmth or coolness depending on your palette. You might hesitate about mixing the busy print with vibrant décor, but it can work when balanced carefully. I once arranged a set of newspaper planters beside bright ceramic pots, and the mix was unexpectedly charming.
Have you thought about how these crafts reflect your values? They’re not just decorative items but also subtle reminders about sustainability. That, for me, changes how you see them—something that’s not only beautiful but meaningful, too.
Conclusions
Newspaper crafts DIY are a fantastic way to combine creativity with eco-conscious living. By reusing newspapers, you reduce waste and create personalized decor items that enhance your space in a meaningful way. The projects covered here are accessible to everyone and help develop crafting skills with simple materials.
Embracing newspaper crafts encourages you to see everyday items differently and find beauty in sustainability. Start your projects today and enjoy transforming your home with unique, environmentally friendly decor that reflects your values and style.


