Introduction
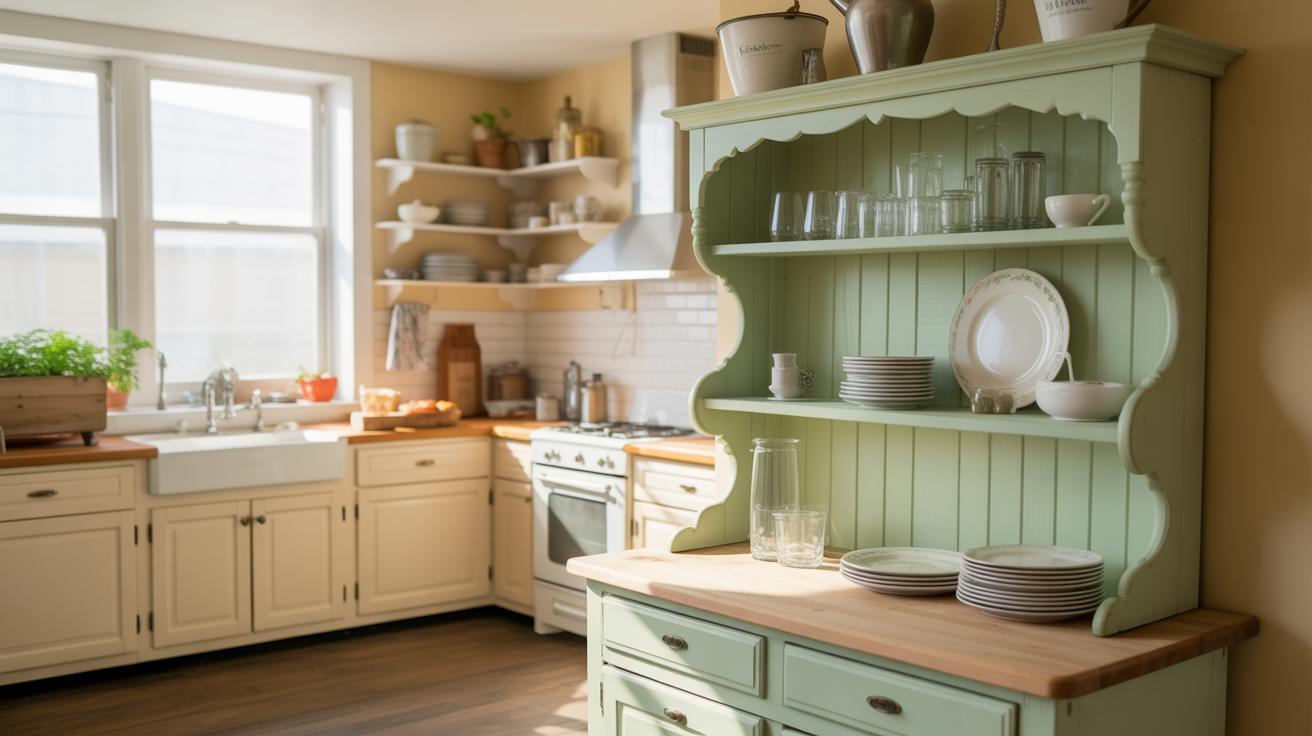
A kitchen hutch often combines storage and display space, making it an essential part of your kitchen. Giving your hutch a makeover can brighten your kitchen and improve its function. You don’t need to replace your hutch to make it look new or match your kitchen decor better.
This article shares practical and inspiring ideas for a charming hutch makeover. You’ll learn about painting techniques, hardware upgrades, lighting, and creative add-ons that turn your kitchen hutch into a standout feature. Let’s explore ways to refresh your kitchen with a simple hutch transformation.
Choosing The Right Paint And Finish

Picking Colors That Brighten Your Space
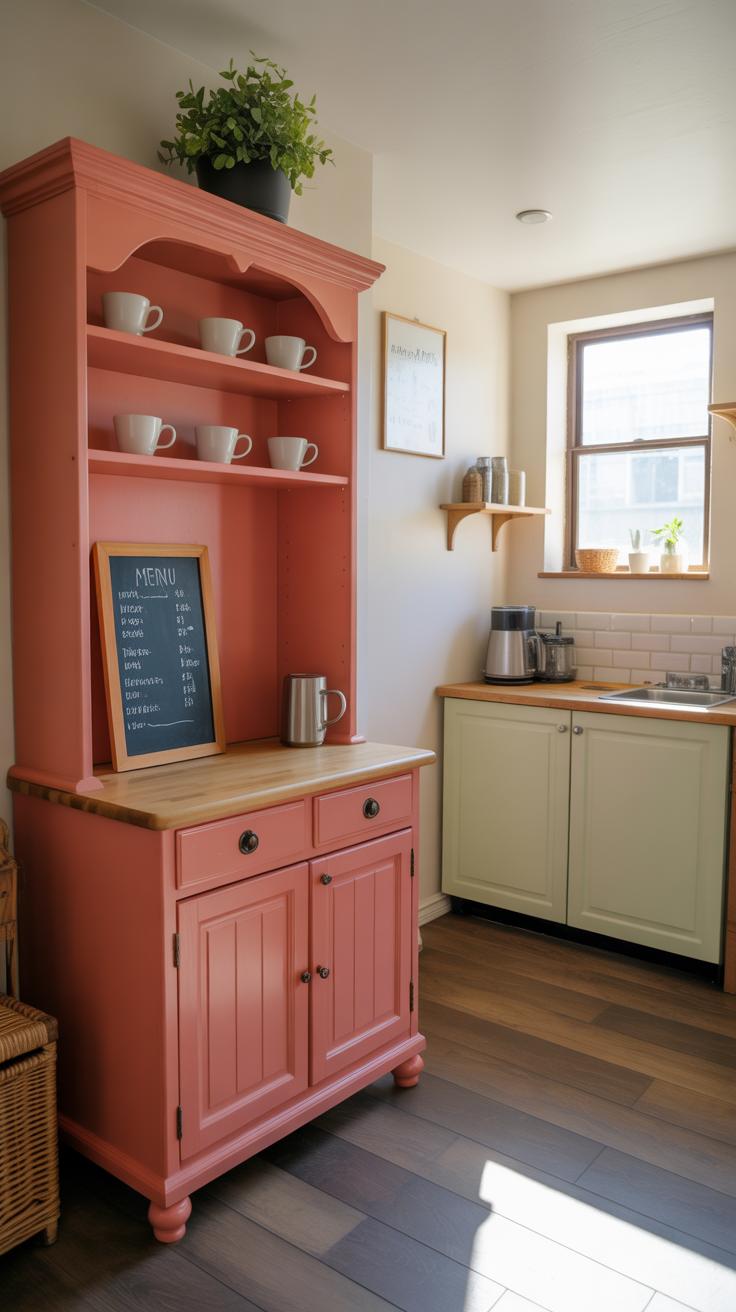
When you’re deciding on paint colors for your kitchen hutch, think about the kind of light your kitchen gets throughout the day. Do you have lots of natural sunlight or mostly artificial lighting? Light colors, like soft whites, pale grays, or muted pastels, tend to reflect light and can make a space feel bigger and more open. But sometimes, a bold color—a deep navy or a rich emerald—can add a surprising pop and make the hutch stand out as a feature piece rather than just background. I’ve seen people hesitate to choose strong hues, fearing it might clash with their kitchen, but paired with neutral walls or countertops, it often works better than expected.
Also, remember that paint looks different on the wall than it does on furniture. The shape and size of your hutch will affect how the color feels. Smaller pieces might handle darker colors better because they won’t overwhelm the room.
Choosing A Durable Finish
Kitchens are busy places. That means you’ll want paint that can take some wear—think spills, grease, and frequent wiping. Usually, satin or semi-gloss finishes are the sweet spot. They’re easier to clean than flat or matte paints and don’t get as shiny or tricky as high-gloss. Some people shy away from gloss because it can highlight imperfections. Yet in a kitchen setting, the trade-off is worth it because you’ll thank yourself every time you wipe down a smudge.
Another option is using enamel paint designed for cabinets, which tends to be tougher than standard wall paint. It’s thicker and creates a protective barrier. If you’re unsure, testing a small area first might save trouble later. The right finish can extend the life of your makeover and keep the hutch looking fresh, even when the kitchen is at its busiest.
Replacing Or Updating Hardware
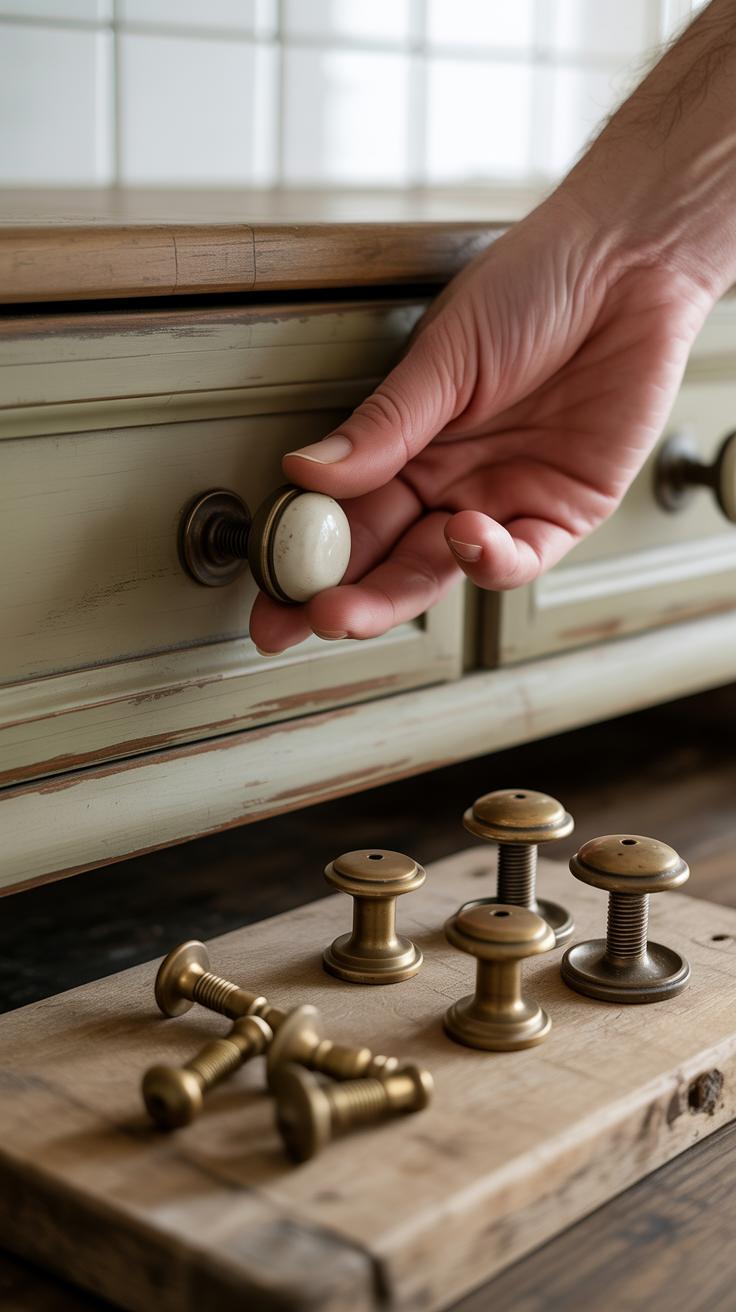
Swapping out old knobs and handles can completely change the look of your kitchen hutch. It’s a simple fix that often gets overlooked but can have a surprisingly big impact—not just visually but in how the hutch feels when you use it. I once replaced plain, worn handles with matte black ones on my own hutch and suddenly it felt more modern and substantial, even though the shape and color hadn’t changed.
When selecting hardware, think about your kitchen’s overall vibe and your personal taste. For a farmhouse style, maybe go with weathered brass or ceramic knobs. Sleeker kitchens might benefit from polished chrome or brushed nickel. If you’re a bit undecided, mixing styles—like classic pulls with a few unique knobs—can give your hutch character without clashing.
Removing old hardware is usually straightforward: grab a screwdriver, remove screws carefully, and keep them save just in case. When installing new hardware, align it properly so doors and drawers close smoothly. Sometimes, new handles come with longer screws; just trim or swap them if they don’t fit perfectly. Don’t rush—double-check measurements before drilling new holes. Trust me, a bit of patience here saves hassle later.
Adding Lighting To Showcase Your Hutch
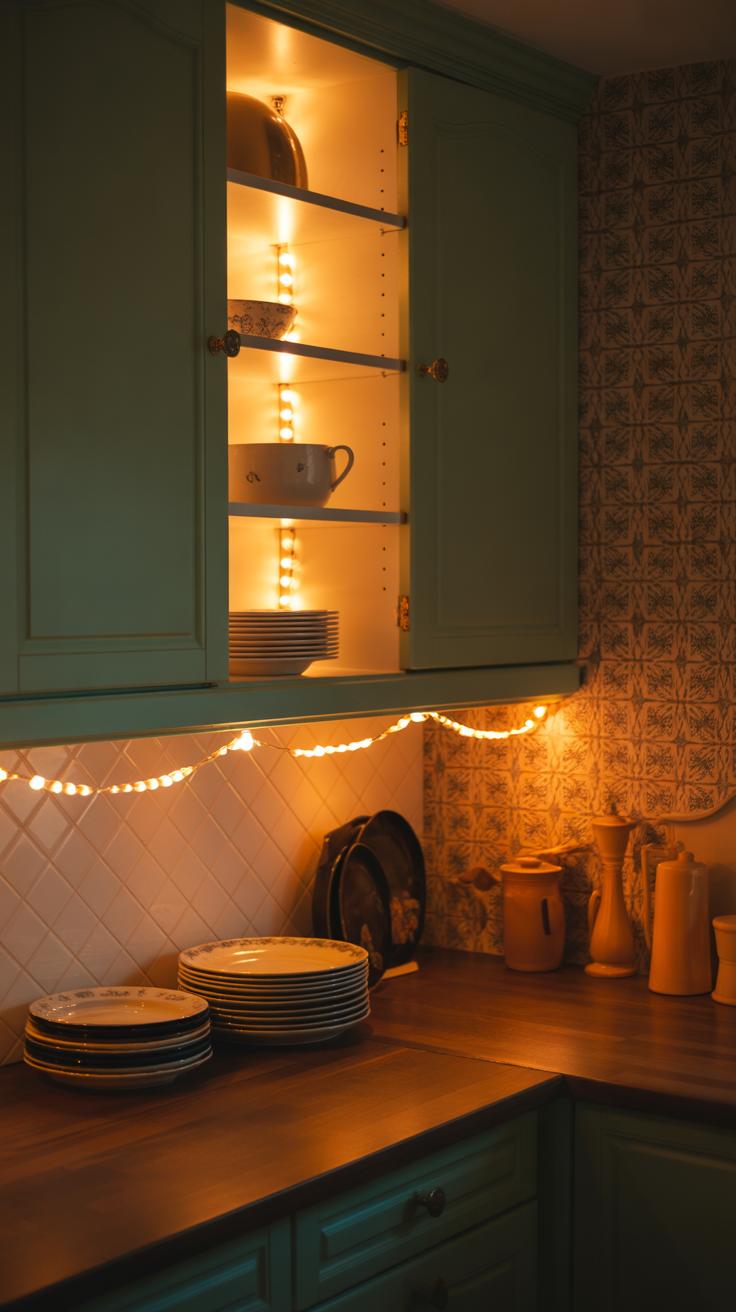
Lighting can completely change how your hutch looks and feels. When you add a light inside or above it, the dishes and decor instantly stand out. It’s not just about making things brighter—you get to highlight your favorite pieces in a way that draws attention to them. Sometimes, the details on a plate or the glass shimmer catches the eye only when the light hits it just right.
There’s also a practical side. A well-lit hutch makes it easier to find what you need, especially if your kitchen can get a bit dim in the evening. But it’s not always about function; it adds warmth and personality to the overall space. You might find yourself admiring your collection more often simply because it’s framed by subtle lighting.
Types Of Lights To Consider
Not all lights work the same way or suit every hutch, so here’s a quick look at some common options:
- LED strip lights: Thin, flexible, and easy to hide, these give a uniform glow and can be cut to length.
- Puck lights: Small, round lights that provide focused beams; usually battery-powered or wired.
- Under-cabinet bars: Slim light bars you can mount discreetly under shelves or along edges.
- Mini spotlights: These create dramatic highlights on select items but can be a bit more involved to install.
LED options tend to be the most popular due to their low heat and low energy use, which is particularly important in a kitchen setting.
Easy Ways To Install Lighting

You don’t have to be an expert electrician to add lighting to your hutch. Here’s a rough idea of how to make it happen without too much fuss.
If you pick LED strip lights, look for ones with adhesive backing. You just peel and stick along the inside edges or top of the hutch. Many come with plug-in adapters—you might need a nearby outlet, or you can get rechargeable versions that avoid cords.
Puck lights are often battery-operated. You simply mount them with screws or strong double-sided tape. This avoids wiring but means you’ll swap batteries every once in a while. For wired puck lights or mini spotlights, and if you are comfortable with a drill, route the wires neatly along the cabinet edges and plug into an outlet or switch.
Whichever you choose, test everything before fixing it in place. Making sure the wires aren’t pinched and that lights don’t get too hot is key to keeping things safe. And don’t rush—taking your time here makes a big difference in the end.
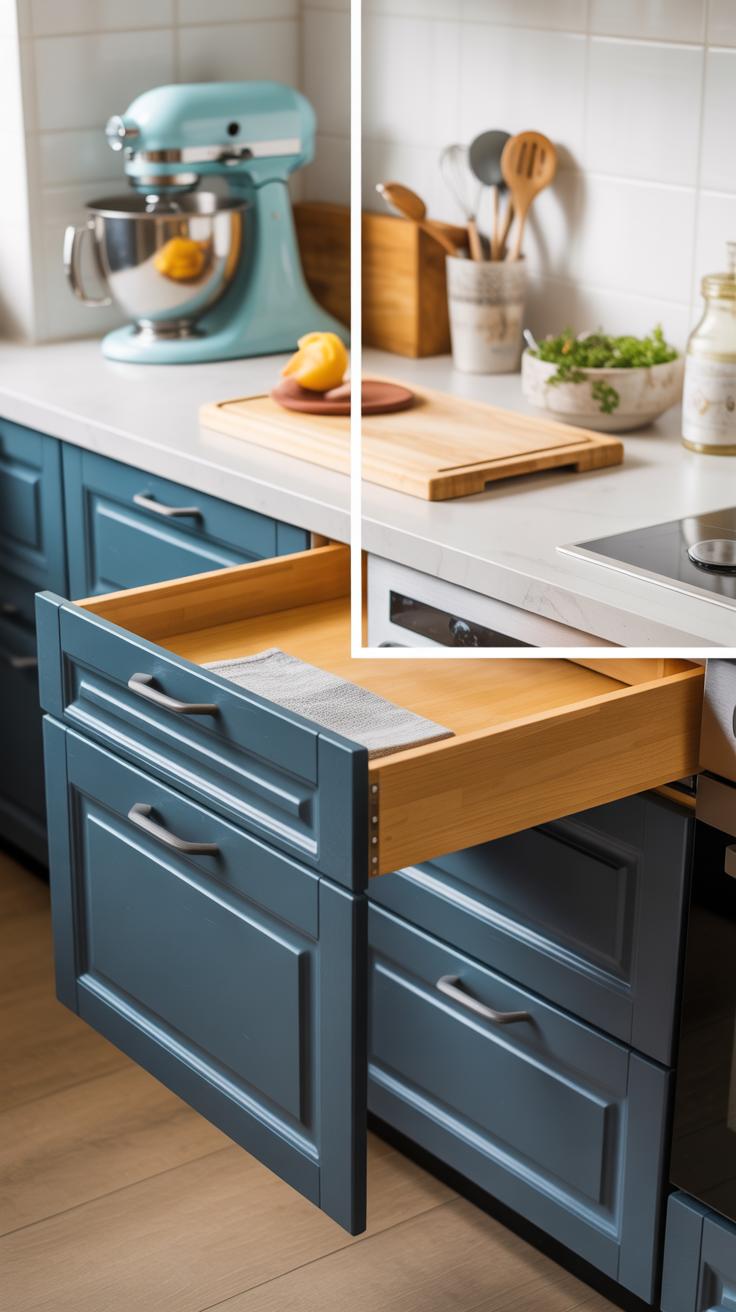
Incorporating Functional Shelving
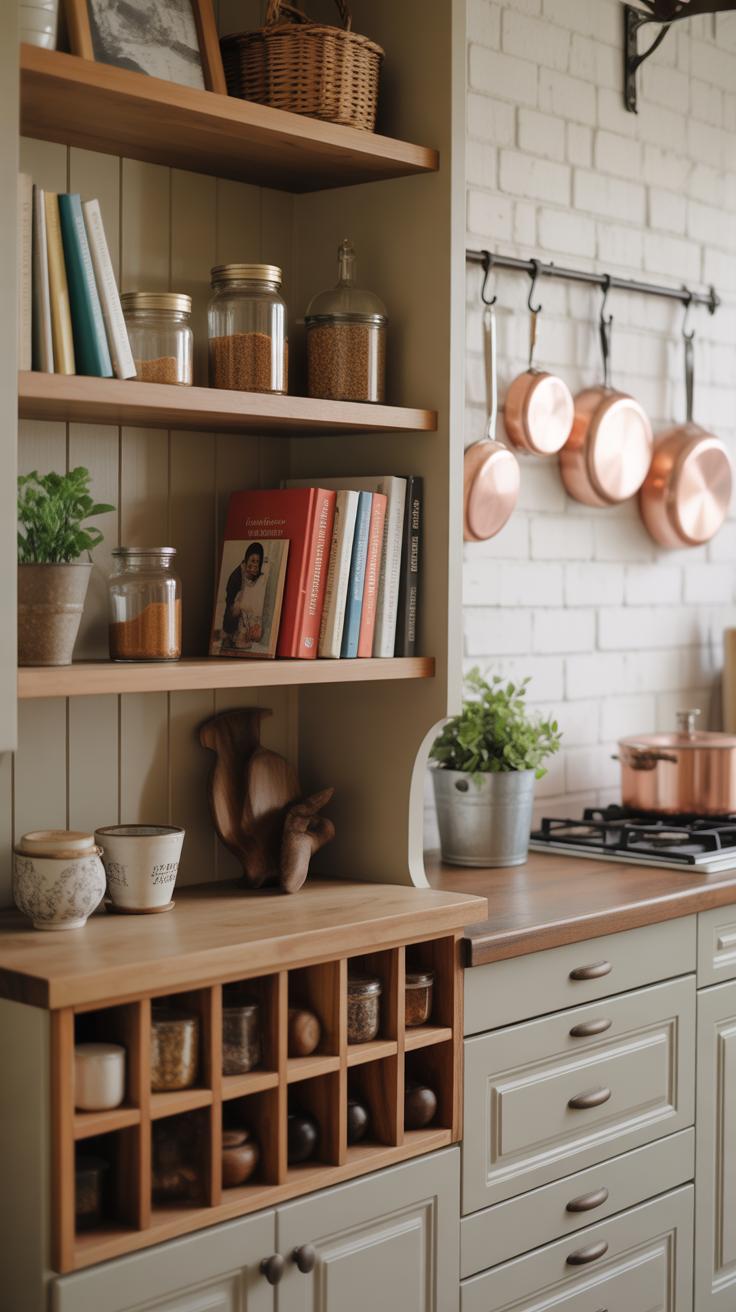
Adding or rearranging shelves inside your kitchen hutch can really shift how you use the space. It’s not just about fitting more stuff—you can actually create a nicer way to show off your favorite dishes or collections. Think about dividing a big open area into smaller sections. That can help sort plates from bowls, or maybe keep those baking books separate from glassware. You may find that a mix of heights works better. Smaller shelves for spices or jars, taller ones for pitchers or vases.
Adjustable shelves come up as a surprisingly practical choice here. They let you change things as your needs evolve. Maybe right now you need a spot for tall wine bottles, but next month, a row of mugs will make more sense. Installing them isn’t always tricky; usually, it’s about drilling a few holes and sliding in the supports. If your hutch is older, test if it can take the new shelf brackets without warping. I once tried to add adjustable shelves in a vintage unit and had to be careful not to damage its delicate frame.
Inside the hutch, hooks or racks open up extra storage without crowding shelves. You can screw in small hooks beneath a shelf to hang cups or measuring spoons. Utensil racks are great to keep frequently used tools handy but off the countertop. Towels can hang from slim bars attached to the sides. These little additions might seem minor, but they make the hutch feel more user-friendly—almost like it was made just for your daily routines. Maybe it’s worth testing a few placements before committing.
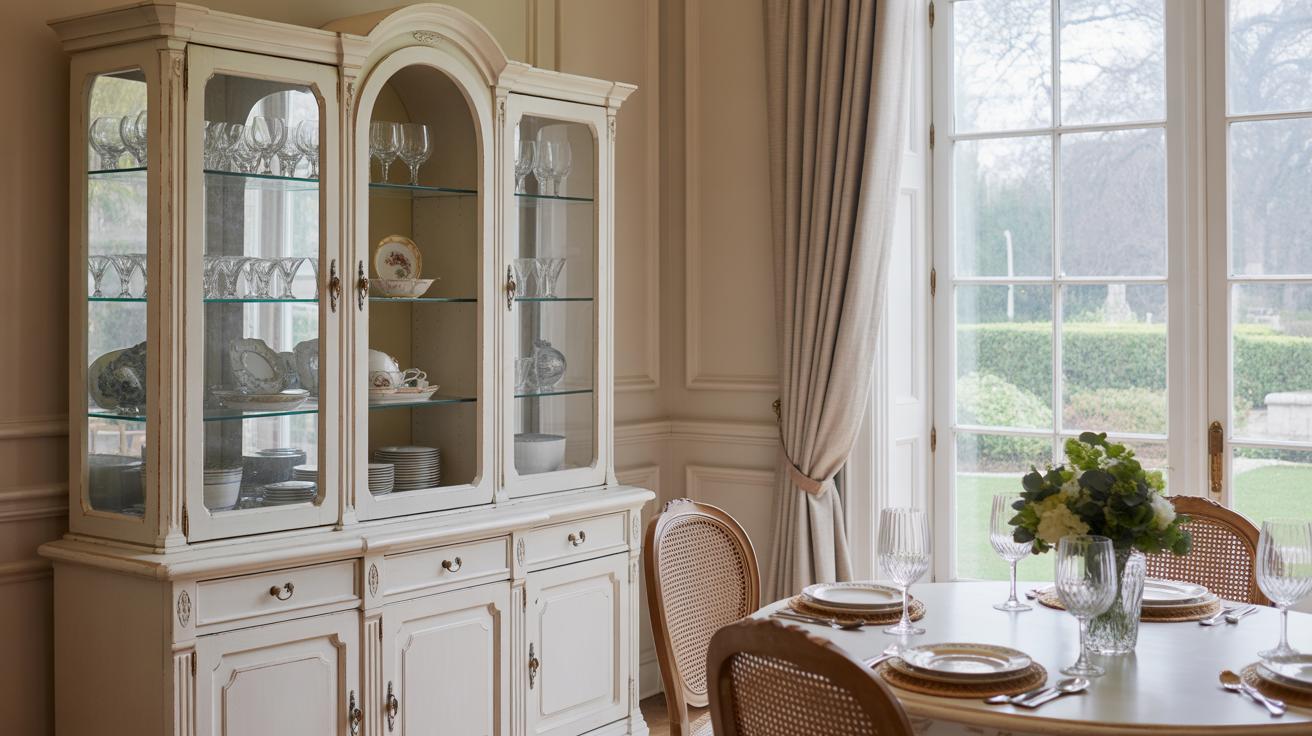
Incorporating Glass Doors Or Panels

Adding glass doors or replacing solid panels on your kitchen hutch can change the whole vibe of the space. It’s a way to showcase your favorite dishes, glassware, or even some quirky collectibles you want to see more often. Plus, glass can lighten the look, making a bulky piece feel less heavy or closed off. I remember swapping out the wooden doors on my own hutch—it made my kitchen feel brighter, almost like I’d gained a bit of extra room.
Choosing The Right Glass Style
Not all glass is the same, and the style you pick can really influence the mood your kitchen hutch gives off. Clear glass shows off everything with sharp clarity, perfect if you want to flaunt beautiful china or colorful mugs. Frosted or textured glass blurs the view slightly, which is useful if you want to hide clutter but still keep things light. You might even consider stained or patterned glass for a subtle splash of character without overwhelming the rest of your kitchen’s look. Sometimes, going for a slightly imperfect glass that has bubbles or waves can add charm—it doesn’t have to be all polished and perfect.
Installation Considerations
Planning to install glass doors? It’s trickier than it seems. Make sure you measure carefully—glass can be fragile but unforgiving if cut wrong. You’ll want strong hinges, maybe ones with soft-close features to avoid slamming. If you’re swapping panels, check if the frame can support glass without extra reinforcement. Safety matters too—tempered glass is usually best because it breaks into small bits rather than sharp shards if it cracks. Installing the doors might require a helper; those panels aren’t light. And don’t forget to think about cleaning—glass shows fingerprints, so placement near food prep zones might mean more maintenance than you expect.
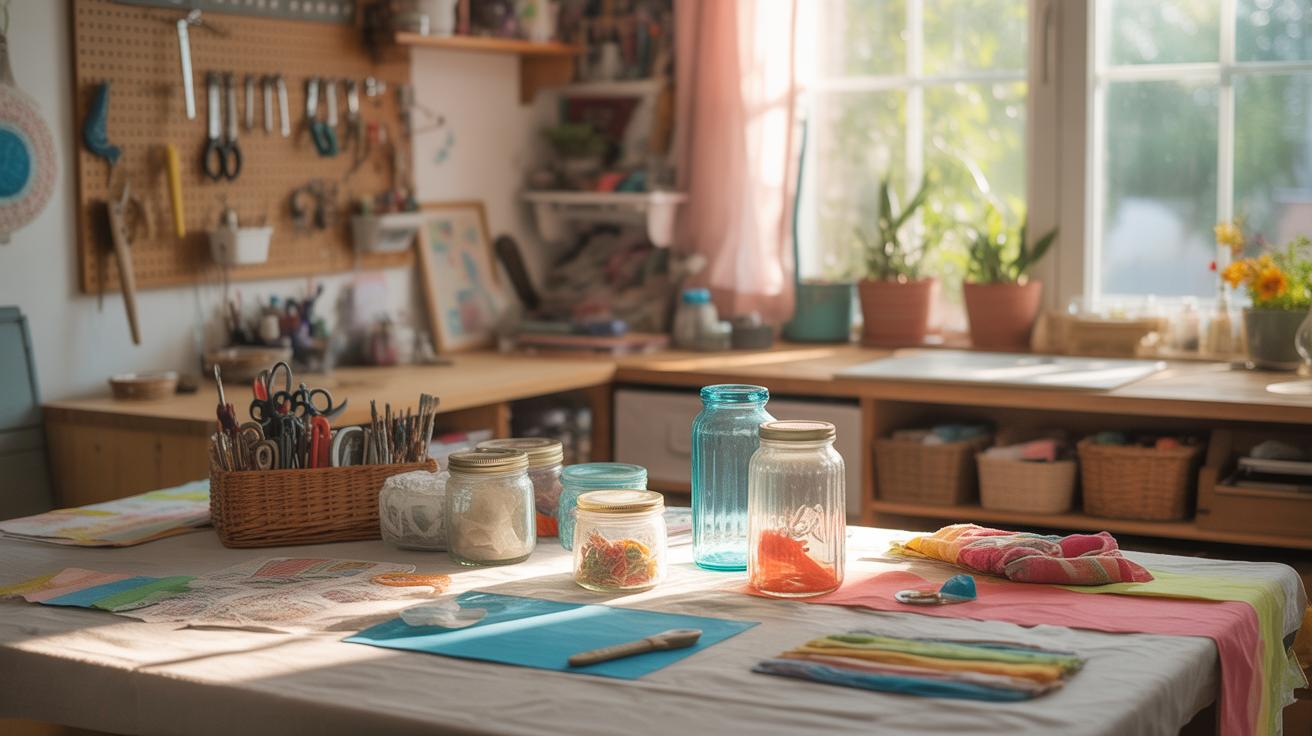
Decorative Accents And Personal Touches
Adding personality to your kitchen hutch can be surprisingly simple—and often fun. One way is to play with paint patterns inside the hutch shelves. Think about stenciling subtle designs or even trying a bold geometric shape on one shelf, just to catch the eye unexpectedly. Some people swear by using removable decals, which let you change things up without a full redo. Maybe a floral or vintage motif suits your style, or perhaps something more minimalist fits better—you’re in charge here. The inner backing of your hutch offers a perfect canvas. It’s a spot many overlook, yet it holds so much creative potential.
Using Wallpaper Or Contact Paper
Wallpaper or contact paper can breathe new life into the back of your hutch. You don’t need to cover every inch—sometimes a strip or section is enough for that pop of interest. When I first tried this, I was surprised by how fast it transformed the entire piece. Peel-and-stick varieties make this process less intimidating and quite forgiving if you need to reposition. Choose something with texture or pattern that complements your kitchen without overwhelming it. You can even mix patterns on separate shelves if you’re feeling adventurous. Just remember, these coverings work best in dry areas, so keep humidity in mind.
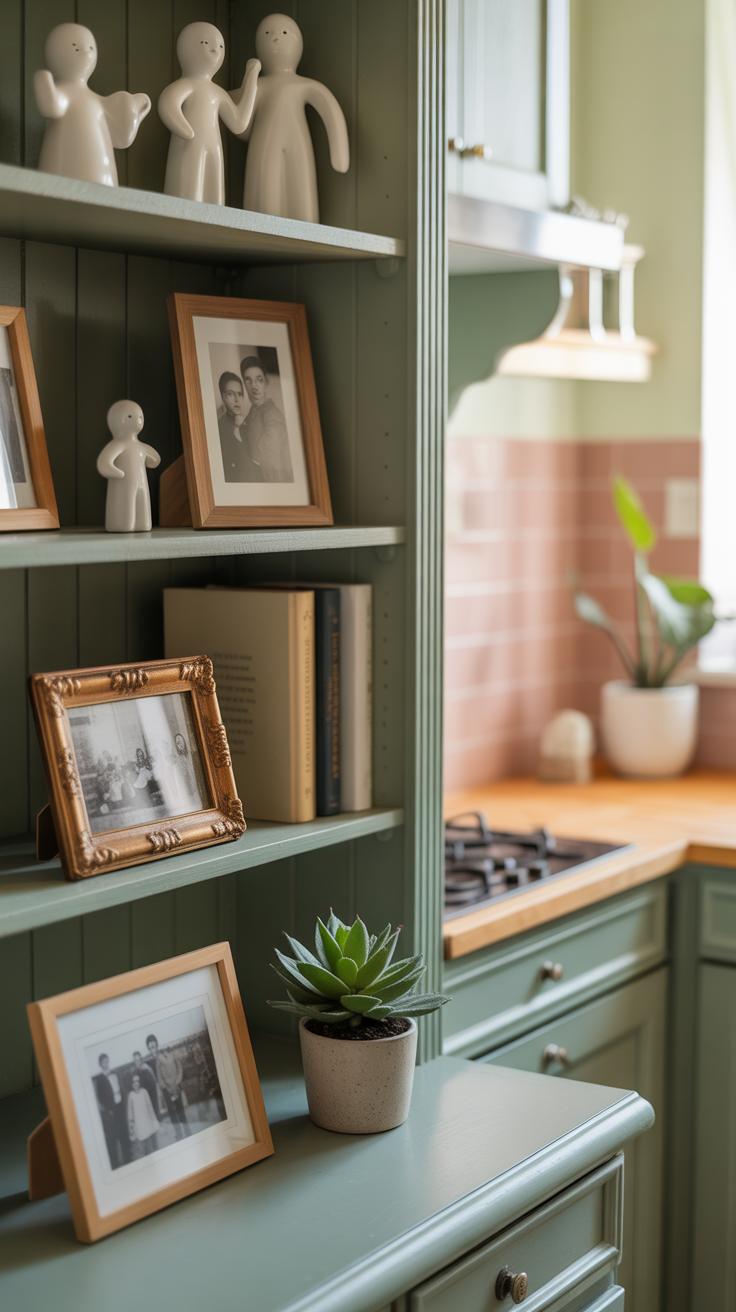
Adding Small Decorative Items
Small accents like potted succulents, hand-thrown bowls, or quirky art pieces add warmth and personality. They make the hutch feel lived-in and personal, rather than just functional furniture. Oddly shaped vases or a delicate figurine can catch the light beautifully, especially if you paired your hutch with glass doors. Consider varying heights to create visual balance—stacked bowls next to a low plant, for instance. Even a framed photo or a favorite cookbook can find a home here. Just don’t overcrowd it; sometimes less really is more, although it’s tempting to fill every shelf.
Maintaining Functionality While Updating Style
When you’re giving your kitchen hutch a makeover, it’s easy to get caught up in the look and forget about daily use. Yet, a hutch is mainly a storage piece—it needs to stay practical. Think about what you really keep in there. Maybe old habits have piled up things you don’t need or use anymore. Take a moment—actually take everything out—and sort through it. You might find it’s time to say goodbye to some clutter.
Ask yourself—what do you reach for most often? Plates? Glasses? Baking supplies? Group those items where they will be easiest to access. You might want to add dividers or baskets to keep smaller things tidy. Adjustable shelves can help switch things around as your storage needs shift over time, which, if you’re like me, happens more than you expect.
Cleaning also plays a role in maintaining your hutch’s freshness. Choose finishes that wipe down easily, and don’t be shy about lining shelves with removable mats. A quick weekly dust or wipe will keep your update looking sharp longer, sparing you major scrubbing sessions later. It’s a little effort, yes, but worth it if you want this makeover to feel like a lasting change, not just a fleeting trend.
Creative Ideas For Small Kitchen Hutches
Small kitchen hutches often feel like a puzzle—how do you keep them useful without crowding the space? One approach that works pretty well is focusing on smart, compact storage. You might try installing narrow shelves inside the drawers or using stackable containers that fit snugly. These little tweaks can clear up clutter and make what you have more accessible.
Another option is adding slim hooks or magnetic strips along the sides or inside doors to hold utensils or spice jars. It’s surprising how much these minor adjustments can open up your counter space. You might even experiment with open shelves on the top to display a few favorite dishes, giving your hutch a bit of personality without making it feel cramped.
Compact Storage Solutions
Think about storage that adapts to small spaces. Vertical dividers can keep baking sheets or cutting boards neat without taking too much room. Also, drawer organizers designed to fit specific utensils help avoid the chaos we all dread. Little baskets or bins can corral loose items—think tea bags, napkins, or small kitchen tools.
One thing I tried: using clear containers for snacks and lining them up. Not only does it save space, but it also looks tidy—plus, it’s easier to see when you’re running low. Have you tried those pull-out trays tucked into the lower sections? They surprise you with how much easier reaching the back becomes.
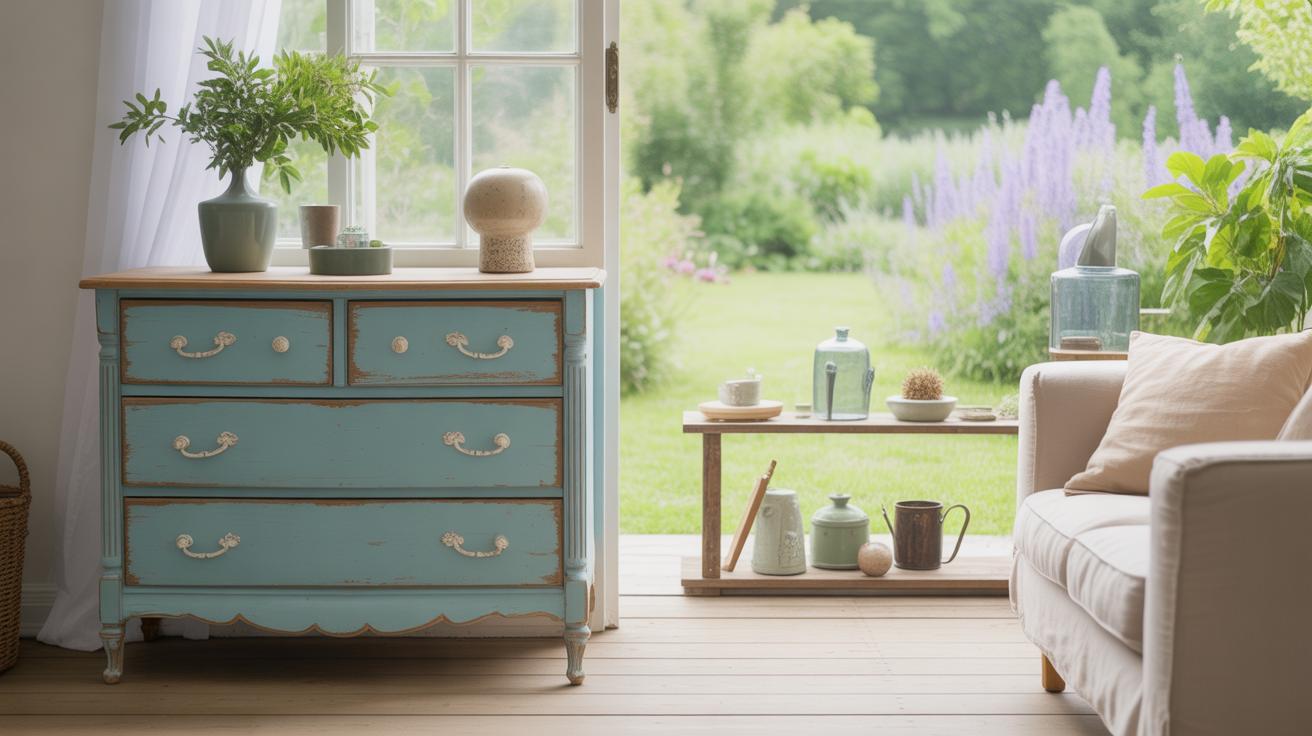
Using Mirrors Or Light Colors
For small hutches, reflecting light might be your best friend. Adding a mirror panel inside the back of the hutch can lend depth and create a sense that the piece is bigger than it really is. I once painted a very tight hutch in a pale cream shade and was amazed at how bright the entire corner felt afterward.
Light colors don’t just brighten a space; they can change the mood. Soft grays, muted blues, or gentle whites tend to reflect daylight well. If you shy away from mirrors, consider a light, glossy finish—this can also bounce light around and make the hutch stand out without dominating the room.
Conclusions
Updating your kitchen hutch doesn’t have to be complicated or costly. It introduces new life to your kitchen space with just a few smart changes. From paint to practical features, you can create a look that reflects your style and improves your kitchen routine.
Consider the ideas shared here to plan your own hutch makeover. With some creativity and effort, your kitchen can feel brighter, more welcoming, and better organized around your hutch. Your kitchen’s charm starts with this one piece.


