Introduction
Egg cartons are often overlooked as waste, but they hold the potential to be transformed into charming crafts that add a green touch to your home. By reusing egg cartons, you not only reduce waste but also create unique and eco-friendly decorations and useful items. Discover the joy of crafting with these simple materials and make your home more sustainable and creative.
This article explores a variety of egg carton craft ideas that are easy to make and suitable for all ages. From planters to decorative art, you’ll find practical and fun projects that give egg cartons a new life. Let’s dive into the world of charming egg carton crafts and see how you can bring green touches into your space.
Understanding Egg Cartons and Their Environmental Impact
Materials Used in Egg Cartons
Egg cartons come in a few common forms, each made from different materials depending on cost, durability, and recyclability. The most familiar kind you might see is molded pulp—basically recycled paper pressed into shape. It feels rough and absorbs moisture well. Then, there’s cardboard cartons, usually stiffer and lighter, sometimes with a smoother finish. Lastly, plastic egg cartons, often clear or translucent, made from polystyrene or PET. These weigh less and protect the eggs better, but don’t break down easily and are trickier to recycle in many places.
Each material brings something different to the table when you think about reusing them. Molded pulp and cardboard cartons lend themselves well to crafting projects because they’re easy to cut and paint. Plastic cartons are less flexible in that regard, though they can still be repurposed if you’re careful.
How Reusing Egg Cartons Helps Reduce Waste
Why bother reusing egg cartons at all? Well, those cartons pile up quickly in homes and stores. Even though many are recyclable, a big chunk ends up in landfills where they slowly break down or just linger for years. By turning them into crafts, you’re giving them a second life instead of tossing them out right away.
Take molded pulp cartons, for example. Rather than sending them to a recycling center—which itself requires energy and resources—they become seed starters, organizers, or decorative pieces. This reduces demand for new materials and keeps rubbish down. It’s a small step, but multiply it across millions of households, and the impact grows.
Still, there’s a bit of tension. While crafting extends the carton’s usefulness, it doesn’t eliminate waste entirely. Eventually, those projects wear out or break. But even then, if the materials are compostable like paper pulp, that helps ease the burden on waste systems.
Do you ever wonder how many of these cartons could be saved if more people got into simple crafts? It feels like a missed chance to me, especially when the results are both creative and useful around the home.
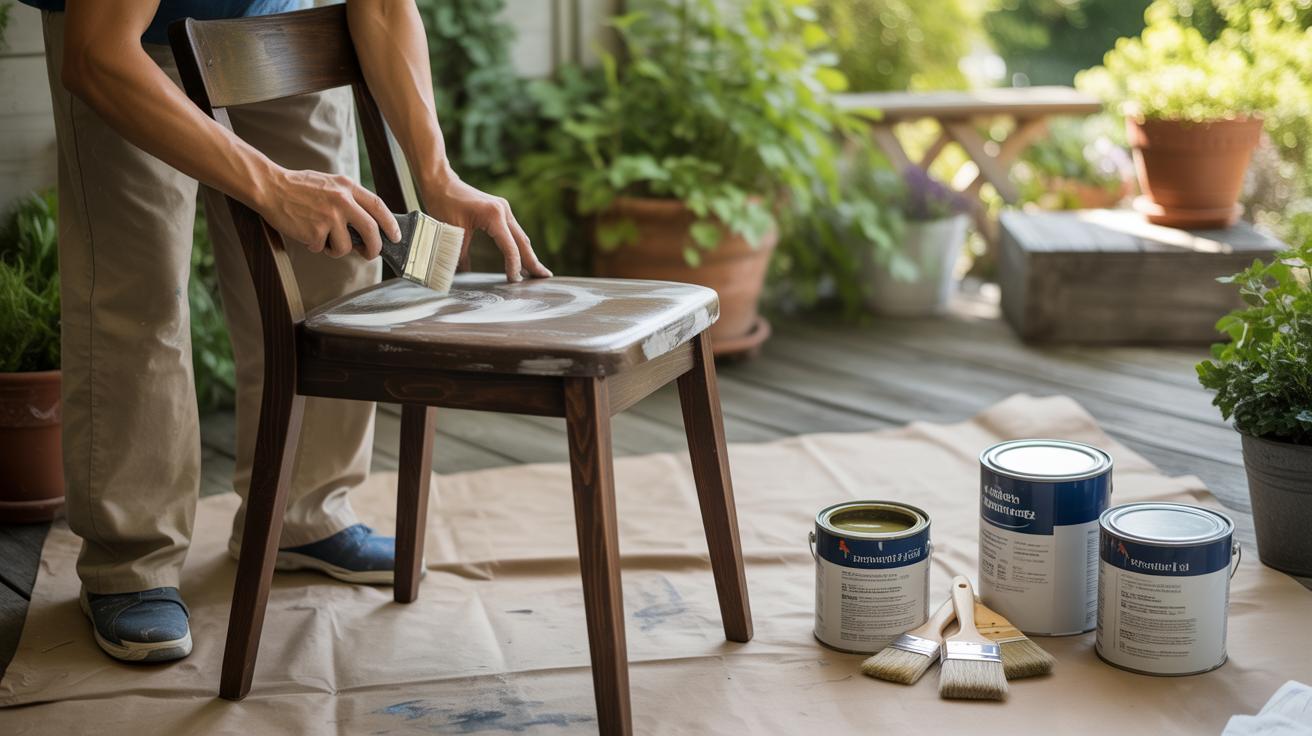
Preparing Egg Cartons for Crafting
Cleaning Egg Cartons
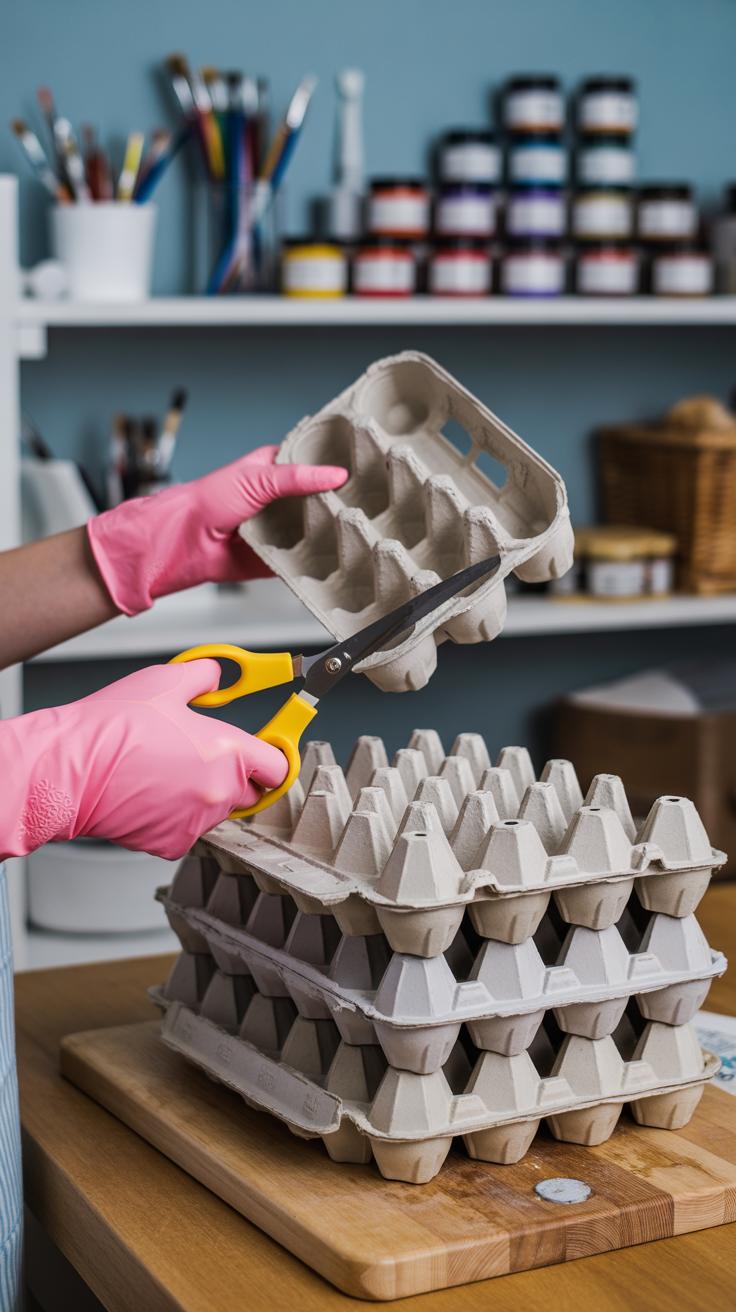
When you bring egg cartons into your crafting space, they might look clean but could still carry residues or little bits of dirt. Taking a few minutes to clean them can make a big difference. For paper or pulp cartons, start by gently brushing off any dry debris—sometimes just shaking them lightly does the trick. If there’s a sticky spot, dampen a cloth with warm water and gently wipe it. Avoid soaking them; wet pulp cartons can become soggy, losing their shape.
Plastic cartons can handle a bit more moisture. Wash them under mild soap and water, then let them dry fully—no damp surfaces when you’re working on crafts, I think you’d agree. If there’s a stubborn stain, a soft toothbrush helps without damaging the carton. It might seem like extra hassle, but clean surfaces keep paint or glue sticking better, and your finished craft looks sharper.
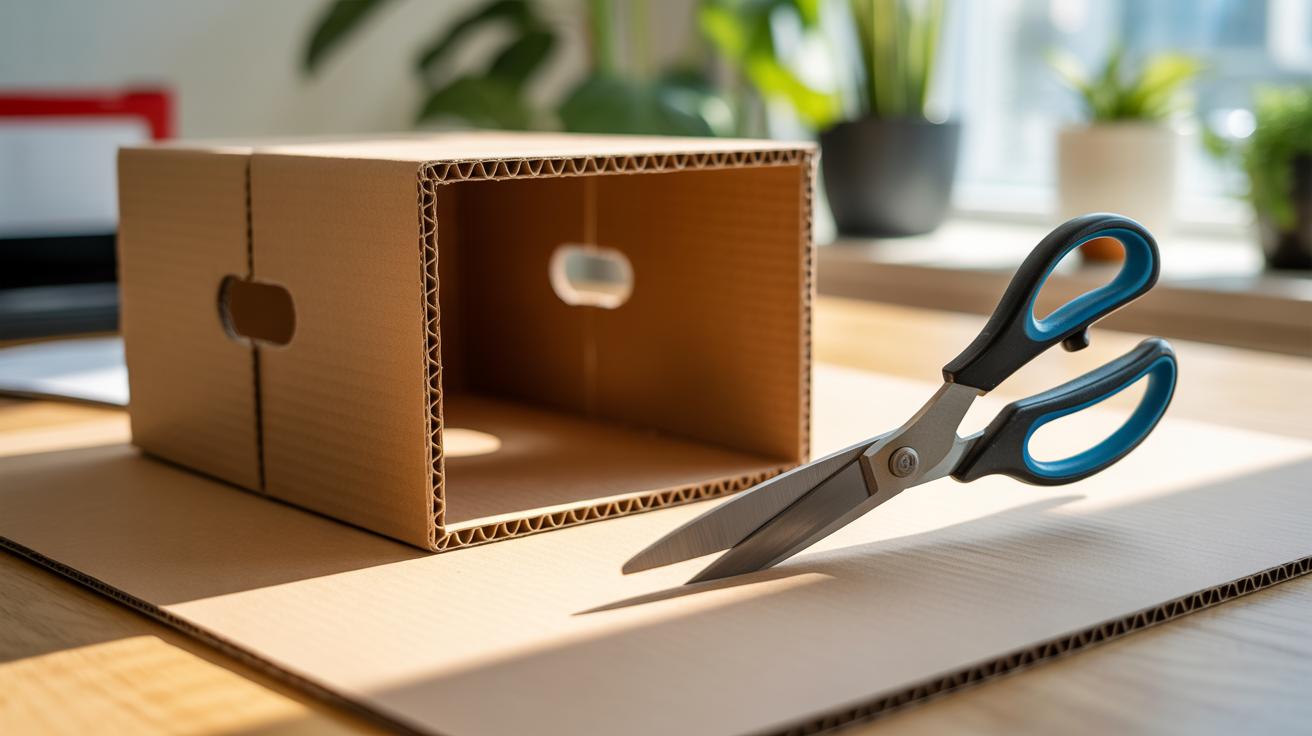
Cutting and Shaping Egg Cartons
Cutting egg cartons is easier than you might expect, but the right tools and care matter. Scissors work well for many projects, especially if you need to cut out whole egg cups. For more detailed shaping—like trimming edges or creating petals—a craft knife offers better precision. Just watch your fingers when working with knives; slipping is surprisingly easy.
Here are some quick tips I’ve found helpful:
– Use a fresh blade for cleaner cuts; dull knives tear pulp cartons.
– If you want smoother edges, lightly sand paper cartons after cutting—it softens rough spots.
– For bending or curving parts, gently wet the carton before shaping; it’s a bit unpredictable but gives flexibility.
– Always cut on a safe surface, like a cutting mat or thick cardboard, to protect your workspace.
Remember, every carton is a little different. Some are thicker, some thinner, and how you cut should depend on your project’s demands. Do you want crisp lines or a rougher texture? Experiment a bit. It’s partly about getting comfortable with the material, and partly about what fits your creative mood at the moment.
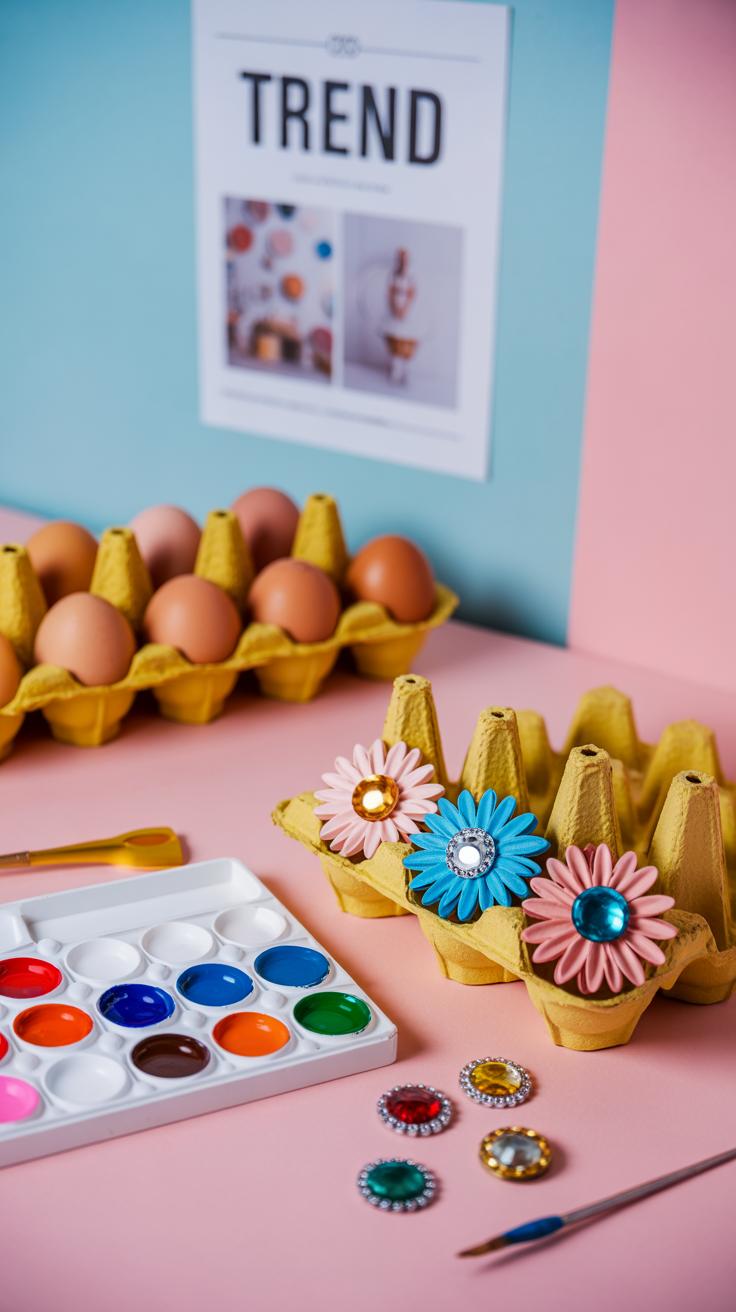
Egg Carton Flower Crafts
Making Basic Egg Carton Flowers
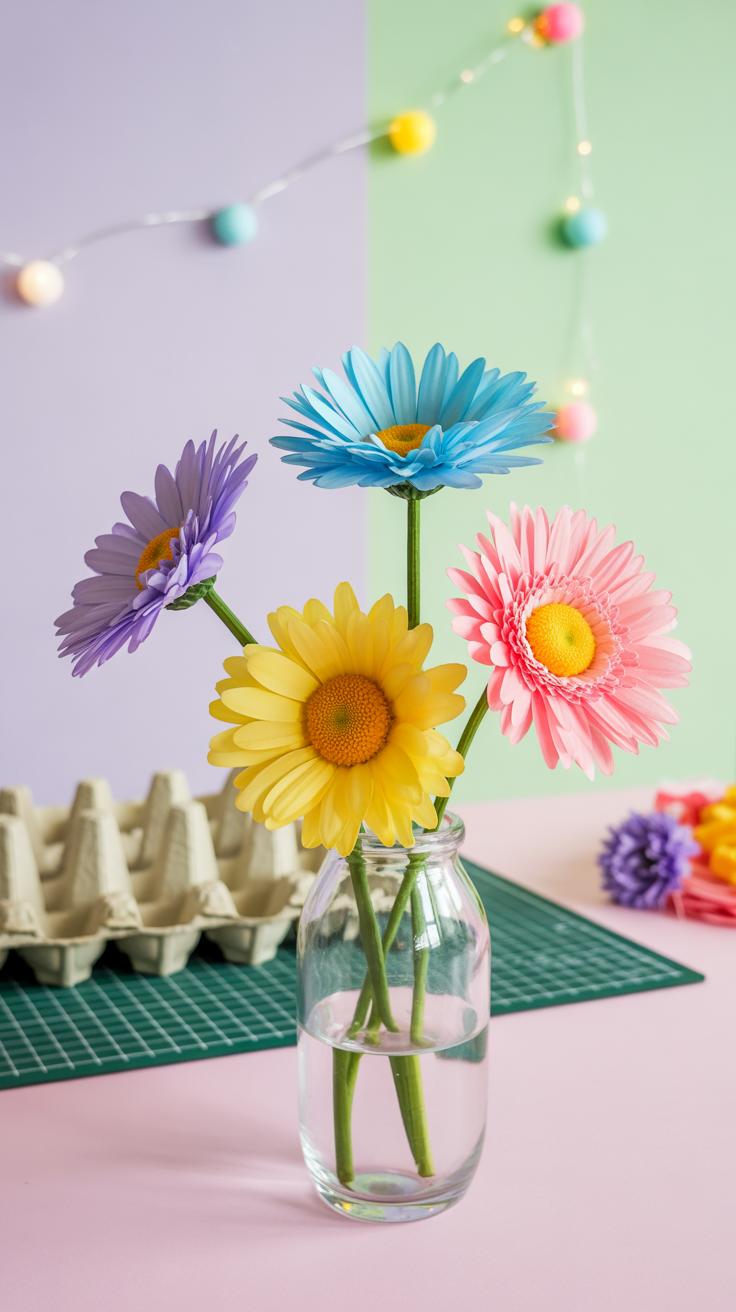
Start by cutting each cup from the egg carton individually. You’ll want to trim each one down so it resembles a petal shape, which usually means snipping off the edges for smoother curves. It doesn’t have to be perfect—in fact, some unevenness gives them character. After shaping, gently flatten the cups a bit. This helps them look more like blossoms instead of rounded cups.
Next, grab some paint—acrylic works well since it sticks nicely and dries quickly. You can choose natural colors like reds, yellows, or greens, or go wild with blues and purples if you like. Painting the petals on both sides adds depth, but a single side sometimes feels enough, especially if you’re in a hurry. Once dry, try curling the petal tips slightly with your fingers to create dimension.
Creating Colorful Arrangements
Now the fun part—putting flowers together. Take several painted petals and glue them in a circle, overlapping slightly to mimic real flower layers. You might want to add a small bead, button, or even a dab of paint in the center for that finishing touch. Don’t feel like all flowers have to look the same; variety can make your arrangement more lively.
Once you have multiple individual flowers, tie or glue them onto sticks, wire, or sturdy stems. You can arrange these into a bouquet, place them in a jar, or even affix them directly onto a frame for wall art. Mixing colors and sizes can give your display an offbeat charm that’s hard to replicate with fresh flowers.
Have you considered how these simple egg carton flowers might brighten up dull corners or add a subtle natural vibe without the fuss of watering? They feel surprisingly personal, maybe because you made them yourself. Give it a try—you might find the process oddly calming, and the results, unexpectedly cheerful.
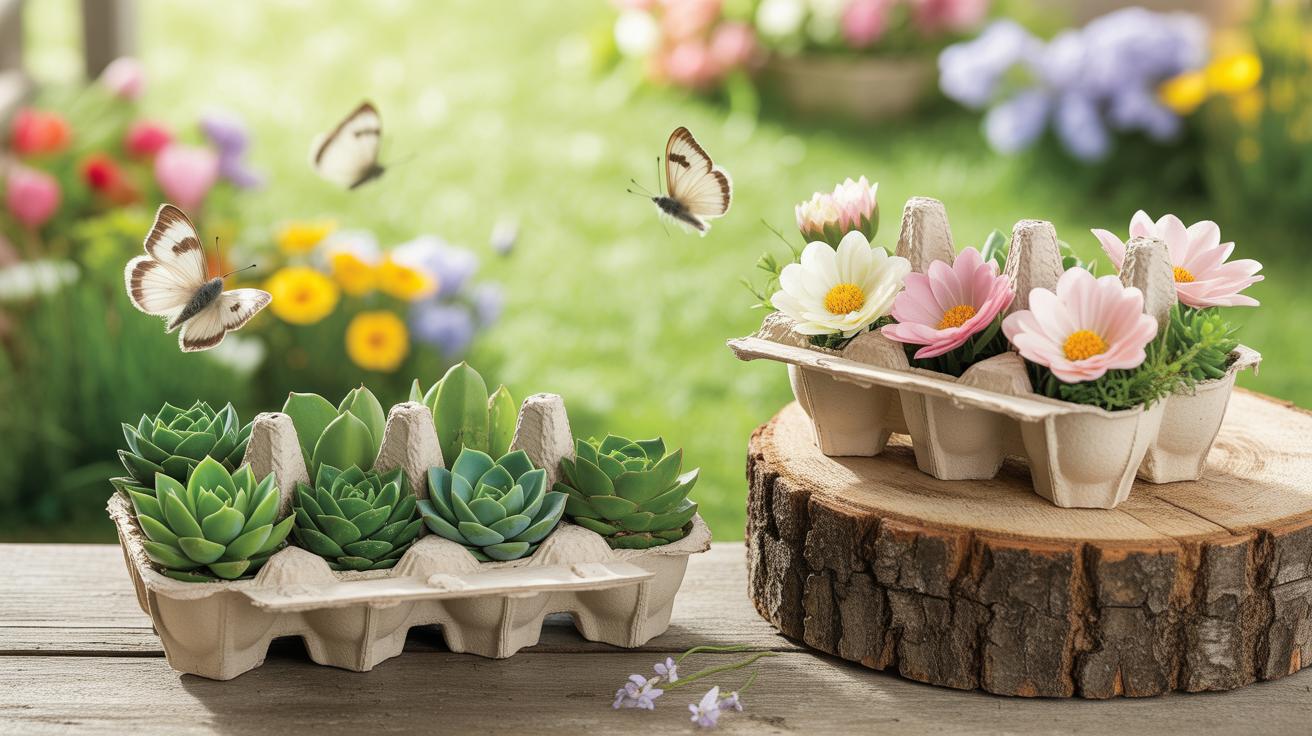
DIY Egg Carton Planters
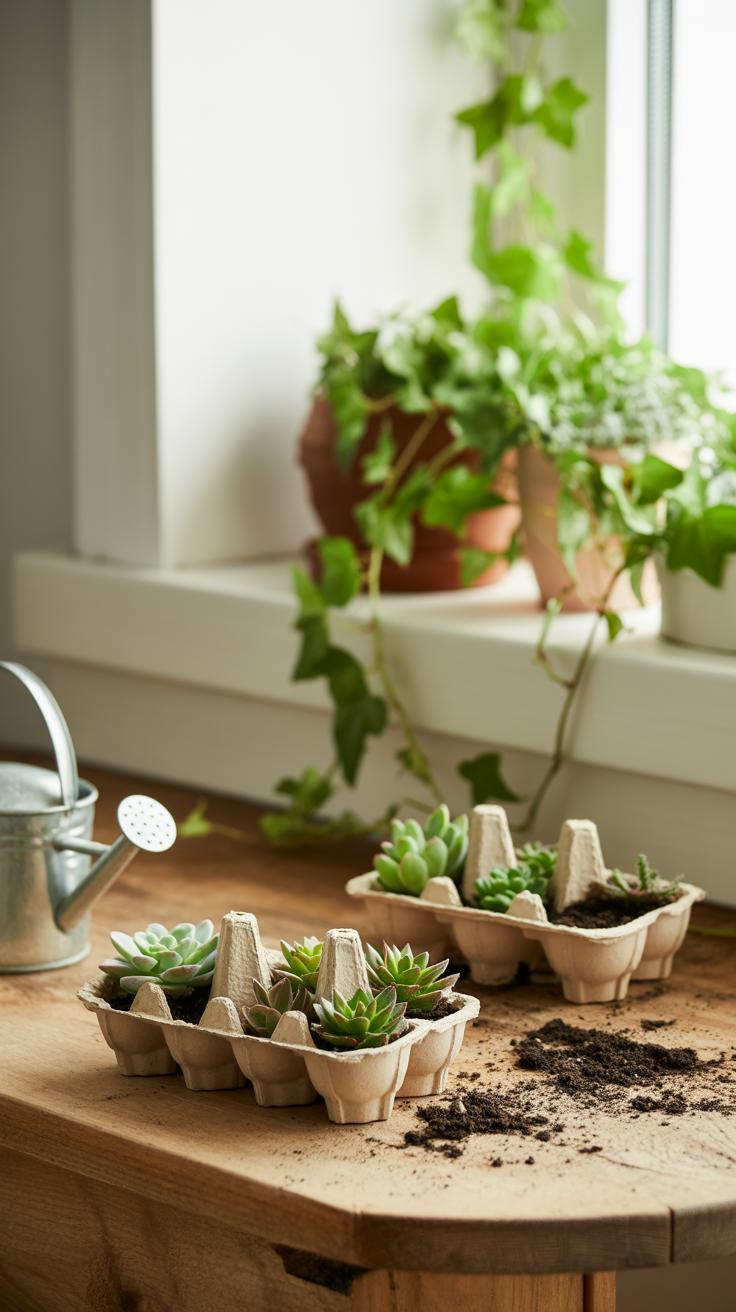
Egg cartons can easily become practical little planters for seedlings or succulents. Their natural shape holds soil well, and the cardboard breaks down over time, which helps plants grow directly in the ground if you decide to transplant. I’ve tried using them for starting herbs on my windowsill—it’s simple and rewarding to watch tiny sprouts emerge from those humble cups.
Setting Up Egg Carton Seed Starters
Start by cutting the egg carton into individual cups or small clusters. You can keep the lid attached to hold some moisture, but it’s optional. Fill each cup with seed-starting mix or light potting soil—dense garden dirt isn’t great here because drainage and air flow matter.
- Sprinkle seeds lightly on the soil surface, then cover with a thin layer of soil or vermiculite, depending on the seed’s preference.
- Label each cup with the type of seed to avoid confusion later.
- Place the carton in a shallow tray to catch excess water.
If you’re planting succulents, use slightly less soil and press the soil gently before setting the small cutting or leaf on top rather than planting seeds. Succulents don’t need much water, so keep that in mind.
Caring for Your Egg Carton Plants
Water your little plants carefully—egg cartons absorb water but too much can make them soggy or even moldy. A fine mist spray works better than pouring water directly for seedlings. Check daily, especially in warm, dry rooms.

Sunlight is vital. Near a window where the plants get indirect sunlight is often best. Bright light can dry soil too fast, causing seedlings to wither before they have a chance to thrive.
Once plants outgrow their tiny containers or the carton starts breaking down, it’s time to transplant. You can plant the whole cup in the garden soil if you like, but do remember that egg cartons might slow drainage a bit at first.
Egg Carton Animal Crafts for Kids
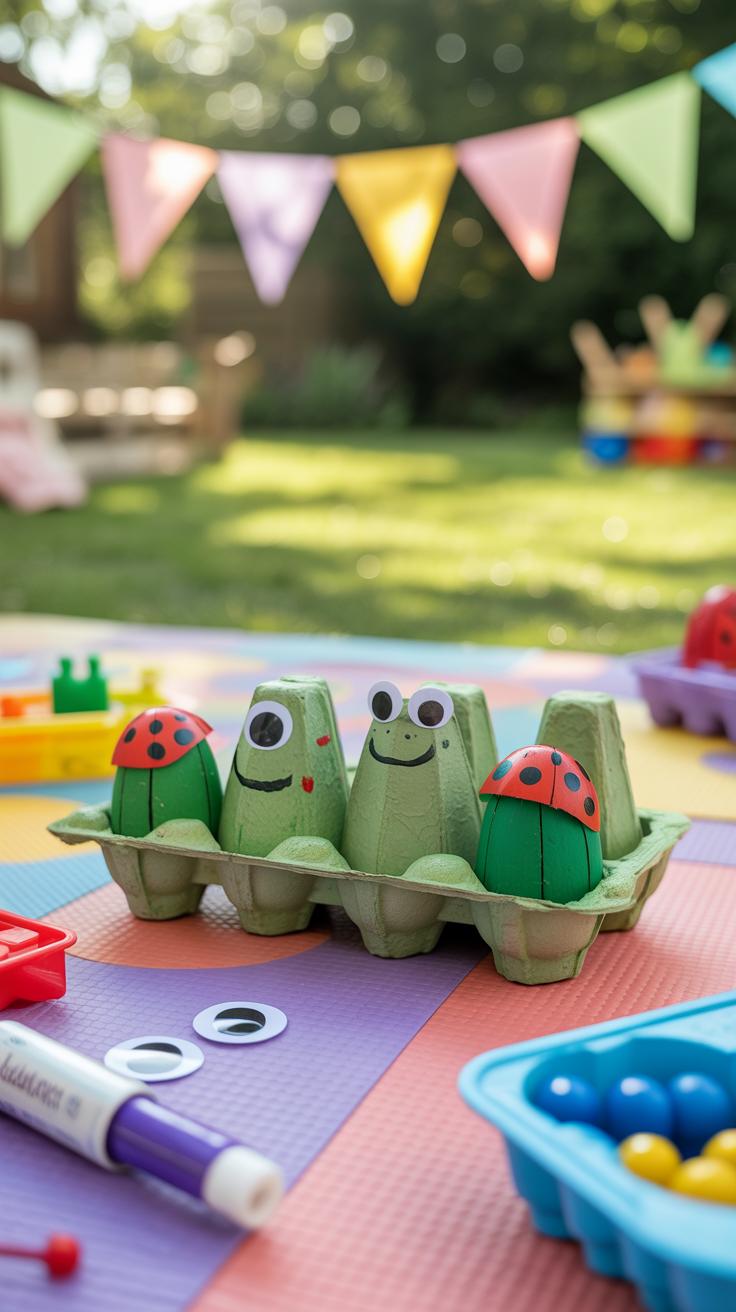
Building Simple Animal Shapes
Egg cartons are surprisingly good at turning into little animals. You can cut the cups apart or keep them connected, depending on the creature you want to make. A caterpillar, for example, can be made by cutting six or seven cups in a row and painting each one a bright color. Add little paper eyes and antennae, and you have a friendly bug crawling across the table.
For turtles, choose one egg cup as the shell and another as the head. You can trim paper or felt to create legs, then glue everything together. It doesn’t have to be perfect—the less precise, the more charming, really. Kids love picking their own colors and adding spots or stripes. The shapes from the carton give a natural 3D feel that flat paper crafts often miss.
Encouraging Creativity and Learning
These crafts do a lot more than just entertain. When children cut, paint, and glue, they practice fine motor skills without even realizing it. Each step demands focus and careful hand movements. I’ve noticed kids get surprisingly absorbed in something as simple as decorating an egg carton caterpillar.
Plus, it’s a gentle introduction to recycling and environmental care—using old materials in fun ways can shape how children think about waste. They might start wondering, “What else could I reuse?” While crafting, conversations about conserving nature or helping animals often sneak in naturally, too. It’s almost like the project teaches without being a lesson.
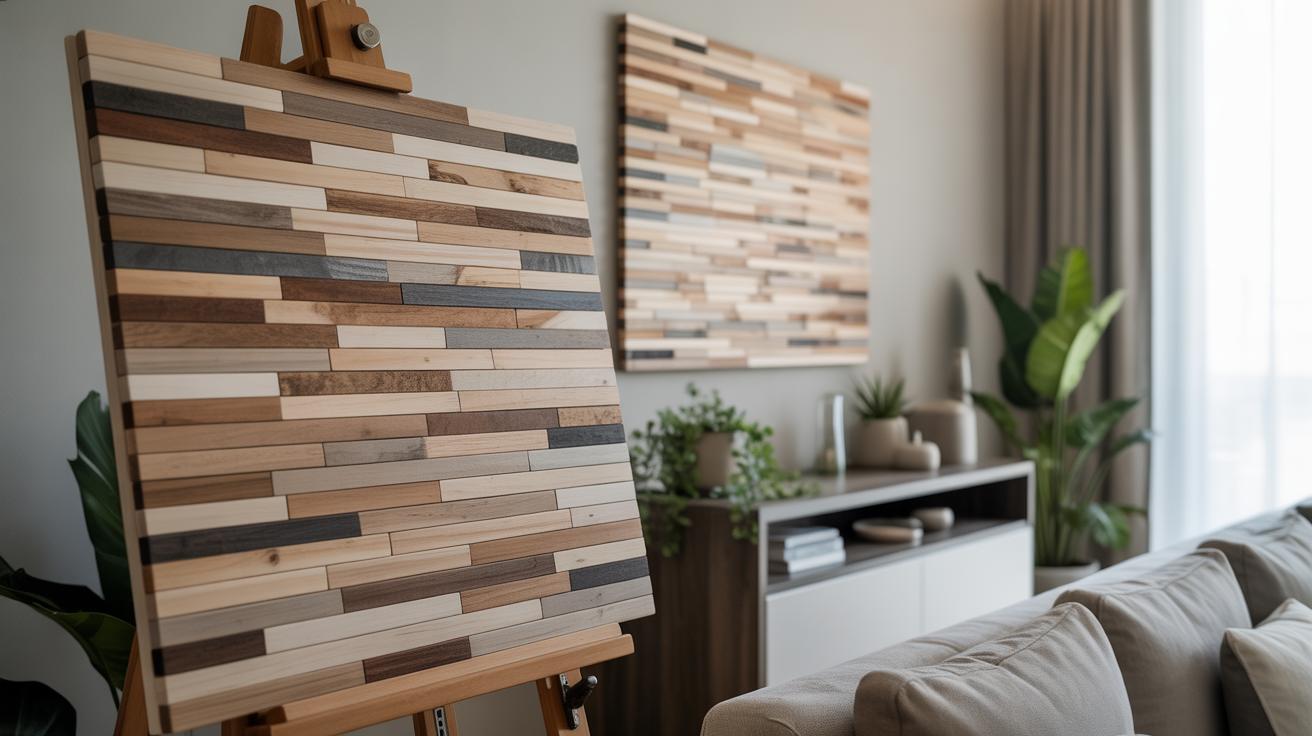
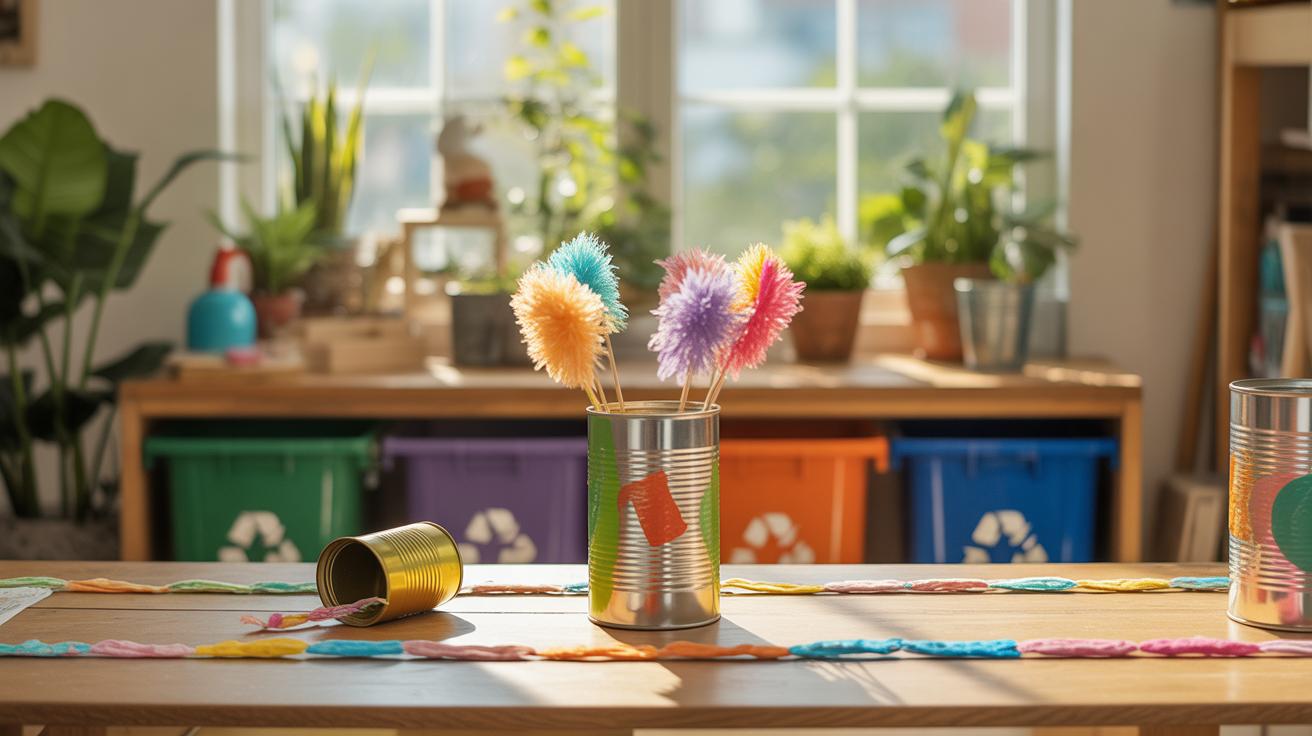
Creating Wall Art with Egg Cartons
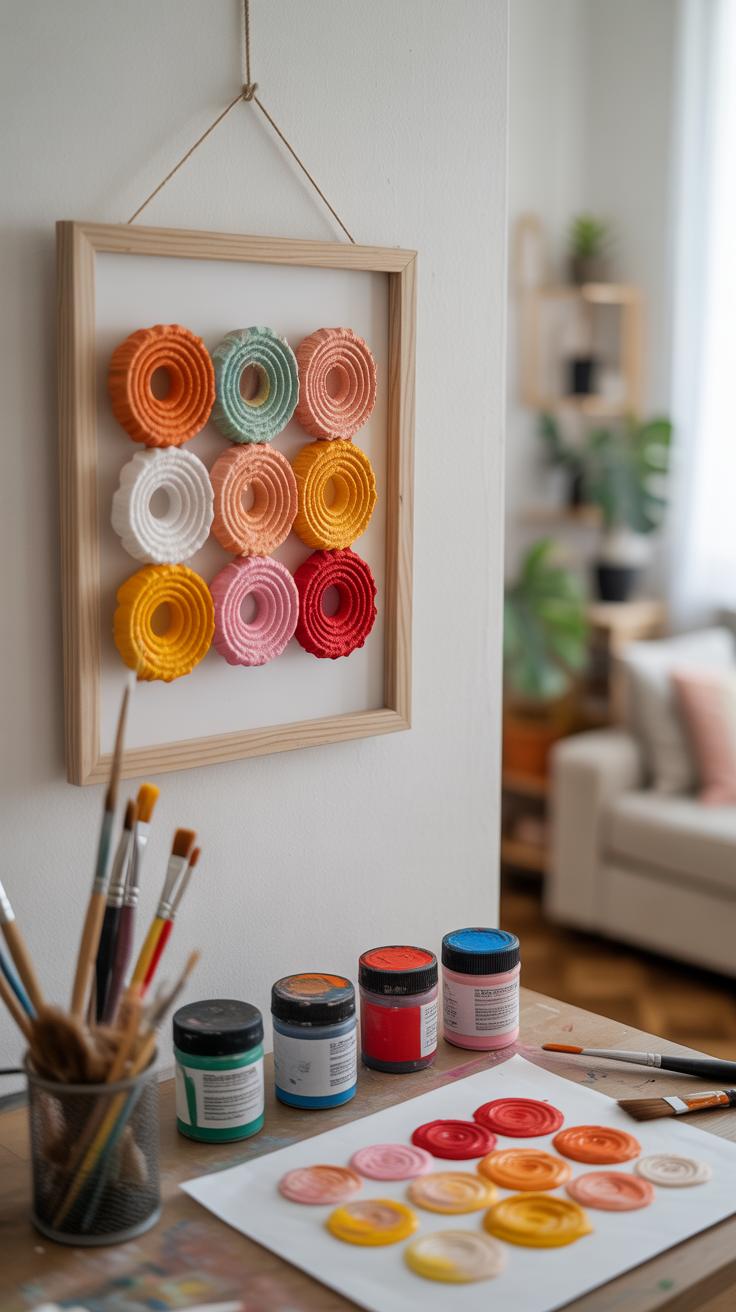
Designing Patterns and Textures
Egg cartons offer a curious, oddly textured material that invites experimentation. You can cut out individual cups or strip segments to form various shapes. Try arranging the cups in repeating rows, spirals, or offset grids—patterns that catch the light or shadow in interesting ways. Sometimes, mixing whole cups with halves or curved edges sparks unique textures that feel more alive. Painting them lends another layer of creativity. A simple coat of matte white can highlight the shapes, while bold colors or metallic paints radically change the mood.
I’ve found that layering paint—like a wash over textured surfaces—makes the details pop. You might even try dry brushing to emphasize ridges or cup interiors. Don’t hesitate to mix in glitters or subtle glazes; they bring an unexpected twist. Each piece can stand alone or link into a larger mosaic. The key is to play with scale and contrast rather than aiming for perfect symmetry. That unpredictability often creates the most compelling patterns.
Mounting and Displaying Your Art
Once your egg carton artwork is ready, think about how to display it. Mounting on a sturdy backing, like canvas or wood, works well—just use glue that grips thick cardboard securely. You could also attach separate pieces onto reclaimed frames for a rustic look. I once used small nails to pin sections onto cork boards, which allowed rearranging on the fly.
Don’t shy away from 3D effects. Bulky parts can jut from the wall, adding shadow and depth. Hanging several smaller panels together creates a gallery feel that’s charming without seeming too formal. Play with lighting angles, too; directional light emphasizes the textured quality, lending subtle drama. Where might you place your new art? Near a window, hallway, or living room? Each spot will transform the way you see the piece over time.
Egg Carton Light Fixtures

Shaping Egg Cartons for Light Designs
Egg cartons can be surprisingly flexible when it comes to shaping them for light fixtures. You can cut out individual cups and arrange them in a cluster to create interesting shadows and a soft glow. Sometimes, I find trimming the edges of each cup into petals or geometric shapes makes the light diffuse in unexpected ways. It’s almost like sculpting with paper but thicker and more textured.
Another way is to flatten parts of the carton and overlap them to form a kind of woven lampshade. This method lets some light peek through the gaps, casting patterns on walls. You might choose to spray paint or even line the cartons with thin colored paper to add subtle hues.
Just be patient when shaping—the cartons can be fragile in spots or stubborn to fold cleanly. But with practice, you discover how to coax them into the form you want.
Safety Tips for Using Egg Carton Lights
There are a few things you should consider before hanging your egg carton lamps. The main one being heat. Egg cartons are made of cardboard, and while they look sturdy, they can quickly become fire hazards if placed too close to hot bulbs. Using LED bulbs is almost a must here, as they emit very little heat.
Also, check that the carton doesn’t sag or come too close to the bulb over time. Attaching the carton securely helps prevent this. And you might want to avoid using the fixture in damp areas, since moisture could weaken the cardboard or cause mold.
I once tried putting a regular incandescent bulb inside an egg carton shade, thinking it would be fine, but it started smelling and discoloring pretty fast. From then on, I stick to low-heat bulbs and keep a close eye on the fixture. Maybe it’s a bit cautious, but better safe than sorry with DIY lighting, right?
Organizing Small Items with Egg Cartons

Egg cartons might seem like an odd choice for organizing tiny things, but they work surprisingly well. Each compartment naturally holds small items like beads, screws, seeds, or buttons without mixing them up. I once used one to separate a handful of different nails and ended up saving a lot of time searching later.
Sorting and Labeling Compartments
Simple tweaks make a big difference. You can divide the carton further by cutting it into smaller sections or stacking two cartons for more layers. Label each compartment with a bit of masking tape or a small sticker showing what belongs inside. It may feel a bit tedious, but having a designated spot for everything helps you avoid clutter.
Portable Storage Solutions
Egg cartons aren’t rigid, but you can turn them into portable organizers. Attach a lightweight lid or close the carton with rubber bands to keep items from spilling. For something sturdier, glue several cartons onto a piece of cardboard and wrap everything with clear plastic wrap. It’s not exactly fancy, but it’s practical for carrying craft beads or tiny tools when you’re on the move. Ever brought a bunch of screws or pins to a project and lost half on the way? Yeah, this helps.
Customizing Egg Carton Crafts with Paint and Accessories
Painting egg cartons can be surprisingly satisfying, though their texture sometimes makes it tricky to get even coverage. Acrylic paints work well because they dry fast and stick nicely, but if you want brighter colors, layering thin coats is often better than one thick splash. Spray paint gives a smooth finish, but it can be messy without a well-ventilated space and a little practice. I’ve found that priming the cartons with a light base color before adding details really helps the paint pop — especially with those rougher surfaces.
Once painted, adding a few extra touches can make a big difference. Think about tiny beads glued into the carton’s dimples or small ribbon bows wrapped around edges. Stickers can be fun, but be careful with glossy ones—they might lift with moisture or handling. Glitter? Sure, but I’d mix it with glue first to avoid an annoying mess. These details let you transform simple egg cartons into charming pieces — maybe a diorama, a planter, or something more abstract—whatever feels right for your space.
Conclusions
Egg carton crafts offer a perfect way to blend creativity with sustainability. By turning recyclable materials into beautiful and functional items, you contribute to reducing waste and conserving resources. These projects are accessible, affordable, and rewarding, making them ideal for families and individuals who want to make eco-conscious choices.
Embracing egg carton crafts helps you connect with the environment while personalizing your home decor. With the ideas and tips shared here, you have everything needed to start crafting and adding green touches at home. Your creativity can make a difference in small, meaningful ways.


