Understanding Cardboard Mycelium Sculpture As Living Art
Fungal Biology Meets Art
Mycelium acts as the underground root system for fungi. It consists of tiny white threads called hyphae. These threads grow quickly through moist materials. When you start a diy cardboard mushroom, the fungi eat the cellulose in the paper. This process binds the layers together tightly. The result is a solid mushroom sculpture that feels like tough wood or heavy foam.
Artists use this biological process to turn a simple paper mushroom into a sturdy piece of art. The mycelium grows into every gap of a cardboard mushroom cutout. It replaces the AIR between the fibers with a strong living glue. After the growth finishes, you dry the piece to stop the fungus. This step preserves your cardboard mushrooms so they stay strong and light for many years.
Sustainability In Sculpting
Traditional art often uses plastic foams or toxic glues. These materials hurt the planet and stay in landfills forever. A cardboard mycelium sculpture offers a better way to create. It uses recycled paper and living organisms to build form. This makes a large paper mache mushroom much safer for your home. You create beautiful objects without producing any harmful waste or chemical fumes.
This medium fits perfectly into the circular design movement. Every diy giant mushroom eventually reaches the end of its life. Because it uses natural fibers, you can break it into small pieces for your garden. It will turn back into soil and feed new plants. Unlike synthetic paper mache mushrooms, this art disappears naturally. It leaves the earth healthy while providing a fun way to craft unique decor.
Essential Materials For Your DIY Cardboard Mushroom Project
Physical And Biological Components
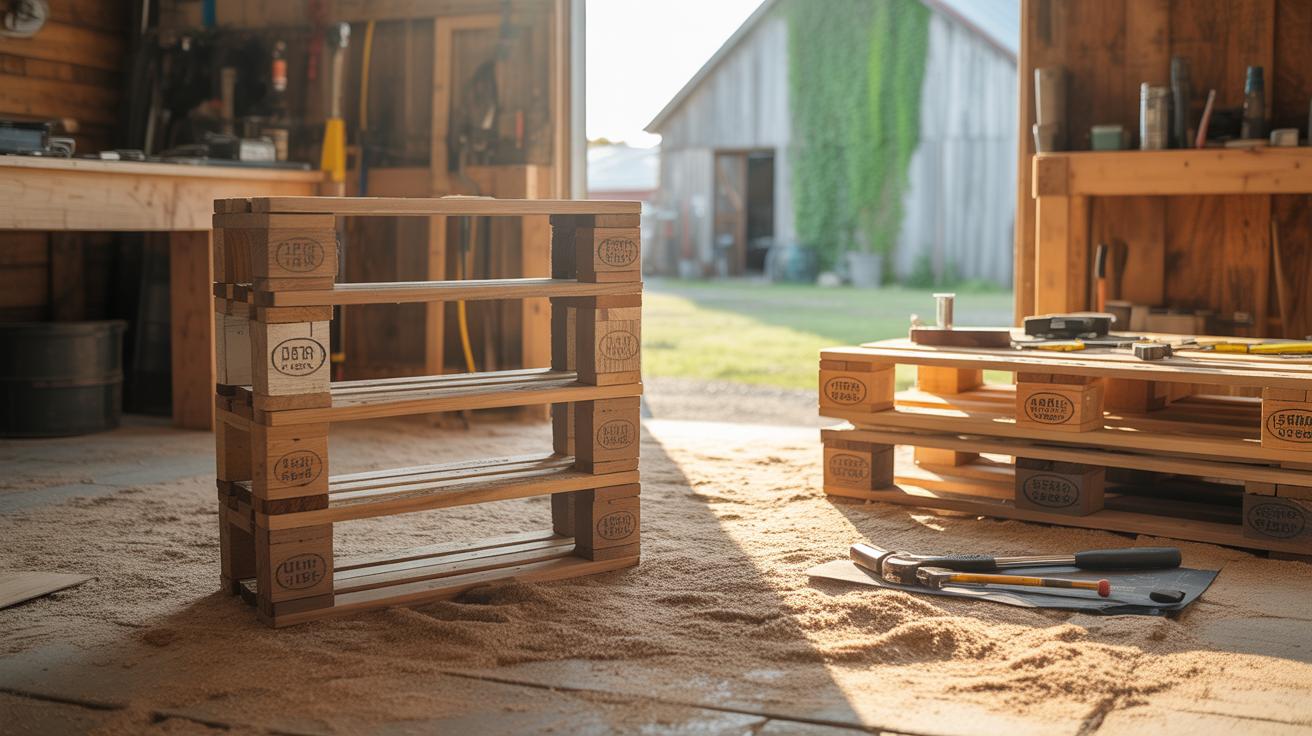
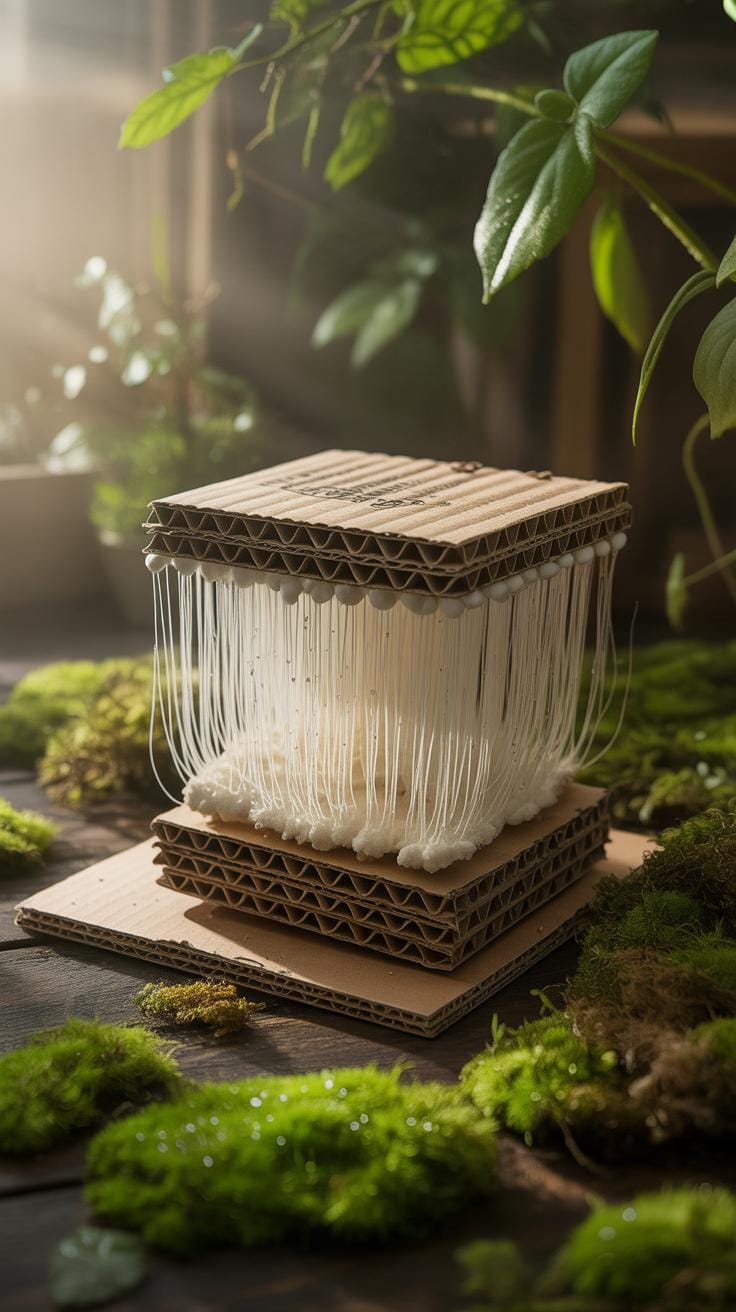
Building a cardboard mushroom requires simple items found around your home. You must gather clean brown boxes to create the base structures. These layers act as both the skeleton and the primary food source for the living fungi. Using a cardboard mushroom cutout helps stabilize the shape of the mushroom sculpture during the early growth stages before the mycelium takes over.
- Corrugated Cardboard: Use clean boxes without excess ink or plastic tape. This material provides the structural cellulose that the fungi eat. It is the foundation for every diy cardboard mushroom project you start.
- Mushroom Spawn: Select high quality grain or sawdust spawn from a reliable supplier. This living component will grow through the paper mushroom layers to create a solid and lightweight biological bond.
- Spray Bottle: Fill a clean bottle with filtered water to maintain high humidity levels. Consistent moisture helps the cardboard mushrooms stay hydrated so the white mycelium threads can spread evenly across the surface.
- Wheat Flour: Mix a small amount of flour with water to create a natural glue. This helps when making paper mache mushrooms. It provides extra nutrients that support the rapid growth of the fungal colony.
- Clear Plastic Bags: Large bags create a mini greenhouse effect for your mushroom sculpture. These covers trap air and moisture. They protect the growing organism from drying out or getting dusty while it develops.
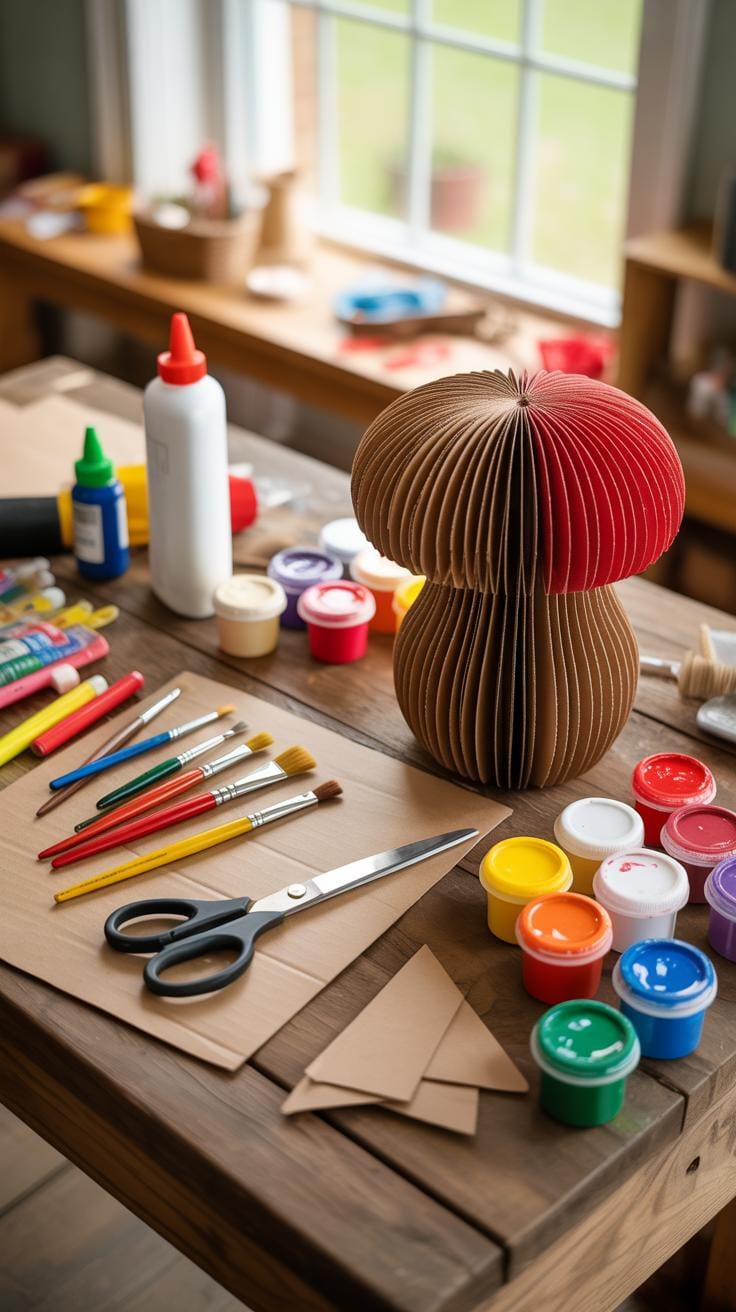
Small tools like scissors and utility knives help you shape a large paper mache mushroom. You will need to soak your paper layers in water to make them soft and pliable. This process allows the diy giant mushroom to hold its form while the living organism weaves through the fibers. Proper preparation ensures your paper mushroom grows strong and resists unwanted mold or bacteria.
Choosing The Right Mycelium Species
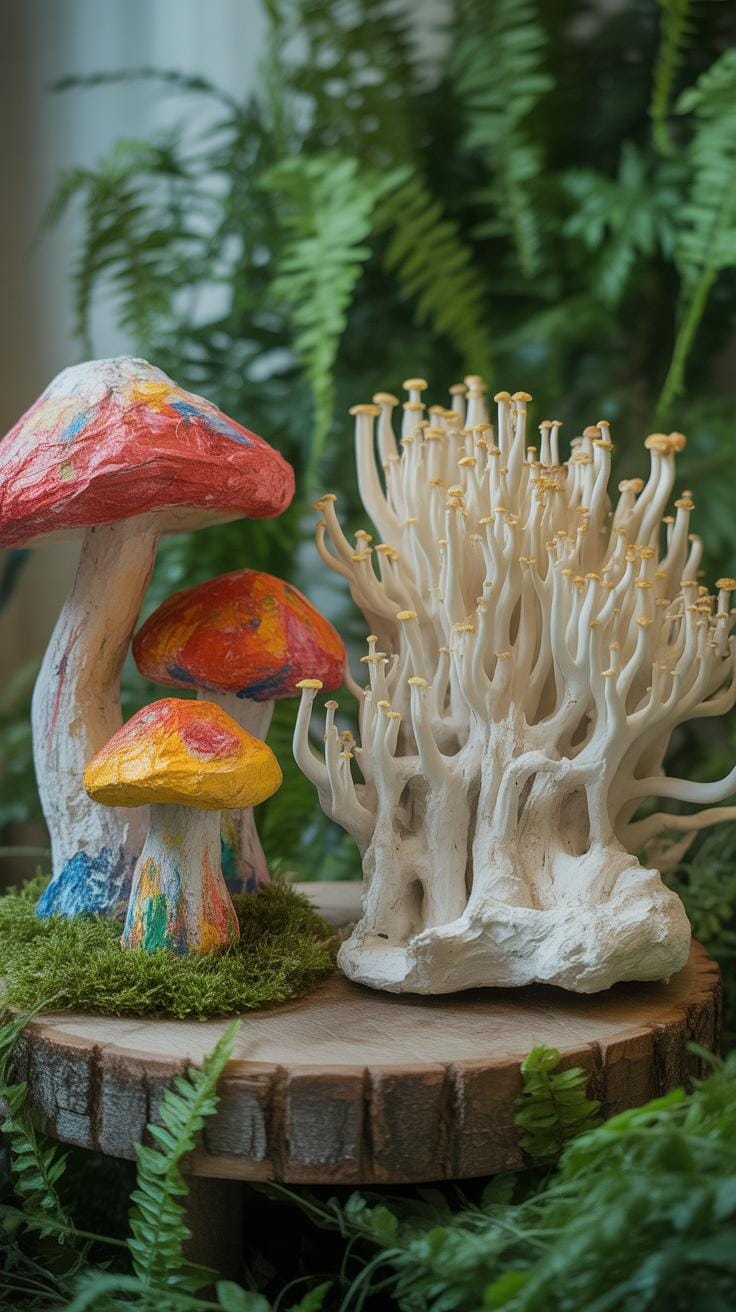
The best choice for a diy cardboard mushroom is the Oyster mushroom species. These fungi are famous for their aggressive growth patterns. They love eating the cellulose found in common shipping boxes. Beginners prefer this type because it grows faster than most other species. It quickly covers the cardboard mushrooms in a white fuzzy layer that eventually hardens into a sturdy material.
Using Oyster mycelium makes creating a large paper mache mushroom much easier. This species tolerates different temperatures and can survive small mistakes in moisture levels. As the fungus grows, it binds the paper mushroom layers together into a solid piece. This natural process turns a simple mushroom sculpture into a unique piece of living art that stays strong even after the growth cycle ends.
Building The Core With A Cardboard Mushroom Cutout
Designing The Skeleton
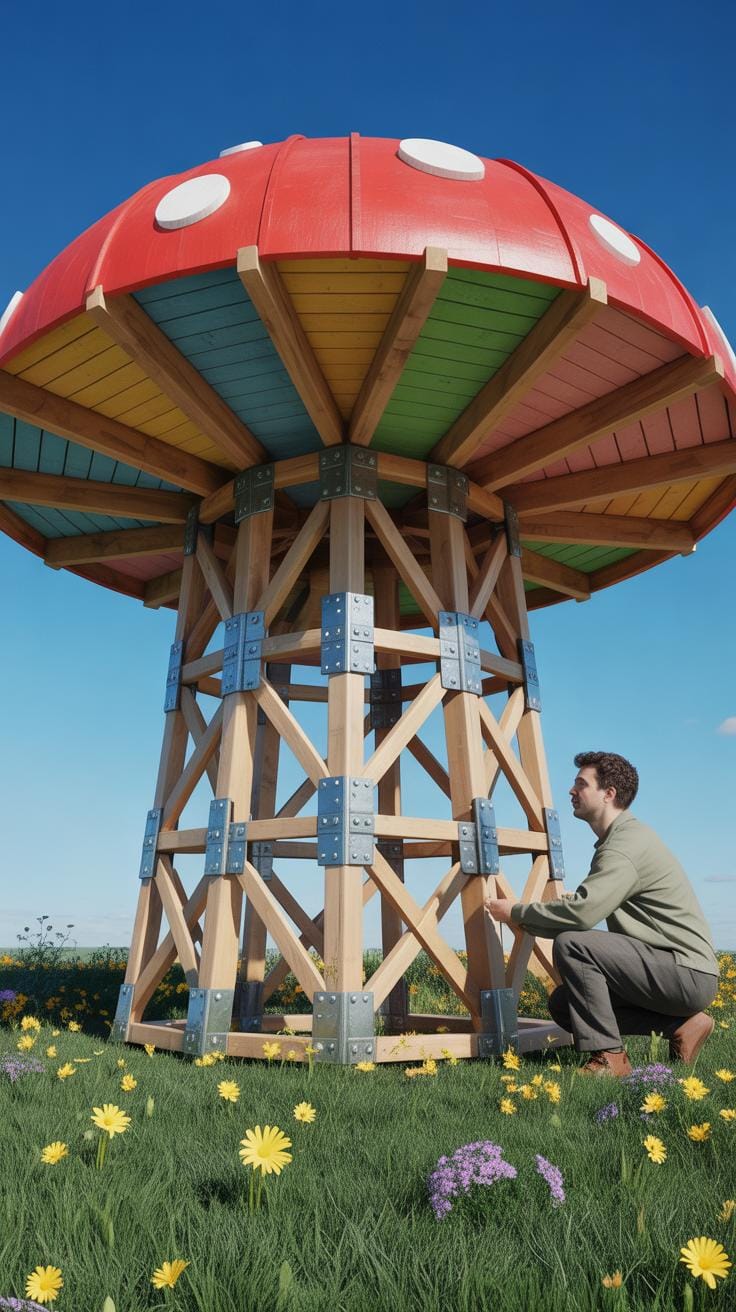
Building a mushroom sculpture begins with a solid plan. You first draw a flat cardboard mushroom cutout to establish the height and width of your piece. This silhouette acts as a central spine for the fungi. The mycelium needs this sturdy guide to stay upright as it grows. Using a simple cutout keeps the shape consistent. It creates a path for the living roots to follow during the colonization phase.
A diy cardboard mushroom starts with this basic paper mushroom shape. You can draw the cap and stem as one piece or two parts. This flat skeleton allows you to see the proportions before you add any weight. It serves as the foundation for larger cardboard mushrooms. This step ensures your art stays balanced. A clear guide helps you manage the organic material later in the process.
Layering For Depth And Strength
Layering turns a flat guide into a diy giant mushroom. You must stack several pieces of corrugated board to add thickness. Glue each layer together to create a 3D form. Corrugated material works best because the internal flutes hold air. These tiny tunnels let the mycelium breathe and move easily. The hyphae grow through these gaps to bond the layers into a single solid block.
This method resembles making paper mache mushrooms but uses thicker material. You can build a large paper mache mushroom base using these thick stacks for extra stability. Most people prefer the strength of cardboard mushroom structures over thin paper. The mycelium digests the wood fibers in the paper and cardboard. This process eventually turns your simple sculpture into a hard and natural compostable object.
The Inoculation Process For Paper Mushroom Forms Relief
Pasteurization And Hydration
To begin your cardboard mushroom project, you must first treat the base material. Soak the corrugated sheets in hot water to soften the structural fibers. This step removes unwanted bacteria and mold spores that might compete with your fungi. High heat ensures a clean environment for later growth. Proper hydration also makes the cellulose easy for the hungry mycelium to digest and inhabit.
Wringing out the excess water is vital for a successful paper mushroom. The material should feel like a damp sponge but not drip. Moist cardboard allows the living organism to travel quickly through the layers. This preparation turns a stiff cardboard mushroom cutout into a soft and welcoming home. You are setting the foundation for a strong and sturdy mushroom sculpture that lasts for years.
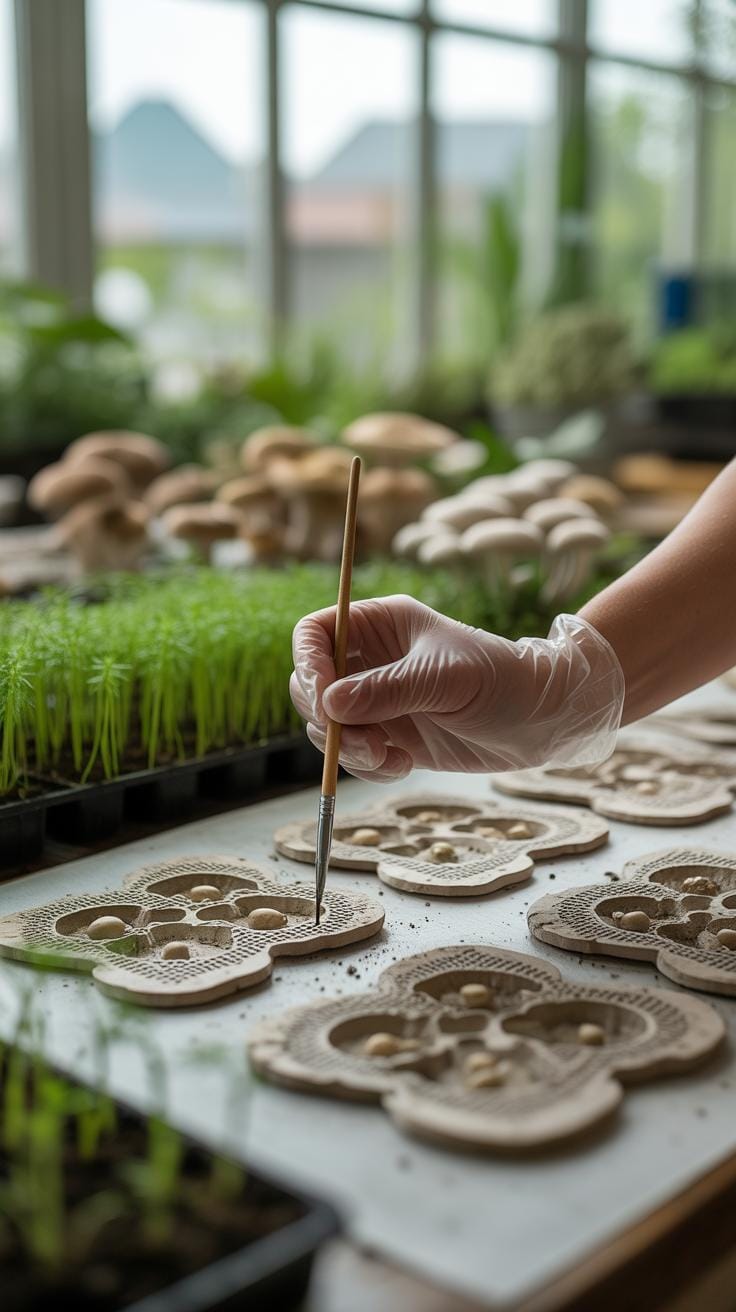
Introducing The Mycelium Grain Spawn
Adding living spawn turns a diy cardboard mushroom into a biological wonder. Wait until the material cools down to room temperature before adding the grain. Sprinkle the white, colonized seeds evenly between the wet layers of cardboard mushrooms. This process mimics how fungi grow in nature on fallen logs. You are now moving from human construction to natural organic growth within the form.
The mycelium acts as a natural glue for your large paper mache mushroom. It binds the loose paper mushroom parts into a solid piece of art. Even a diy giant mushroom becomes lightweight and very strong during this stage. Watch as the white fibers slowly wrap around each paper mushroom layer. Soon, these simple materials will become a solid mushroom sculpture through the quiet power of nature.
Nurturing Your Cardboard Mushrooms During Incubation
Environmental Controls For Growth
Place your mushroom sculpture in a dark spot away from direct sunlight. Mycelium prefers a quiet corner where the air stays still. Keeping the room temperature between sixty five and seventy five degrees Fahrenheit helps the fungi thrive. You must maintain high humidity to prevent the materials from drying out. A simple spray of water near the base keeps the atmosphere moist for your diy cardboard mushroom.
Steady conditions allow the fungi to colonize the paper layers without stress. Sudden cold snaps or high heat can stop the growth process. Check your cardboard mushrooms often to ensure the air remains damp. If the environment stays consistent, the fungi will knit the internal structure into a solid mass. Proper care during this phase ensures your cardboard mushroom cutout becomes a strong and durable art piece.
Signs Of Healthy Colonization

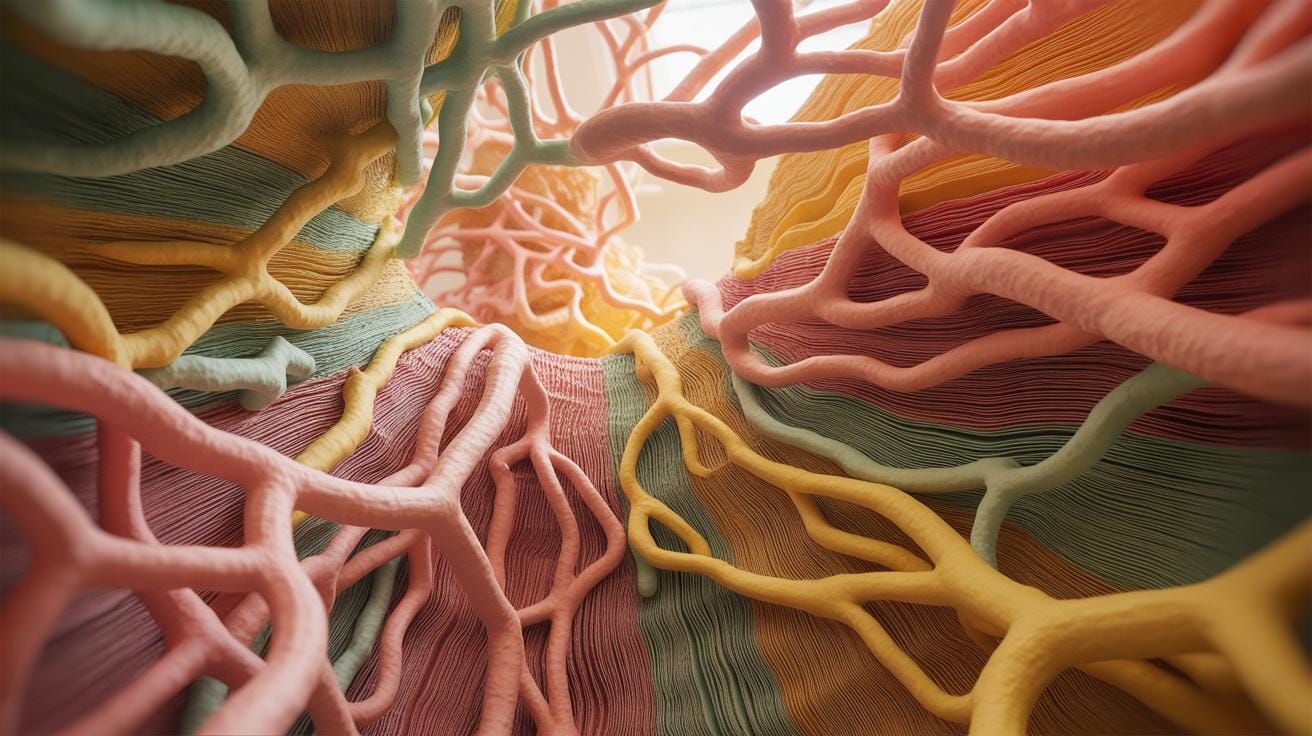
Watch for a fuzzy white coating appearing on your large paper mache mushroom. This bright fuzz is the mycelium moving through the paper fibers. It seeks out the natural starches in the glue and the wood pulp in the cardboard. This process acts like a natural biological cement. You will see the separate layers of your paper mushroom begin to merge into one single and sturdy organic form.
Healthy mycelium smells earthy and fresh like a forest floor after rain. If the white web covers the surface evenly, your mushroom sculpture remains on the right track. This growth proves the fungi are active and eating the substrate. Soon, the soft diy giant mushroom will feel firm and heavy. Once the color is solid white, your paper mache mushrooms have successfully finished the vital primary stage of incubation.
Techniques For A Large Paper Mache Mushroom Hybrid
Combining Bio Materials With Traditional Crafts
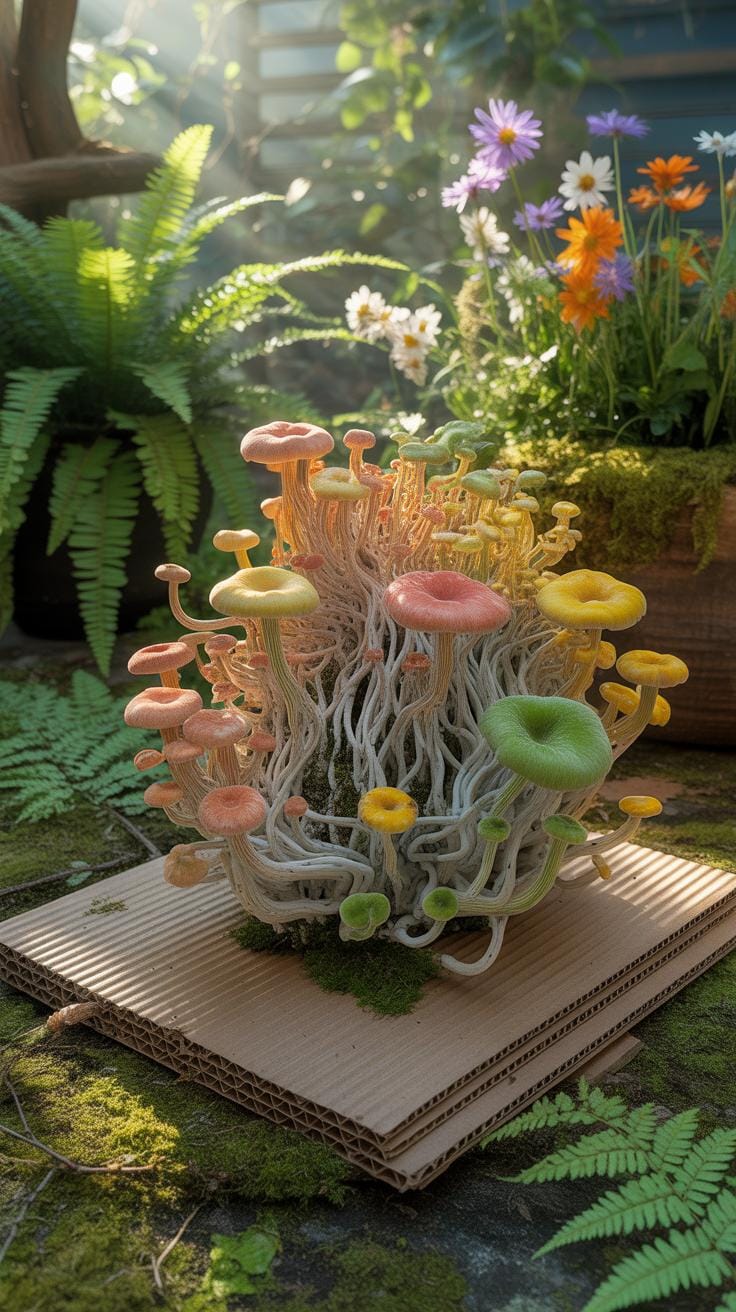
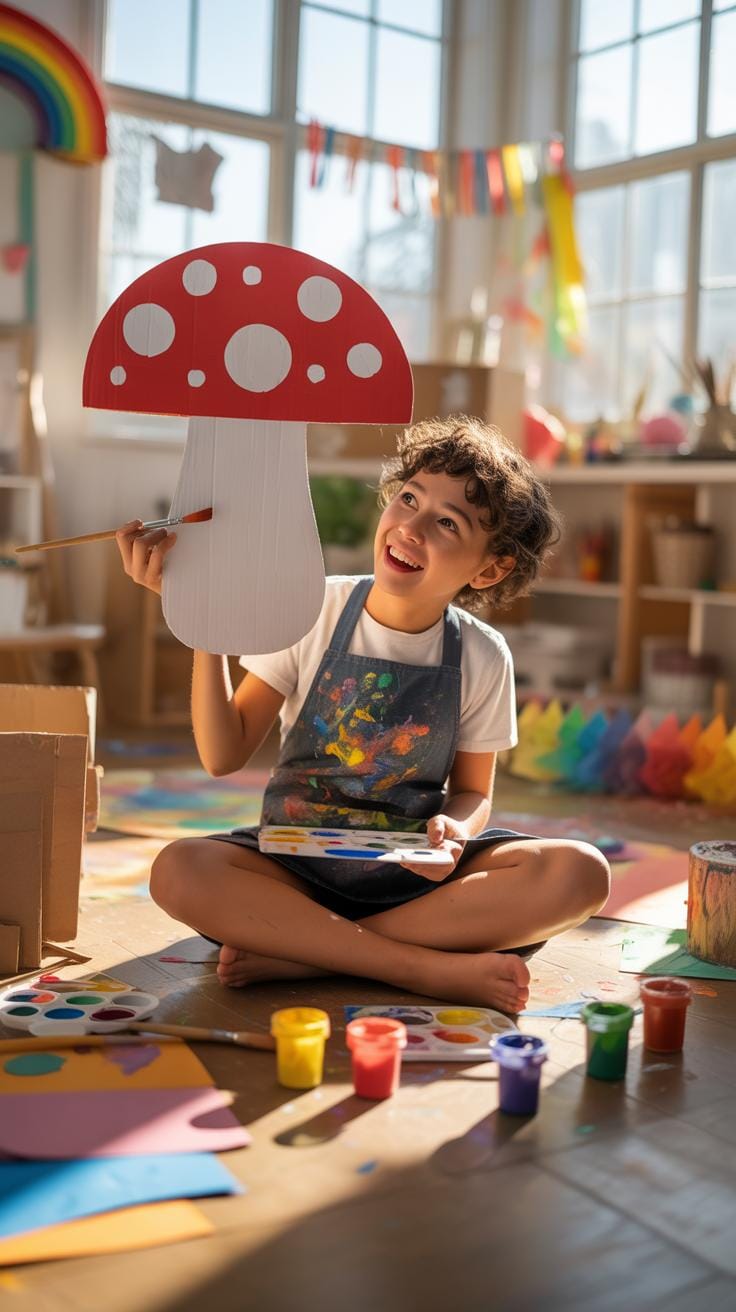
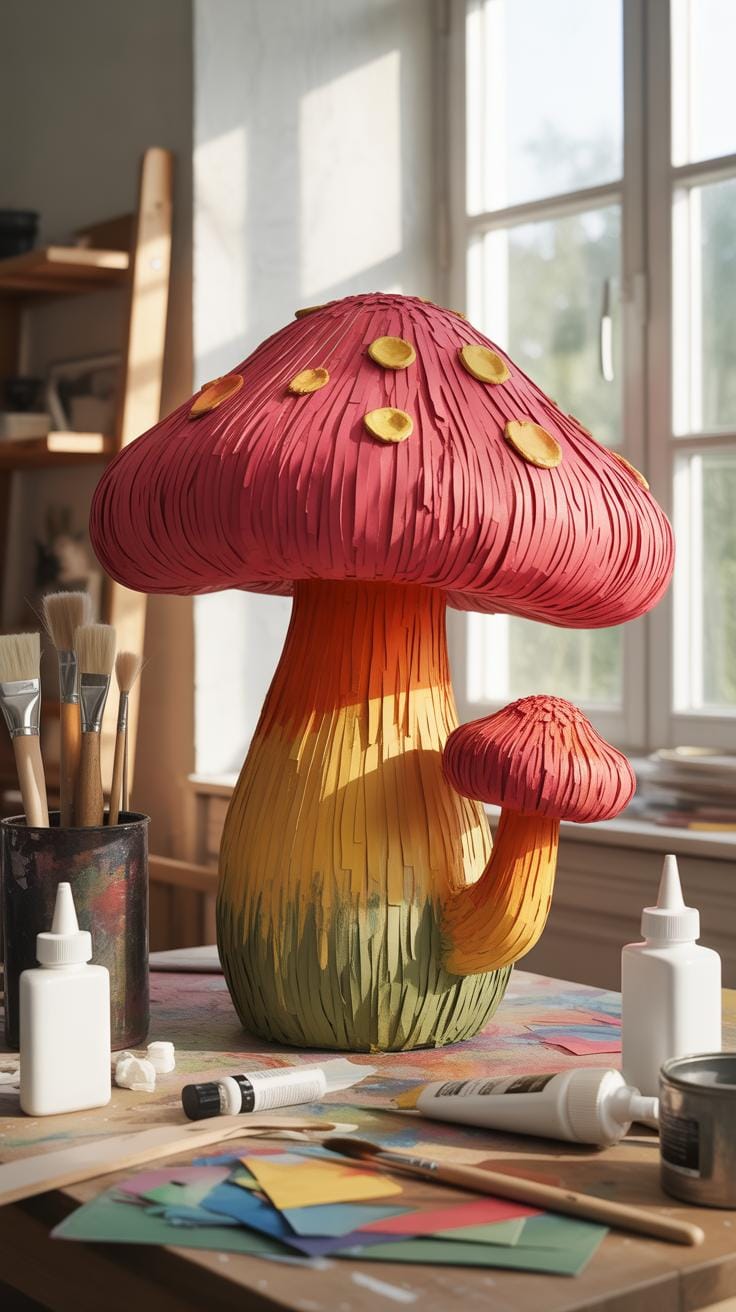
Traditional crafting meets modern science when you build a Large Paper Mache Mushroom with a living core. Start by assembling a Cardboard Mushroom Cutout to serve as the structural skeleton. Apply wet paper pulp mixed with mycelium spawn over this frame. The fungi treat the Paper Mushroom layers as a food source. This process binds the materials together into a solid and lightweight Mushroom Sculpture that resists breaking.
As the mycelium grows, it colonizes the Paper Mache Mushrooms and the cardboard base. This biological bond creates a strength that traditional glue cannot match. You are building a living Diy Giant Mushroom that hardens as it matures. The paper fibers provide a perfect grid for the fungal threads to navigate. This hybrid method ensures your Cardboard Mushrooms remain durable while showing off the complex textures of organic growth.
Like the unseen threads of mycelium binding the earth, our hands reclaim humble paper to reveal the silent strength of nature’s connections.
— Merlin Sheldrake
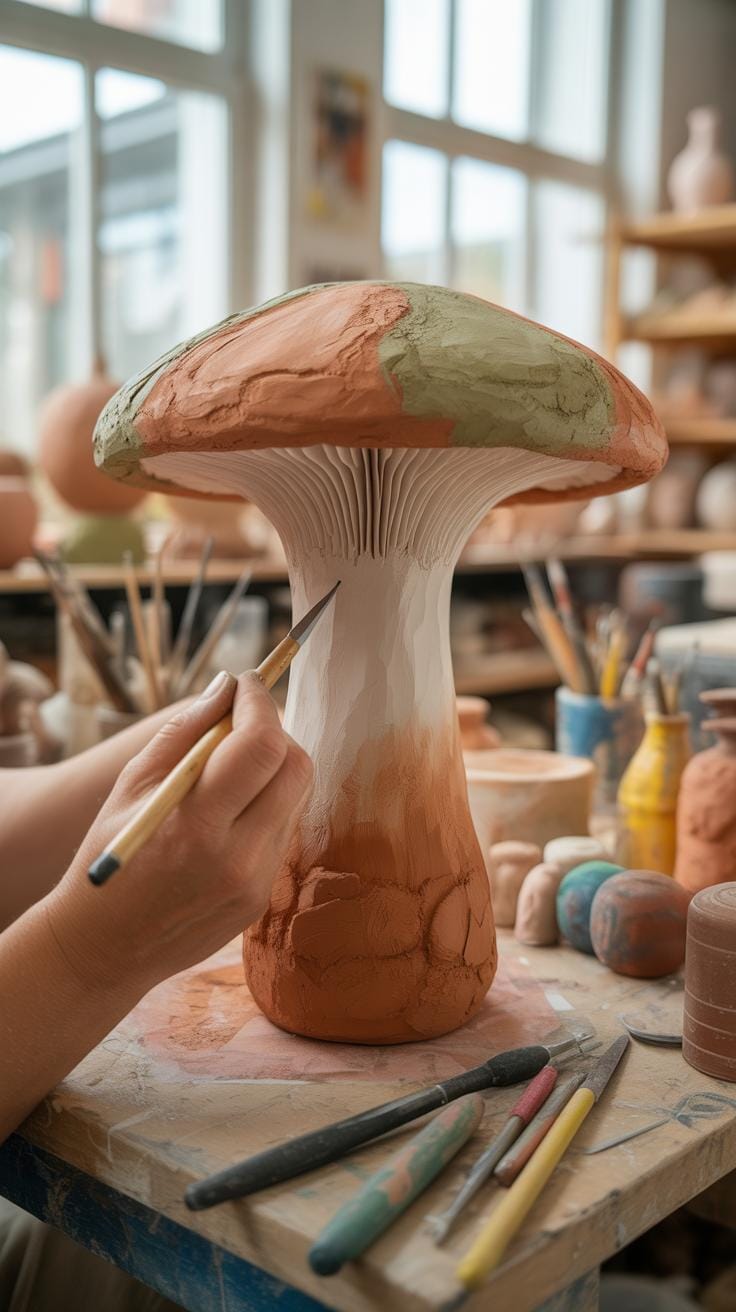
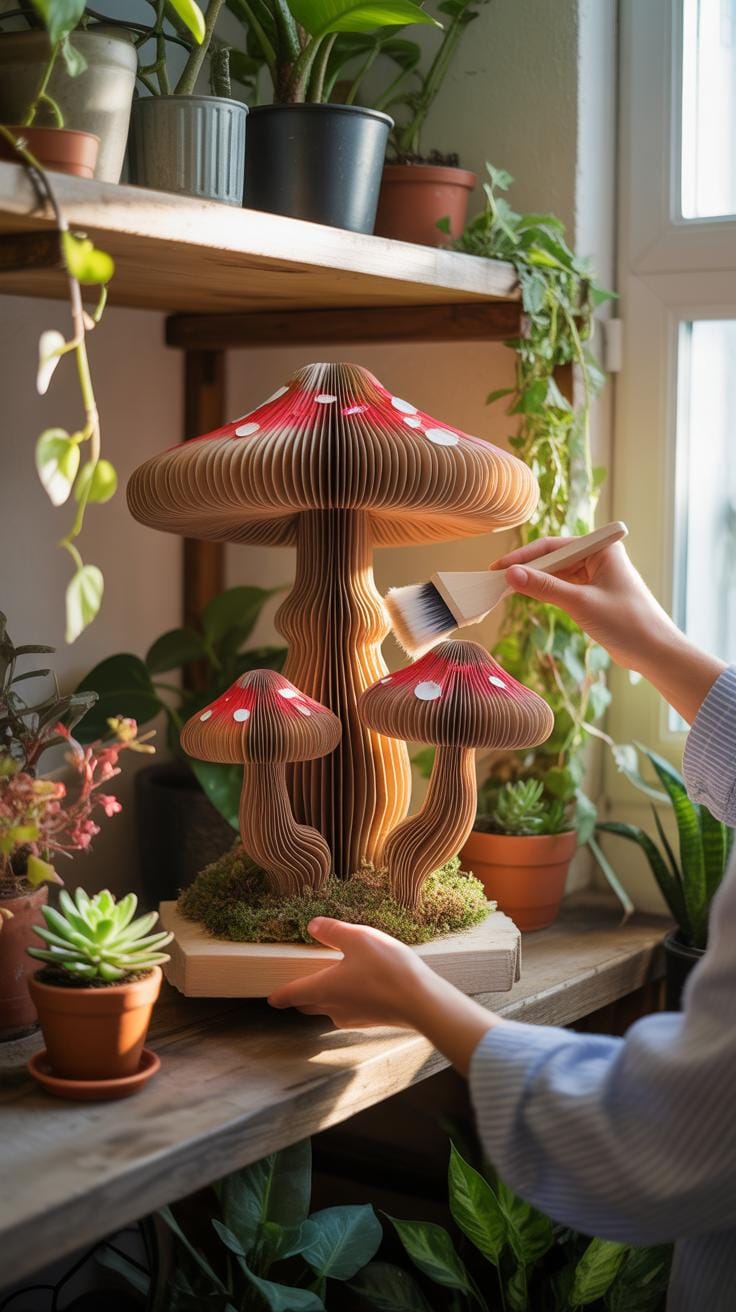
Smoothing And Shaping The Cap
Creating a smooth finish on a Diy Cardboard Mushroom requires patience and moisture. Once the mycelium covers the top of your Cardboard Mushroom, it forms a soft white skin. You can direct this growth by lightly spraying the surface with clean water. This step helps the Paper Mushroom develop a velvet texture. This natural coating looks identical to the skin found on a real forest fungi cap.
Proper shaping makes your Mushroom Sculpture look professional and realistic. Press down any loose bits of the paper pulp while it is still damp to keep the surface even. The mycelium will fill in small gaps and cracks as it spreads across the Large Paper Mache Mushroom. This results in a seamless piece of art. Successful Cardboard Mycelium Sculpture relies on this balance between human touch and the natural habits of the fungi.
Structural Integrity Of A DIY Giant Mushroom Structure
Scaling Up Your Fungal Art
Creating a DIY giant mushroom requires a sturdy internal skeleton to support the weight of the growth medium. You should build a thick frame using a heavy-duty cardboard mushroom cutout as your base. This core provides the necessary shape while the fungus colonizes the surface. As the mycelium grows through the paper mushroom layers, it creates a living bond that makes the large paper mache mushroom very tough.
The mycelium acts like a natural glue that fuses every cardboard mushroom together into a single unit. This biological process creates a mushroom sculpture that is much lighter than wood but surprisingly durable. You can use large amounts of recycled scrap to build these cardboard mushrooms. The result is a solid form that honors the history of bio-design by using simple waste materials to create something functional.
Avoiding Structural Collapse During Growth
Maintaining the right moisture level is vital when working on a diy cardboard mushroom project. You must keep the cardboard damp so the fungi can eat the cellulose fibers easily. However, soaking the paper too much will cause your cardboard mycelium sculpture to lose its shape or sag. Wet cardboard grows soft and may collapse under its own weight before the mycelium can harden the entire structure.
Good airflow helps the paper mache mushrooms dry slightly as the mycelium spreads and binds the layers. Watch your mushroom sculpture closely for any signs of leaning or soft spots in the base. If the large paper mache mushroom starts to tilt, use temporary supports until the fungus finishes its growth cycle. Proper care ensures the cardboard mushrooms remain upright and strong throughout the entire natural hardening process.
Refining The Details Of Your Mushroom Sculpture
Dehydrating To Stop The Growth
Your cardboard mushroom needs heat to stop the living fungi from growing further. Place the piece in a low-temperature oven or a specialized drying cabinet. This process removes all moisture from the organic matter. It turns the soft white fuzz into a sturdy and solid material. You are essentially curing the diy cardboard mushroom to ensure it stays in its current shape forever.
The heat also makes sure your cardboard mushrooms do not sprout real caps later on. Without this step, high humidity might trigger the fungi to produce spores. Drying creates a shelf-stable mushroom sculpture that lasts for years in your home. This stage makes the paper mushroom feel light and rigid. It prepares the surface for the final tactile improvements that create a high-quality finish.
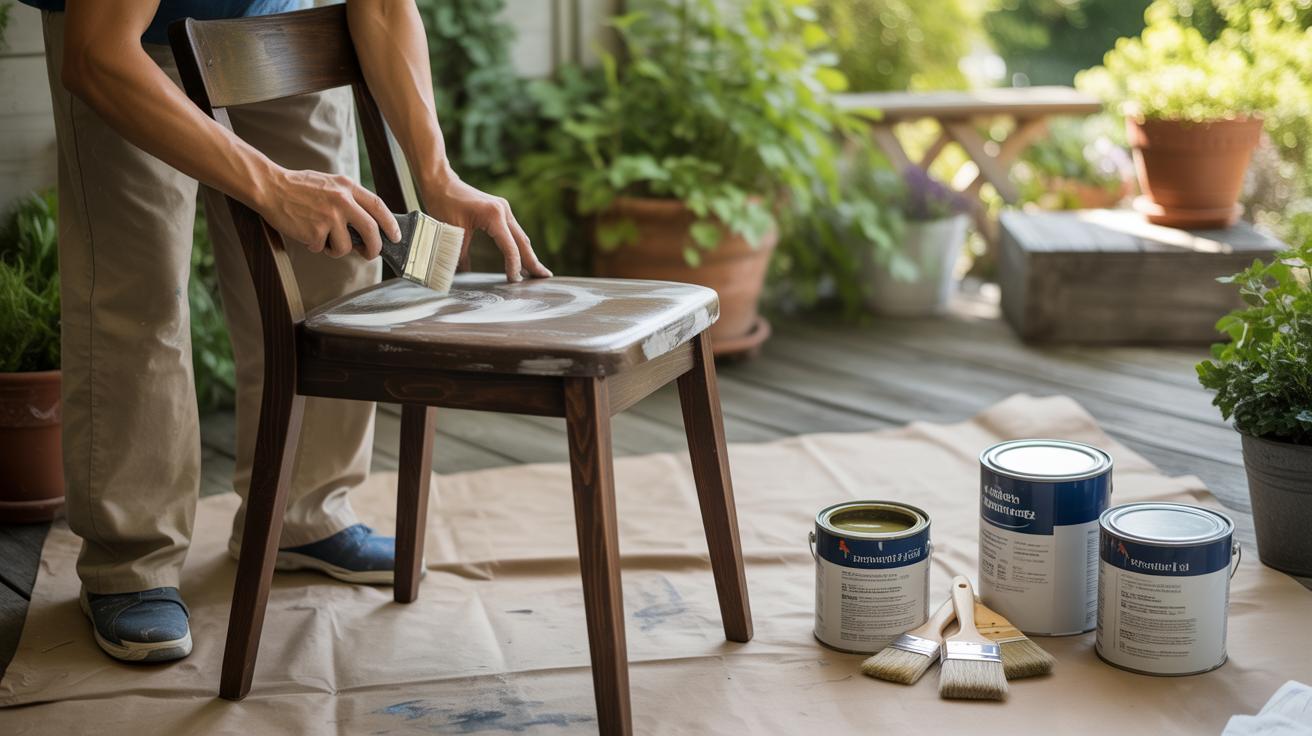
Sanding And Finishing The Surface
Once the material is dry, you can use sandpaper to smooth the edges. Treat the cardboard mushroom cutout like a piece of soft wood or foam. Rub the surface gently to remove any rough bumps or uneven mycelium patches. This technique works well on a large paper mache mushroom to create a professional look. You can shape the gills under the cap with precision during this stage.
A smooth finish helps the paper mache mushrooms look like they came from a high-end design studio. If you want a specific color, apply a natural sealant or organic paint after sanding. This protects the diy giant mushroom from absorbing water from the air. Using these steps ensures your mushroom sculpture transition from a experimental project into a beautiful piece of art. The final result feels solid and looks incredibly detailed.
Comparing Paper Mache Mushrooms To Mycelium Art
Biological Vs. Chemical Binders
Traditional paper mache mushrooms rely on simple kitchen flour or synthetic white glue to hold paper layers together. These common binders act as a physical bridge between fibers but remain susceptible to outside forces. Damp air often causes these adhesives to soften or grow unwanted household mold over time. Crafting a diy cardboard mushroom this way requires thick coats of plastic sealants to prevent the structure from rotting in humid rooms.
Mycelium changes the building process by using living root systems to fuse cardboard mushrooms into a solid block. The fungi consume the cellulose within a cardboard mushroom cutout or paper mushroom to create a natural plastic. This biological bond produces a water-resistant mushroom sculpture that stays strong without toxic chemicals. Unlike paper mache mushrooms, the living mycelium acts as a self-healing glue that deepens the structural integrity of the final piece.
The Aesthetic Of Living Structures
A standard diy giant mushroom made from paper has a smooth or wrinkled surface depending on the crafting technique. Artists often paint a large paper mache mushroom to hide the seams of the underlying material. While a paper mushroom looks charming, it lacks the tactile depth found in nature. Builders who make a cardboard mushrooms base usually cover it with plaster to mimic the textures found in real forest environments.
Cardboard mycelium sculpture offers a velvet texture that grows directly from the paper layers. The fine white threads of the fungi create a soft skin over every cardboard mushroom cutout. This living finish reacts to light and touch in ways that standard paper mache mushrooms cannot match. Observers see the microscopic work of the hyphae as they weave through each diy giant mushroom, making every sculpture a unique biological record.
Maintenance And Display For Cardboard Mushroom Art
Preserving Your Fungal Masterpiece
Owning a cardboard mushroom requires specific care to keep the structure strong. Natural fibers and mycelium react to the environment around them. To protect your mushroom sculpture, you must control the moisture levels in your home. High humidity can soften the layers and cause the piece to sag or lose its shape. Keep your art in a dry spot with good air flow to prevent any unwanted growth.
- Moisture Control: Keep your paper mushroom away from bathrooms or damp basements. Water softens the glue and cardboard layers, leading to structural failure or mold growth over time.
- Light Exposure: Place your cardboard mushrooms out of direct sunlight. Constant UV rays fade natural pigments and can make the paper brittle, causing the edges to flake or crack.
- Dusting Techniques: Use a soft, dry brush to clean your diy cardboard mushroom regularly. Avoid wet cloths or chemical sprays, as these liquids soak into the porous surface and damage the internal mycelium network.
- Safe Handling: Move your cardboard mushroom cutout by lifting from the base. Delicate edges on the cap can tear if handled roughly, especially if the sculpture uses thin paper layers for detail.
- Temperature Stability: Store your large paper mache mushroom in a room with a steady temperature. Rapid changes in heat cause the materials to expand and contract, which weakens the bond between the layers.
Small repairs help maintain the look of your diy giant mushroom for many years. If a piece of the paper mushroom peels away, use a tiny amount of wood glue to tack it back down. This simple step keeps the surface smooth and prevents further damage. Proper display turns your art into a focal point that captures the quiet beauty of the forest floor inside your living room.
Ethical Disposal And Re Use
Deciding to retire your mushroom sculpture is easy because the materials are earth-friendly. Since you used cardboard mushrooms and natural binders, the entire piece is biodegradable. You do not need to throw it in the trash where it will sit for years. Instead, you can return the paper mushroom to the soil. This process follows the natural cycle of growth and decay found in real forest ecosystems.
Break your large paper mache mushroom into small chunks by hand or with a garden tool. Bury these pieces under a layer of mulch or soil in your backyard garden. The fungi and cardboard will decompose quickly and turn into rich compost for your plants. Using cardboard mushroom art means your creative hobby helps the planet stay healthy. Your old project becomes food for the next generation of garden flowers.
Frequently Asked Questions

What exactly is a cardboard mycelium sculpture and how does it work?
A cardboard mycelium sculpture is a sustainable piece of art created by inoculating corrugated cardboard with fungal spores, typically oyster mushrooms. The cardboard serves as a carbon-rich food source and structural framework for the mycelium to colonize. As the root-like network grows through the paper layers, it binds them together into a solid, biological mass. This process creates a lightweight, durable, and completely biodegradable interior decor piece that bridges the gap between nature and design.
How do you prepare the cardboard layers to ensure successful fungal growth?
To start your cardboard mycelium sculpture, you must first sterilize or pasteurize the cardboard by soaking it in boiling water. This removes competing bacteria and softens the fibers. Once cooled and squeezed of excess moisture, layer the wet cardboard with grain spawn in a clean container or mold. Maintaining a humid environment and proper airflow is essential during the colonization phase to allow the white mycelium to fully weave through every paper layer.
Is creating art with fungus an expensive hobby for beginners to start?
One of the best things about this medium is its incredible accessibility and low entry cost. Most materials for a cardboard mycelium sculpture can be sourced for free, such as discarded shipping boxes and plastic containers for molds. Your only significant investment is the mushroom spawn, which is widely available and affordable online. This makes it an ideal eco-friendly project for budget-conscious artists looking to experiment with biomaterials without purchasing expensive traditional sculpting supplies.