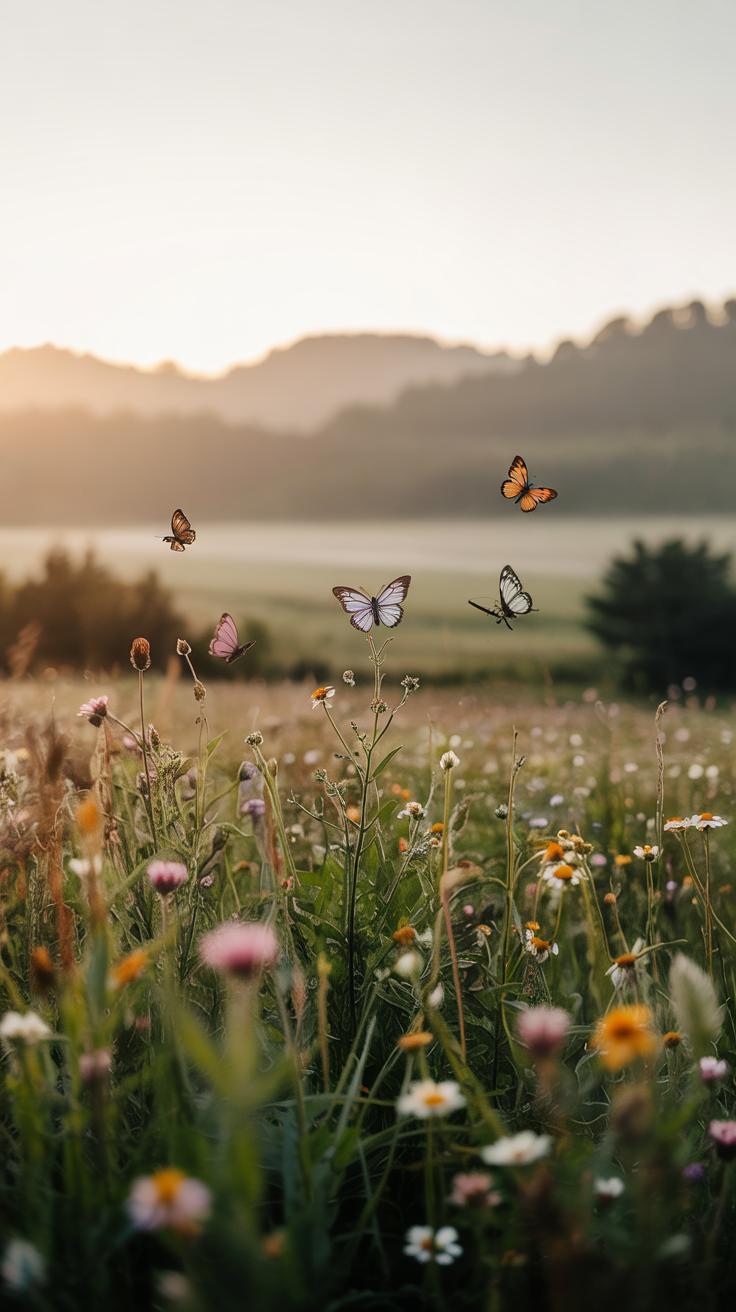
Introduction
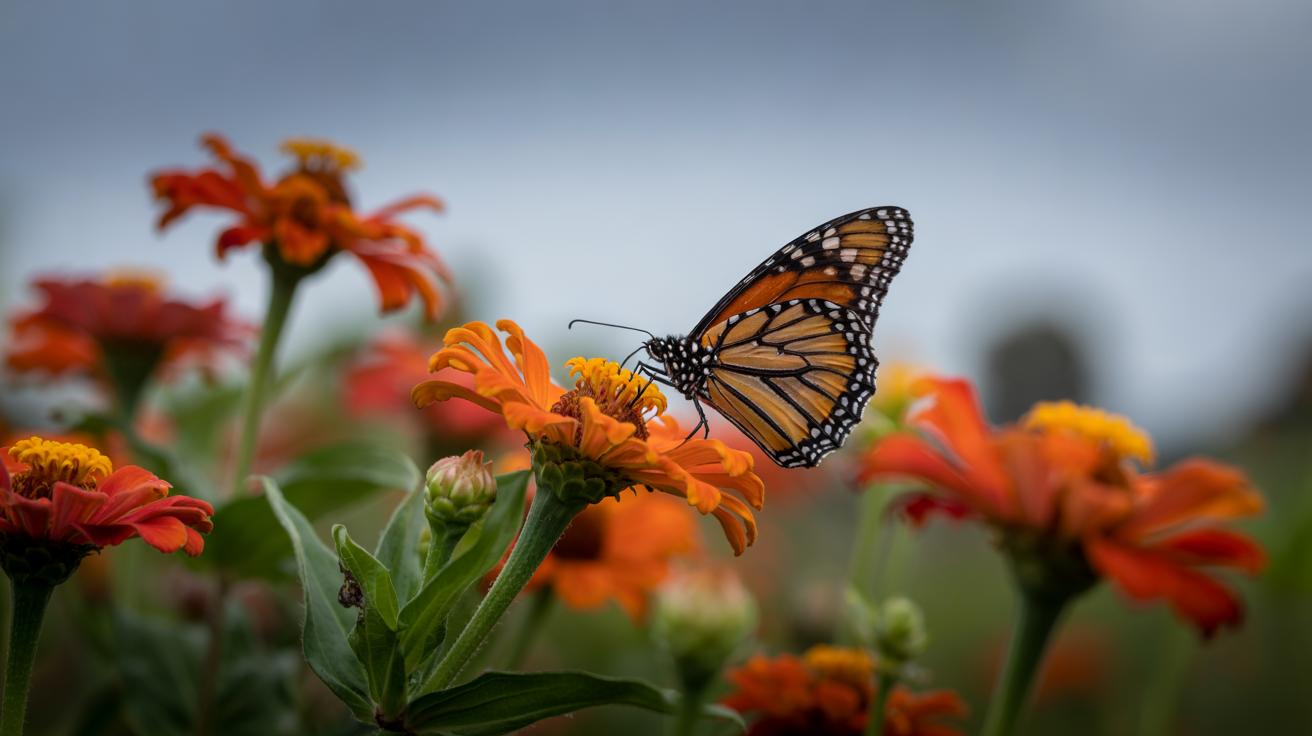
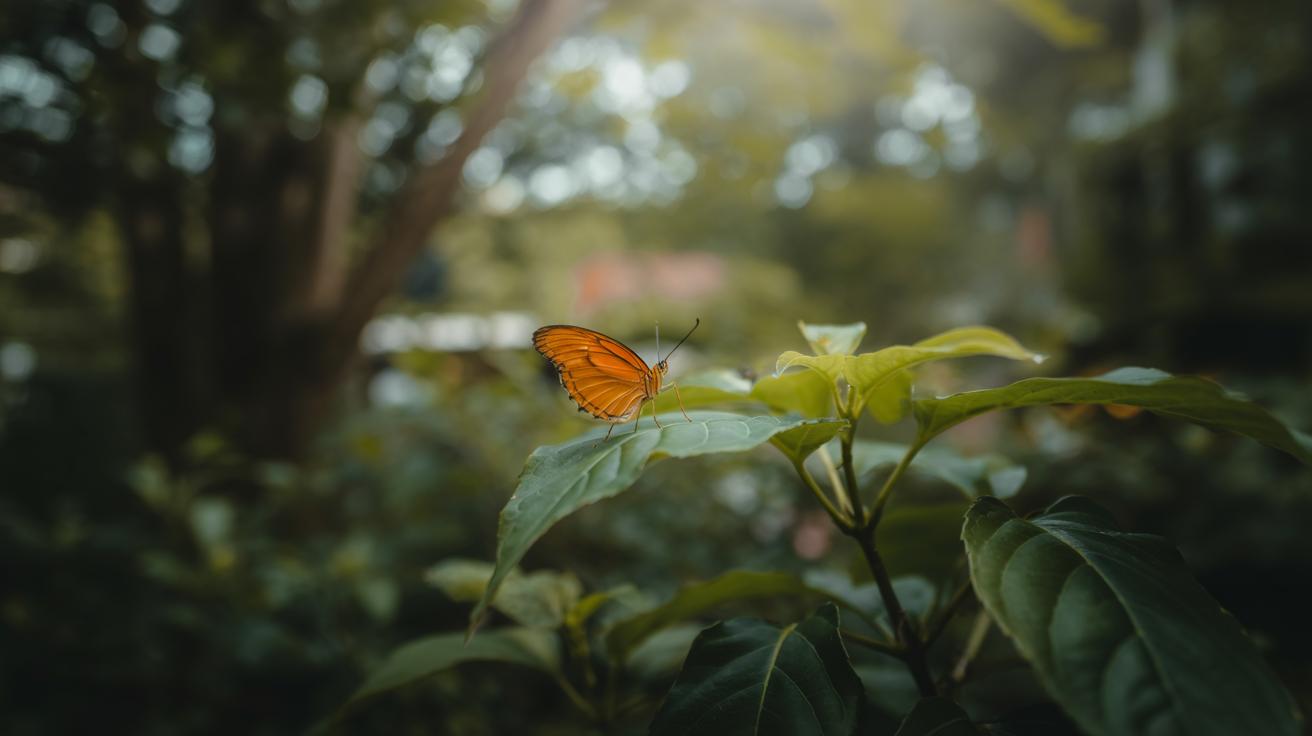
Capturing butterflies on flowers is a rewarding experience for photographers. These moments reveal nature’s delicate beauty and complexity. Close-up shooting of butterflies on flowers requires skill and patience. It offers you an opportunity to showcase details of butterfly wings and flower petals that are often missed by the naked eye.
This article will guide you on how to improve your close-up butterfly photography. You will learn how to select the right equipment, choose ideal locations, understand butterfly behavior, and apply composition techniques. Practical insights and thoughtful questions will help you develop your style. Your photos will not just document but celebrate these small wonders of nature.
Choosing The Right Camera And Lens
Your choice of camera and lens plays a huge role in capturing close-up images of butterflies on flowers. A camera with manual controls allows you to adjust settings precisely, which is necessary for sharp close-ups. Mirrorless and DSLR cameras are ideal because they offer flexibility with lenses and settings.
Macro lenses are designed to focus very close to the subject while maintaining sharpness. These lenses reveal details like wing patterns and flower textures. Common focal lengths range from 50mm to 100mm. Longer focal lengths let you keep some distance from the butterfly, causing less disturbance.
If you don’t have a dedicated macro lens, close-up filters or extension tubes can help you get closer to your subject but may reduce image quality. A telephoto lens with good autofocus can also work if the butterfly stays still on a flower.
Use a small aperture, such as f/8 to f/16, to get a good depth of field so more of the butterfly and flower stay in focus. Single-point autofocus helps you lock focus precisely on the butterfly’s eyes or wings.
Stabilize your camera using a tripod or a monopod to avoid blur from hand movement. A remote shutter release or self-timer reduces shake further. These tools let you compose shots carefully and wait for the perfect moment.
Understanding Macro Lenses
Macro lenses are made to photograph very small subjects at close distances. Their key feature is a minimum focusing distance that allows sharp images from just inches away. This makes them perfect for butterflies resting on flowers.
Focal lengths on macro lenses vary, commonly between 50mm and 100mm. Shorter focal lengths let you get closer but may risk scaring your subject. Longer focal lengths give more working space and compress the background for a nicer blur.

Image sharpness is a priority for macro lenses. They produce crisp pictures that show fine details, such as scales on butterfly wings or pollen grains on petals. Their optics minimize distortion even when shooting close up.
When choosing a macro lens, check the reproduction ratio. A 1:1 ratio means the subject appears life-size on the sensor, ideal for true close-ups. Some lenses offer higher magnification for extreme detail.
Camera Settings For Sharp Images
Smaller apertures like f/11 or f/16 increase depth of field, keeping more of the butterfly and flower in focus. Avoid too high an f-stop as diffraction can soften the image. Balance aperture with light availability.
Fast shutter speeds help freeze butterfly movement. Start around 1/500 second to avoid blur caused by wing flutter or body shifts. If light is low, increase ISO but keep it as low as possible to maintain image quality.
Use continuous autofocus (AF-C) or single-point autofocus to track or lock focus on your subject’s key features. Manual focus is useful if autofocus struggles with distracting patterns in the background.
Manual exposure can give you better control over light, but auto mode with exposure compensation can work if you are new to close-up photography. Review your images frequently and adjust settings as needed to get clearer results.
Implementing these camera and lens choices along with careful settings improves your chances of capturing sharp, detailed butterfly flower close-ups every time you shoot. How will you experiment with your camera gear to find the best setup?
Finding The Best Locations And Timing
Butterflies and flowers thrive together in places where nature provides both sunlight and plenty of nectar sources. You can find great spots in gardens, city parks, and natural reserves. Arboretums often grow diverse native plants that attract many butterfly species. Butterfly conservatories also offer controlled environments but may lack natural lighting.
Butterflies are most active when temperatures rise above 60°F. Early mornings are cool, so many rest or slowly warm up, while late mornings and afternoons see increased activity as the sun heats the area. Spring through early fall usually offers the best seasons for butterfly sightings, depending on your region.
Patience plays a major role. Butterflies don’t always appear instantly. Observing flowers for patterns of visits can help you learn when and where to wait. Asking yourself, “Where will the butterfly land next?” sharpens your anticipation.
Ideal Habitats To Explore
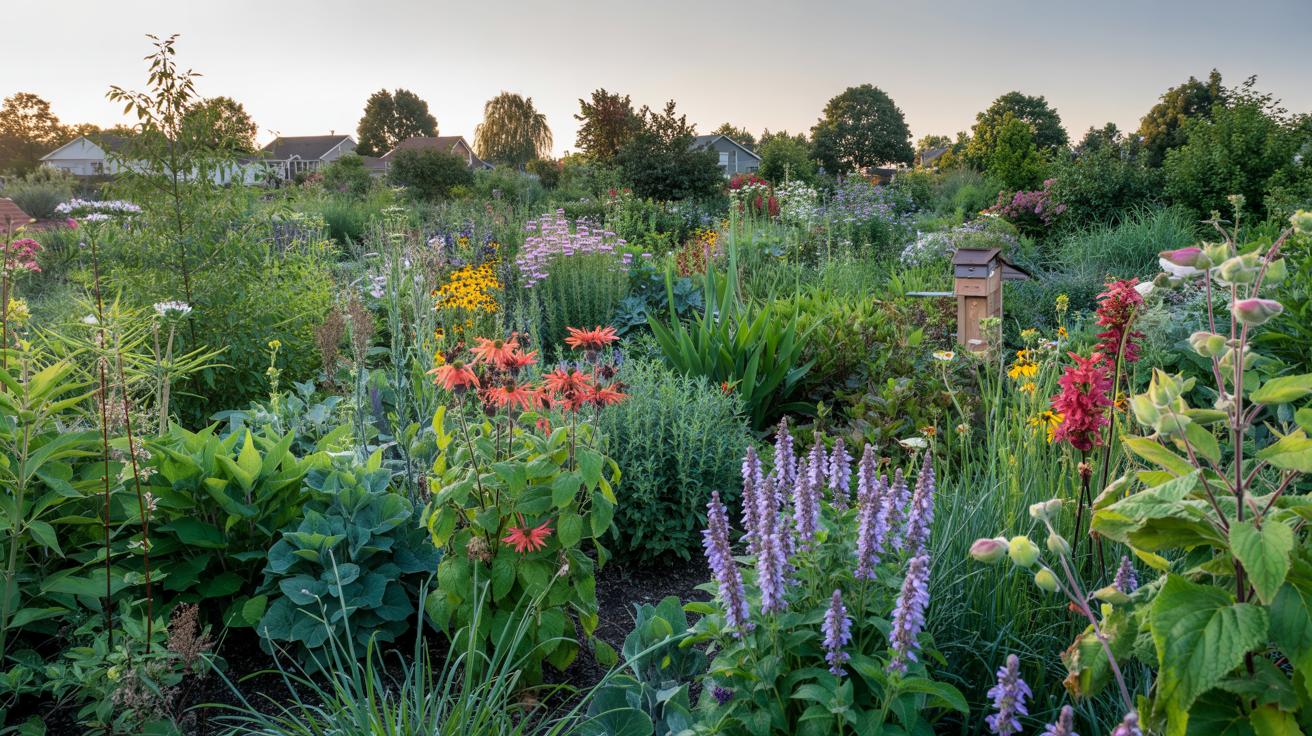
Butterflies prefer sunny patches filled with a variety of flowering plants. Look for open meadows, wildflower fields, and pollinator gardens that include milkweed, coneflowers, or asters. These attract different types of butterflies because of their nectar and host plants.
Public parks often design butterfly-friendly habitats by planting native flower species in sunny locations. If you live near woodlands, check the sunny edges or clearings where wildflowers grow. Butterfly gardening in your own backyard can create small pockets of habitat and opportunities to practice close-up photography.
Consider visiting butterfly trails in nature reserves, where conservation efforts increase butterfly numbers. Are you near a butterfly sanctuary or botanical garden? Take time to identify spots with dense flower clusters for more frequent butterfly activity.
Timing Your Photography Sessions
Temperature affects butterfly flight; cool mornings slow them down, while high heat may drive them to shade. Aim to shoot during mid-morning after the sun has warmed the air, or late afternoon when light softens and butterflies feed actively.
Golden hours—around sunrise and sunset—offer flattering light that reduces harsh shadows on delicate wings and petals. Visit your favorite location repeatedly to track butterfly activity patterns. Note how different weather conditions change their behavior and adjust your schedule accordingly.
Arriving before peak activity allows you to set up quietly and find ideal angles before butterflies begin moving. Ask yourself how you can use natural light to highlight wing details and flower textures. Timing your sessions is as much about preparation as it is being ready to capture fleeting moments.
Observing Butterfly Behavior
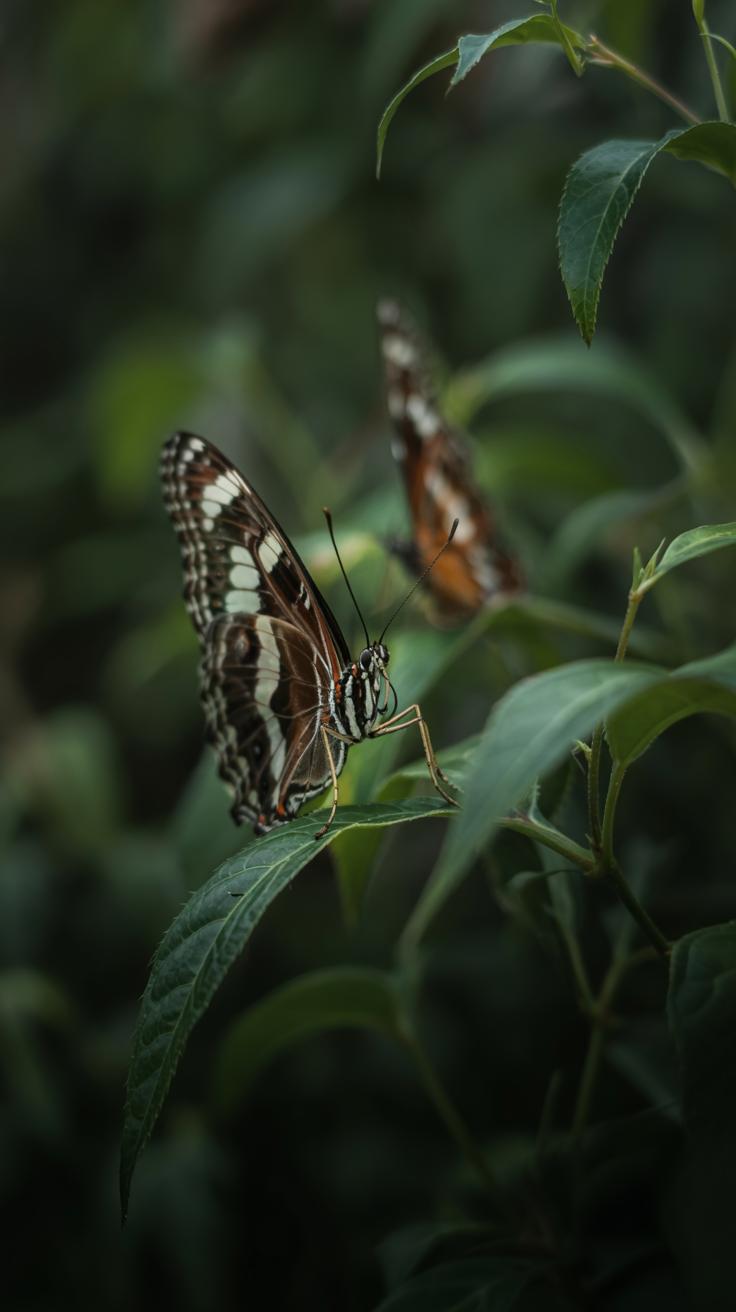
Butterflies follow clear patterns when feeding and resting. They usually land gently on flowers to sip nectar using their long proboscis. You can watch how they choose certain flowers depending on the species. Some butterflies stay still for longer when feeding, others move quickly among blooms.
Noticing these habits helps you predict where a butterfly may go next. If one butterfly stays on a group of flowers, more might arrive. Butterflies often return to the same spots unless disturbed.
Try to move slowly and observe from a distance. Quick actions can make butterflies take off. When you stay calm, they behave naturally, giving you better photo chances. What signs will you look for next time a butterfly flutters nearby? Learning to read these cues makes your shots more rewarding.
Butterfly Feeding Patterns
Butterflies feed mostly on nectar from flowers. They prefer flowers that are brightly colored and have a tubular shape, which fits their feeding style. Common favorites include milkweed, lantana, and coneflowers.
Watch closely where butterflies land. They often visit several flowers in a row before resting. By spotting these flower types, you can set up your camera near likely feeding spots.
Understanding these feeding preferences lets you anticipate movements. For example, if you find a patch of favored flowers, you may find butterflies arriving regularly. Planning your shots around these spots improves your chances of catching close-ups just as a butterfly settles in.
Respecting Butterflies And Their Space
Keep a respectful distance when photographing butterflies. Approaching too close or making sudden movements startles them, causing flight. Avoid touching or blocking their path.
Avoid using flash or loud noises that may disturb their natural behavior. Natural light is better, and silence helps butterflies feel safe. If you need to adjust your position, move slowly and calmly.
Protecting their space leads to more natural, relaxed photos. How will you balance getting close with respecting their comfort next time? Ethical photography ensures butterflies remain unharmed and your images stay authentic.
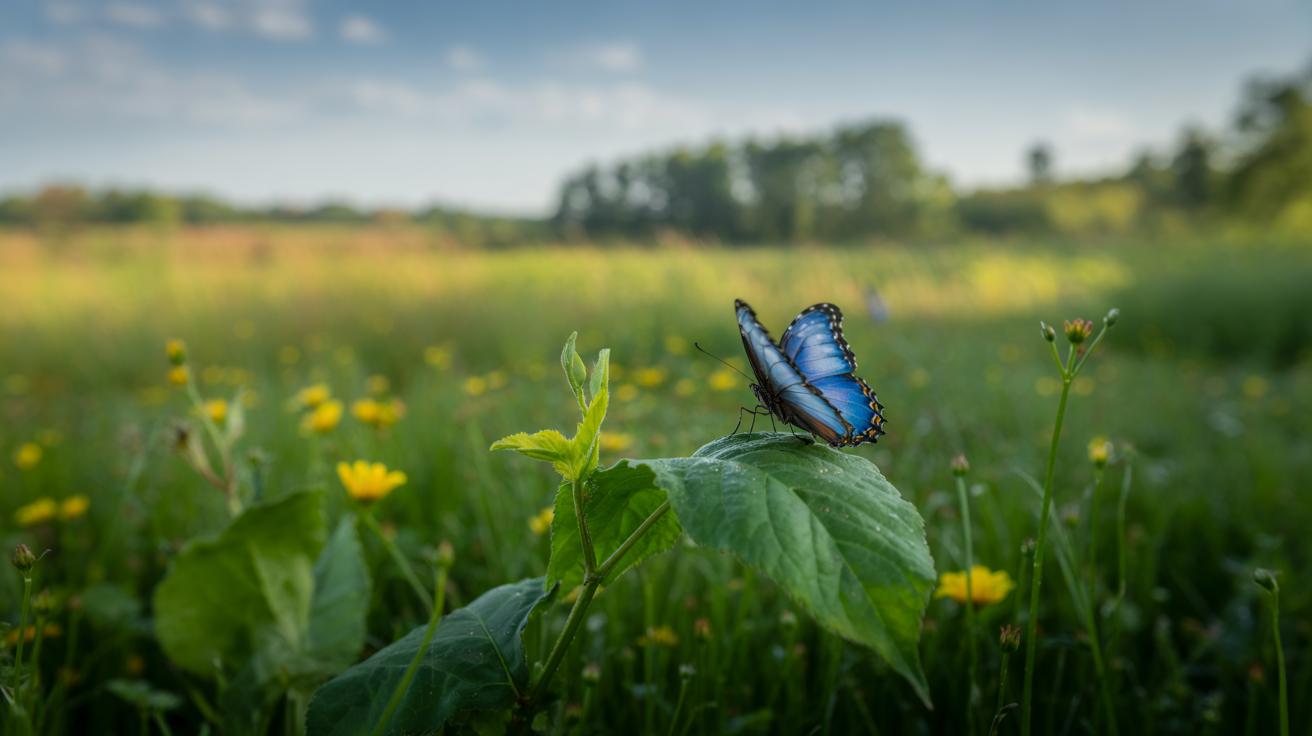
Using Natural Light To Your Advantage

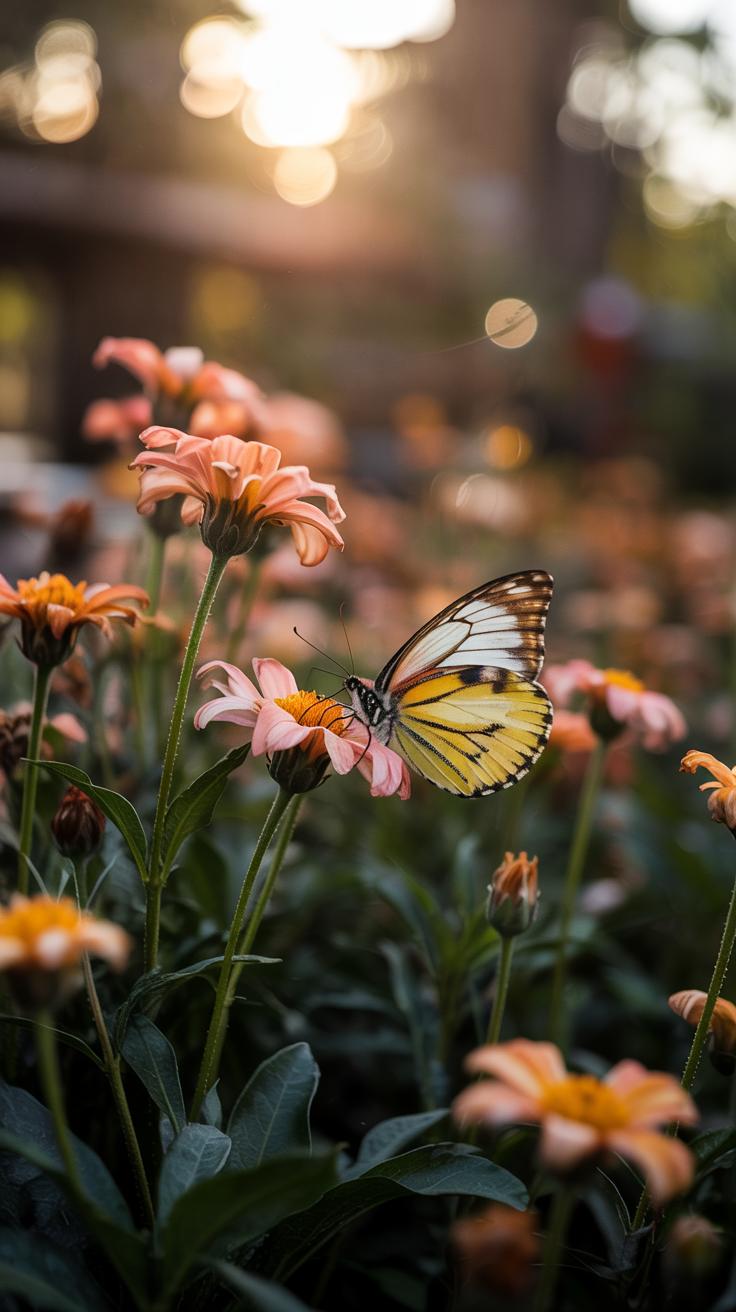
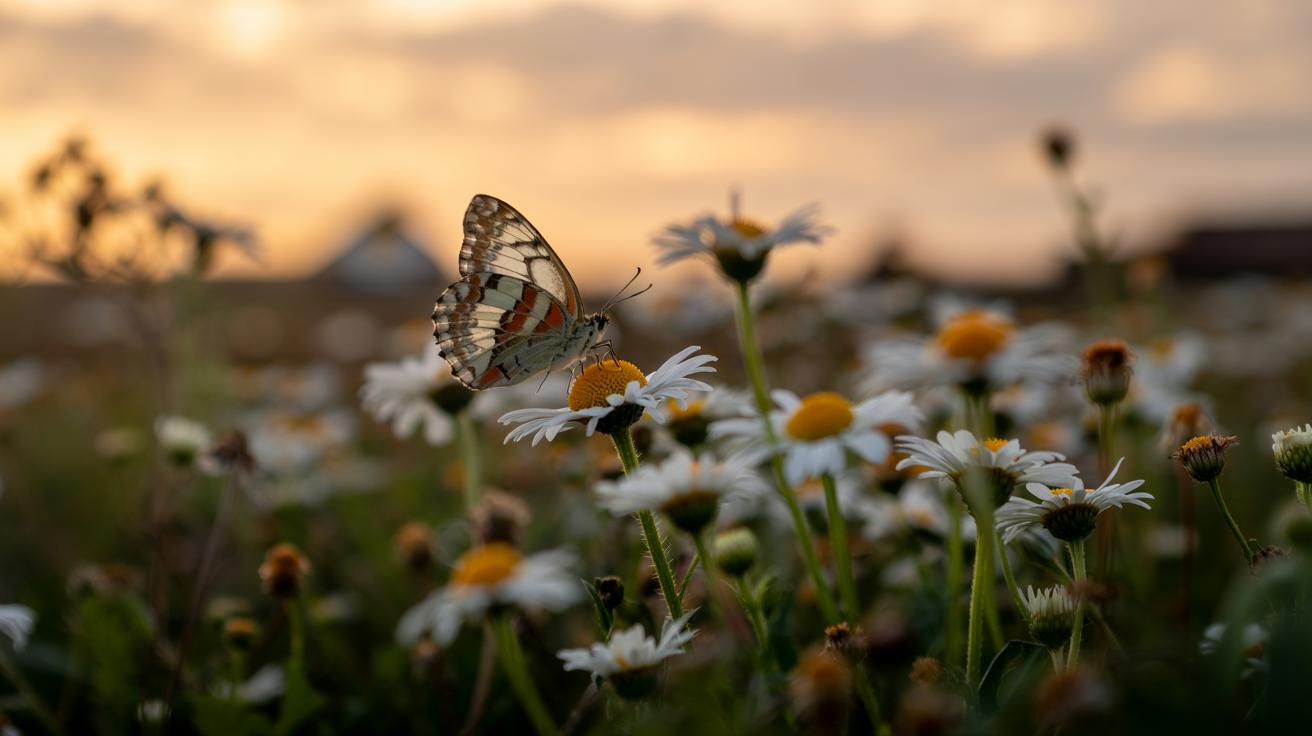
Natural light shapes how your butterfly close-ups look. Soft light from overcast skies reduces glare and creates even lighting on the delicate wings. This light avoids harsh shadows that can hide details or wash out colors. Shooting during the golden hour—the time just after sunrise or before sunset—offers warm, gentle tones. This light brings out wing patterns and textures beautifully.
Position yourself to have the sun behind or slightly to the side to make butterfly wings glow and reveal their vibrant colors. You can catch reflections that add sparkle and life to the image. Shadows cast by wings or petals add depth when controlled carefully. Have you noticed how shifting just a few feet changes the light’s impact?
Understanding how natural light interacts with your subject helps you show the fine details of butterflies and flowers without distraction. Where do you find the best light in your favorite shooting spots?
Benefits Of Diffused Light
Diffused light from cloudy skies spreads evenly across your subject. It eliminates harsh shadows that blur or darken parts of the butterfly. This type of light keeps colors true and vivid, so the natural patterns on wings appear clear.
Soft lighting also helps avoid bright spots that distract from the delicate textures of both butterfly wings and flower petals. You’ll capture more consistent exposure, allowing your camera to highlight subtleties. Have you tried shooting just after a rain shower when clouds block intense sun, revealing a soft light that wraps around your subject?
Positioning Yourself For The Best Light
Consider the sun’s angle to get clean, bright images without glare. Facing the sun directly can cause unwanted reflections or washed-out colors. Position yourself so the sun hits the side or back of your subject. This side light reveals texture and depth, making wings pop against the background.
Choose backgrounds that contrast with your butterfly’s colors and place yourself to avoid harsh shadows falling on the subject. Adjust your shooting angle by moving slowly to see how light and shadow shift. Have you checked how your butterfly photos change when you switch from shooting facing east to west?
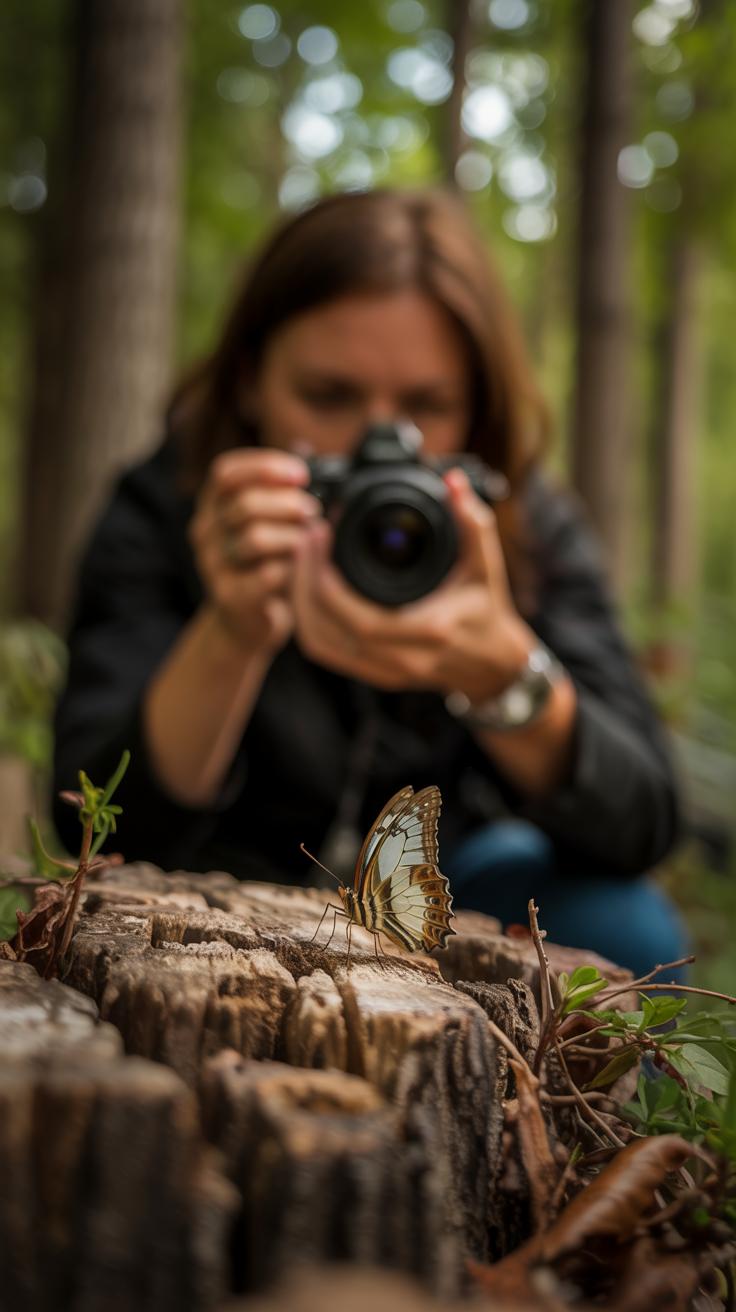
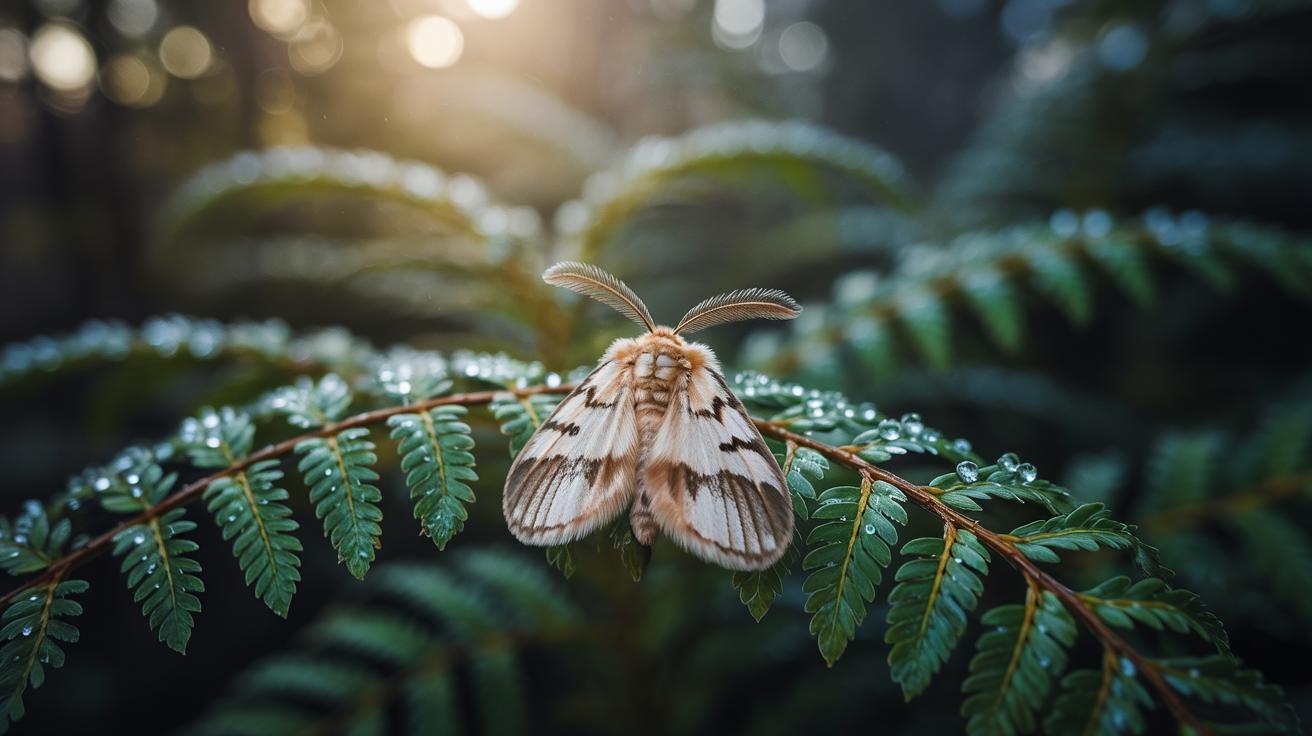
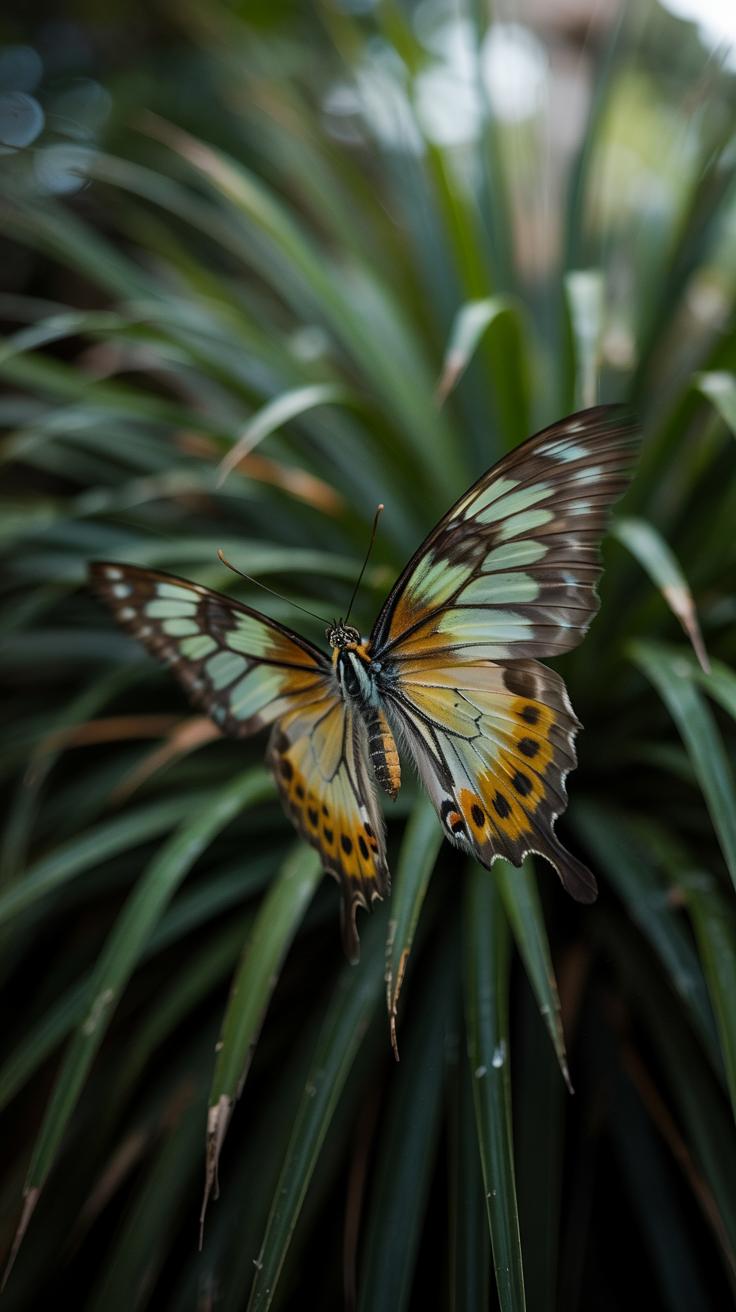
Mastering Focus And Depth Of Field
To capture sharp butterfly close-ups, your focus must be precise, especially on the butterfly’s eyes and wings. Focusing on the eyes pulls viewers into your photo, making it powerful and engaging. Using manual focus often gives you better control than autofocus, which can struggle with small, moving subjects. Try focus peaking on your camera if it has this feature—it highlights sharp areas so you know exactly where the focus lies.
Depth of field plays a big role in isolating your butterfly from distracting backgrounds. A shallow depth of field blurs the background and helps the butterfly stand out, but it also narrows your focus range. You can use focus stacking—taking several shots focused at different points and combining them—to keep more of the butterfly sharp without losing background blur.
Steady your camera by using a tripod or resting on a stable surface to avoid blur. Experiment with different distances and apertures to see how they affect sharpness and background blur. How close can you get while keeping your entire butterfly crisp? Techniques like these sharpen your skills and boost your close-up shots.
Focusing On Critical Details
Eyes draw the most attention in butterfly photos. Keeping them sharp makes your image more alive and engaging. When you focus on butterfly eyes, viewers feel connected to the subject. To do this effectively, slow your movements and hold your camera steady.
Your breathing affects steadiness too. Try holding your breath while pressing the shutter. Use continuous focus mode if your butterfly moves, so the camera adjusts focus as it shifts.
If your camera allows, use single-point focus to control exactly where the camera locks focus. This is better than letting the camera pick automatically, which might focus on the flower or other parts you don’t want sharp. Can you see the difference a sharp eye makes compared to a soft one?
Controlling Depth Of Field
Aperture controls how much of the butterfly and background appear sharp. Smaller apertures (larger f-number like f/11) increase depth of field but may reduce background blur, which can make your subject blend more into the surroundings.
Wide apertures (smaller f-number like f/2.8 or f/4) create a shallow depth of field, isolating the butterfly against a smooth, creamy background. This effect highlights your subject nicely but requires careful focus because the sharp zone is thin.
Try starting with apertures between f/5.6 and f/8. This gives a good balance: enough blur to soften background distractions but enough depth to keep wings and eyes sharp. How does changing your aperture affect what stands out in your photo? Testing different settings will teach you how to shape your image.
Composing Your Butterfly Close Up
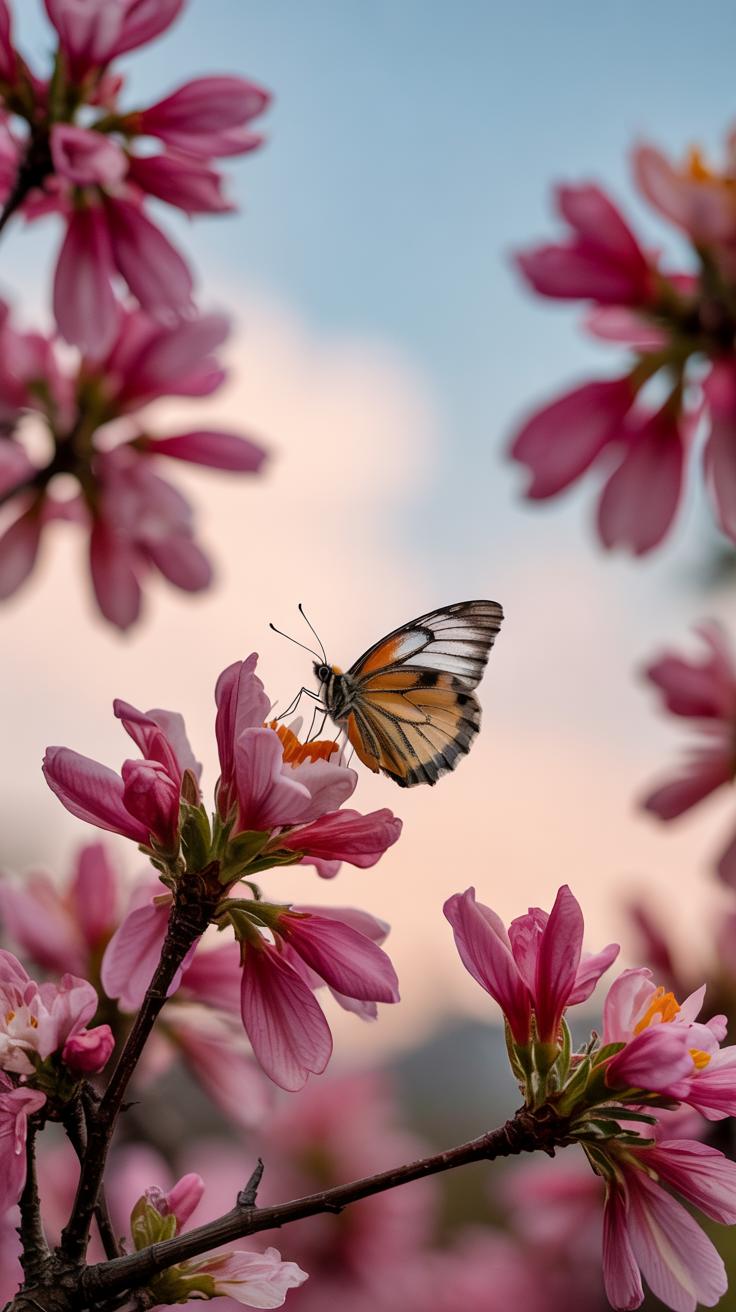
Visual composition guides how you present the butterfly on its flower. Position your subject using the rule of thirds by placing the butterfly off-center. This draws the viewer’s eye naturally and avoids a static feel. Use the flower’s petals as leading lines that guide attention toward the butterfly’s wings or eyes.
Keep your background simple to avoid distractions. Balance the size of the butterfly against the flower; neither should overwhelm the frame. Think about negative space too—it helps your subject stand out. Ask yourself if anything in the frame pulls focus away from your butterfly.
Focus on clarity by removing clutter such as extra leaves or bright spots in the background. This creates a clean image where the butterfly and flower form a strong pair. Your goal is a clear connection between butterfly and flower that holds the viewer’s gaze.
Framing For Visual Impact
Select an angle that shows your butterfly’s most interesting features—wings spread, antennae visible, or eyes sharp. Crop just enough to leave space around the butterfly so it doesn’t feel cramped. This “breathing room” adds to the photo’s appeal.
Try framing with flower petals curving around the butterfly. This acts as a natural frame and draws the eye inward. Also, consider shooting slightly from the side or above to reveal depth and avoid flat images. Experiment with different perspectives until the butterfly feels like the star of your shot.
Balancing Background Elements
Use a shallow depth of field to blur the background and minimize distractions. This lets your butterfly and flower pop. If the background colors clash with your subject, adjust your angle or change position until you find a harmonious color match.
Matching the butterfly’s colors with those of the flower helps unify the image. Look for complementary or similar tones in the petals and leaves. This harmony keeps the focus on the subject and provides a pleasing balance. Check your frame carefully to avoid stray elements that compete for attention.
Enhancing Images With Post Processing

Post processing helps you improve your butterfly close-ups beyond what the camera captures. Simple adjustments can bring out details that might have been missed at the moment of shooting. Cropping lets you remove distractions and tighten the focus on your butterfly and flower. Sharpening can enhance wing patterns and the petals’ texture, making the image clearer.
Color correction adjusts hues and tones, fixing lighting or color balance issues so your image looks more like what you saw. You might boost brightness or contrast, but be careful not to overdo it. Too much editing can create unnatural colors or details that distract from the real beauty of your subject. Ask yourself if the image still feels like a natural view of a butterfly on a flower.
For beginners, tools like Adobe Lightroom or free options like Snapseed and GIMP offer easy ways to apply these corrections. Try working with sliders instead of presets so you control the effect carefully. Experiment with small changes and compare before and after views. How does the edited image make you feel compared to the original? Let that guide your choices.
Basic Corrections To Apply
Start with cropping to improve your composition and remove unwanted space. This focuses the viewer on your main subject without distractions. Use sharpening moderately to highlight the butterfly’s wing veins and the flower’s fine details. Increasing clarity can also help bring out textures without making the image look artificial.
Adjust exposure if your photo is too dark or bright. Correct white balance to fix color shifts caused by different lighting conditions. Often, slight contrast improvements make your image pop. These standard edits boost clarity and color accuracy while keeping the image true to the scene you captured. Avoid heavy filters or extreme effects on your first passes.
Maintaining Natural Appearance
Butterflies and flowers are delicate, and your edits should respect their natural look. Avoid pushing colors to unrealistic tones or over-sharpening edges that create halos. Keep saturation adjustments subtle to prevent artificial hues. The goal is to enhance, not transform, what you saw through your camera.
Look closely at your edits on a full screen. Do the butterfly’s colors and the flower’s tones still feel organic? If something stands out as unusual, reduce that effect. Gentle retouching helps your viewers connect with the true beauty of the moment. How can you make your image stronger while preserving the life in your subject?
Common Challenges And How To Overcome Them
Photographing butterflies on flowers up close brings several challenges. Their fluttering wings often cause blurred images. Changing sunlight can alter exposure quickly. Wind shifts flowers and butterfly positions constantly. These factors make it hard to get a sharp, well-composed shot.
You can reduce motion blur by using faster shutter speeds. A shutter speed of at least 1/1000 second often freezes a butterfly’s quick wing beats. Choosing wind-sheltered spots helps keep flowers steady, improving focus.
Prepare to adjust your camera settings regularly as light conditions change. Waiting patiently pays off; butterflies may settle briefly when you least expect it. Staying alert allows you to seize those brief moments of stillness.
Ask yourself: How can you stay ready for sudden butterfly movement? What nearby spots protect you from wind and harsh light? These questions guide your preparation for successful close-ups.
Dealing With Movement
Butterflies move fast and unpredictably. Using burst mode lets you take many photos quickly, increasing your chances of capturing a sharp image. Focus tracking helps keep your camera locked on a butterfly even as it shifts.
Try pre-focusing on a flower where the butterfly may land. This reduces autofocus delay when the butterfly arrives. Holding your camera steady or using a tripod improves sharpness.
Experiment with different focus points and autofocus modes. Continuous autofocus (AF-C) works well to track butterflies in flight. Practice helps you learn your camera’s best settings for fast motion.
Handling Environmental Factors
Wind can move flowers and blur your shots. Find areas shielded by bushes or trees where the wind calms down. If wind persists, increase shutter speed to reduce motion blur or use a lens hood to cut glare.
Light changes frequently outdoors. Morning or late afternoon provide softer, steady light. Overcast days often offer even lighting without harsh shadows. Adjust your ISO or aperture to keep exposure balanced.
Consider how natural light affects color and contrast in your shots. Use reflectors or diffusers to control shadows if needed. Observing the environment helps you choose the right moment and place for clear, vibrant close-ups.
Sharing And Preserving Your Butterfly Photos
After capturing your butterfly close-ups, choosing how to share them affects how others enjoy and respect your work. You want your images seen but also protected from misuse. Think about platforms where nature lovers gather. These spaces invite discussion and give credit to creators.
Sitting on your images limits their impact. Sharing your photos helps others appreciate butterfly behavior and flower relationships. Each picture can tell a story about the environment and inspire care for living things outside your camera’s frame.
Creating backups is vital. Digital files can vanish through accidents or hardware failure. Organize your photos in labeled folders by date or location. Cloud storage, external drives, or reliable photo-management software keeps your collection safe and easy to access for future projects.
Choosing The Right Channels
You can present your photos on platforms designed for nature photography. Sites like Flickr and 500px offer galleries where you control who can download or share. Facebook and Instagram groups focused on wildlife connect you with communities ready to comment and support.
Look out for local or online photo contests related to butterflies or flowers. These events boost exposure and provide feedback from experienced photographers. They also teach you what makes an image stand out in focused themes, improving your skills.
Archiving And Protecting Your Work
Store your butterfly photos in multiple places to avoid loss. Use at least two backup methods: a physical drive and a cloud service. Rename files clearly with identifiers like date and location to find specific shots quickly.
Consider saving original files alongside edited versions. This way, you maintain full control over your images over time. Protect your files with passwords or private folders when necessary.
How much thought do you put into safely keeping your photos? Proper archiving today saves time and effort later, so you enjoy your work for years to come.
Conclusions
The skill of photographing butterflies on flowers opens a doorway to appreciating nature’s smallest details. You will find that careful observation and preparation increase your chances of capturing stunning shots. Each butterfly offers a unique challenge with its movements and colors. By applying techniques like lighting control and focus management, your images will show enhanced clarity and beauty.
Keep practicing and experimenting with angles, backgrounds, and timing. Consider the environment and the subject’s behavior. Your photos can tell stories about the interaction between butterflies and flowers. As you refine your art, you contribute to the visual recording of biodiversity. How will your next butterfly photograph reveal the delicate dance between insect and flower?


